
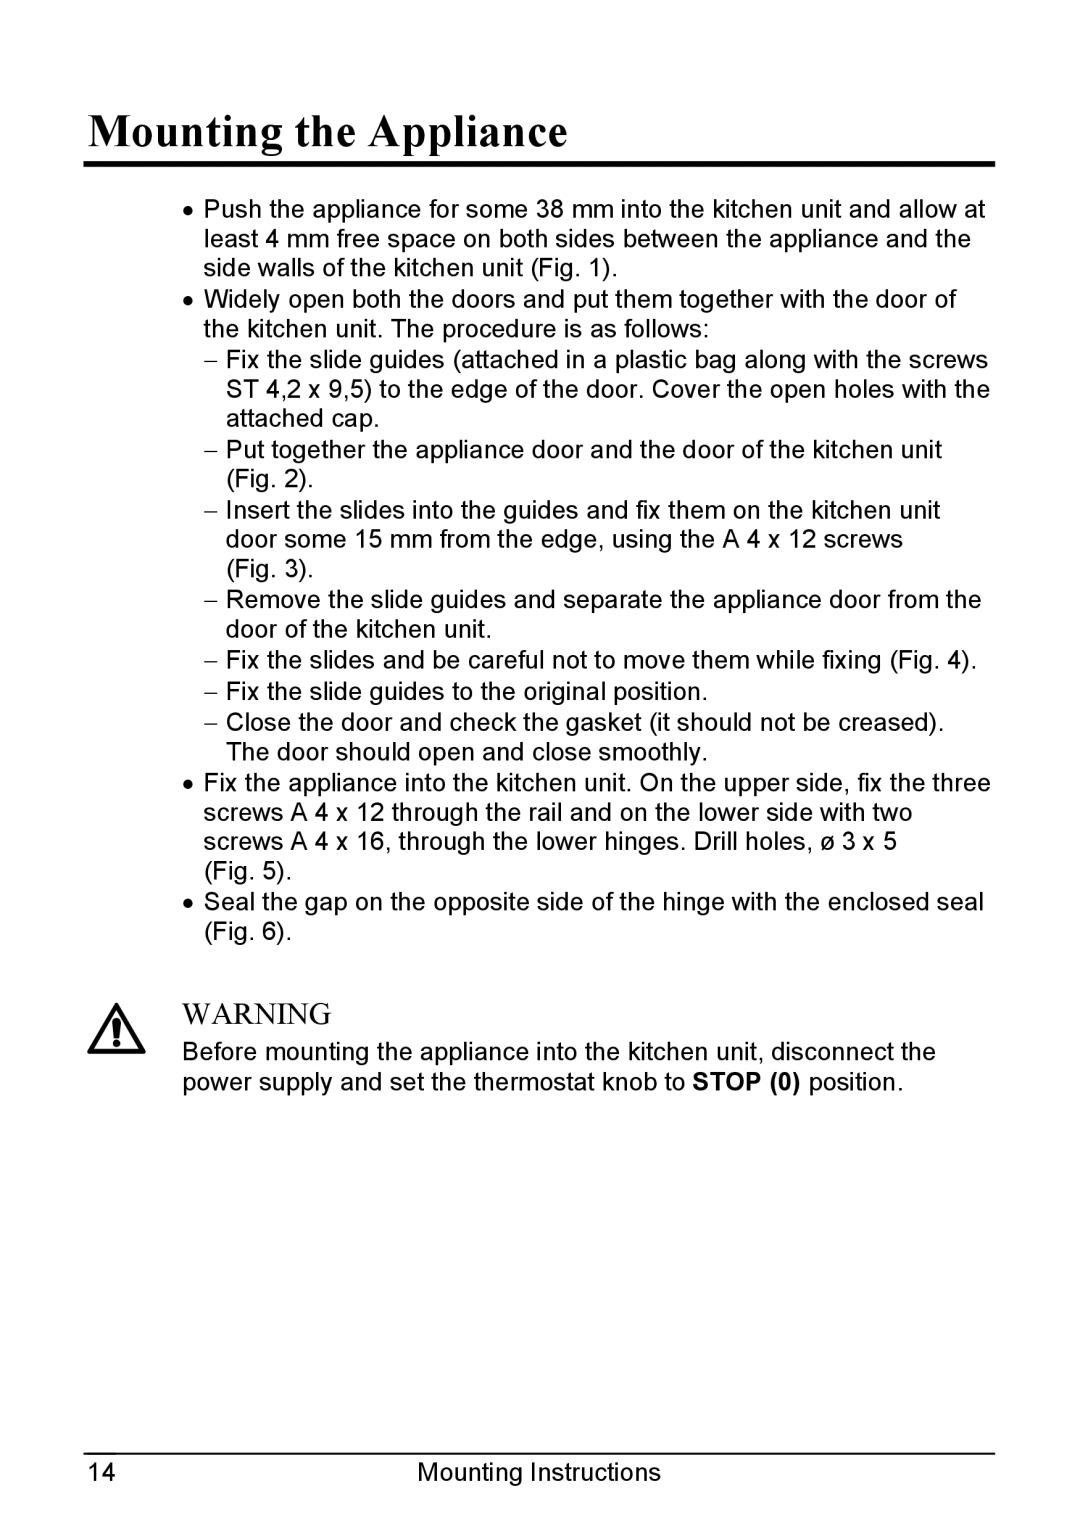
CR321A specifications
The Smeg CR321A is a distinguished model in the realm of refrigerators, combining both style and functionality to meet the demands of modern kitchens. Designed with an eye for elegance, this refrigerator not only enhances your kitchen aesthetic but also embodies advanced technology to preserve food freshness.One of the standout features of the Smeg CR321A is its spacious interior layout. With a generous capacity, it is structured to accommodate a variety of food items, from larger produce to beverages. The adjustable shelving allows for customization based on your storage needs, making it easy to organize everything from tall bottles to small jars. The addition of door bins provides extra space for condiments and smaller items, ensuring that everything is within easy reach.
This refrigerator is also equipped with Smeg's innovative cooling technology. The No Frost system eliminates the need for manual defrosting by preventing the buildup of ice and frost. This not only saves time but also enhances energy efficiency, making the CR321A an eco-friendly choice. Keeping your food at the perfect temperature is vital, and this model comes with multiple cooling zones, allowing you to set different temperatures for specific areas based on your storage requirements.
Energy efficiency is another hallmark of the Smeg CR321A, boasting an impressive energy rating that ensures reduced electricity consumption without sacrificing performance. This not only leads to savings on your utility bills but also contributes to a lower carbon footprint, making it a responsible choice for the environmentally conscious consumer.
Moreover, the sleek design of the Smeg CR321A features a stylish stainless steel finish that is not only aesthetically pleasing but also durable and easy to clean. The ergonomic handle and user-friendly controls add to its convenience, enhancing the overall user experience.
In summary, the Smeg CR321A is a perfect fusion of style, capacity, and technology. With its No Frost system, adjustable shelving, energy-efficient operation, and elegant design, it stands out as a premier choice for homeowners looking to invest in a refrigerator that not only meets their practical needs but also elevates their kitchen's overall appeal. The Smeg CR321A is indeed a blend of modern design and sophisticated functionality, making it an excellent addition to any home.