520 Single Stage Snowthrower
 Unboxing & Assembly
1.Using a utility knife, open the box and remove the snowthrower.
IMPORTANT NOTE
When removing the snowthrower from the box and unfolding the han- dle bars DO NOT PINCH THE AUGER CONTROL CABLE IN THE HANDLE BARS.
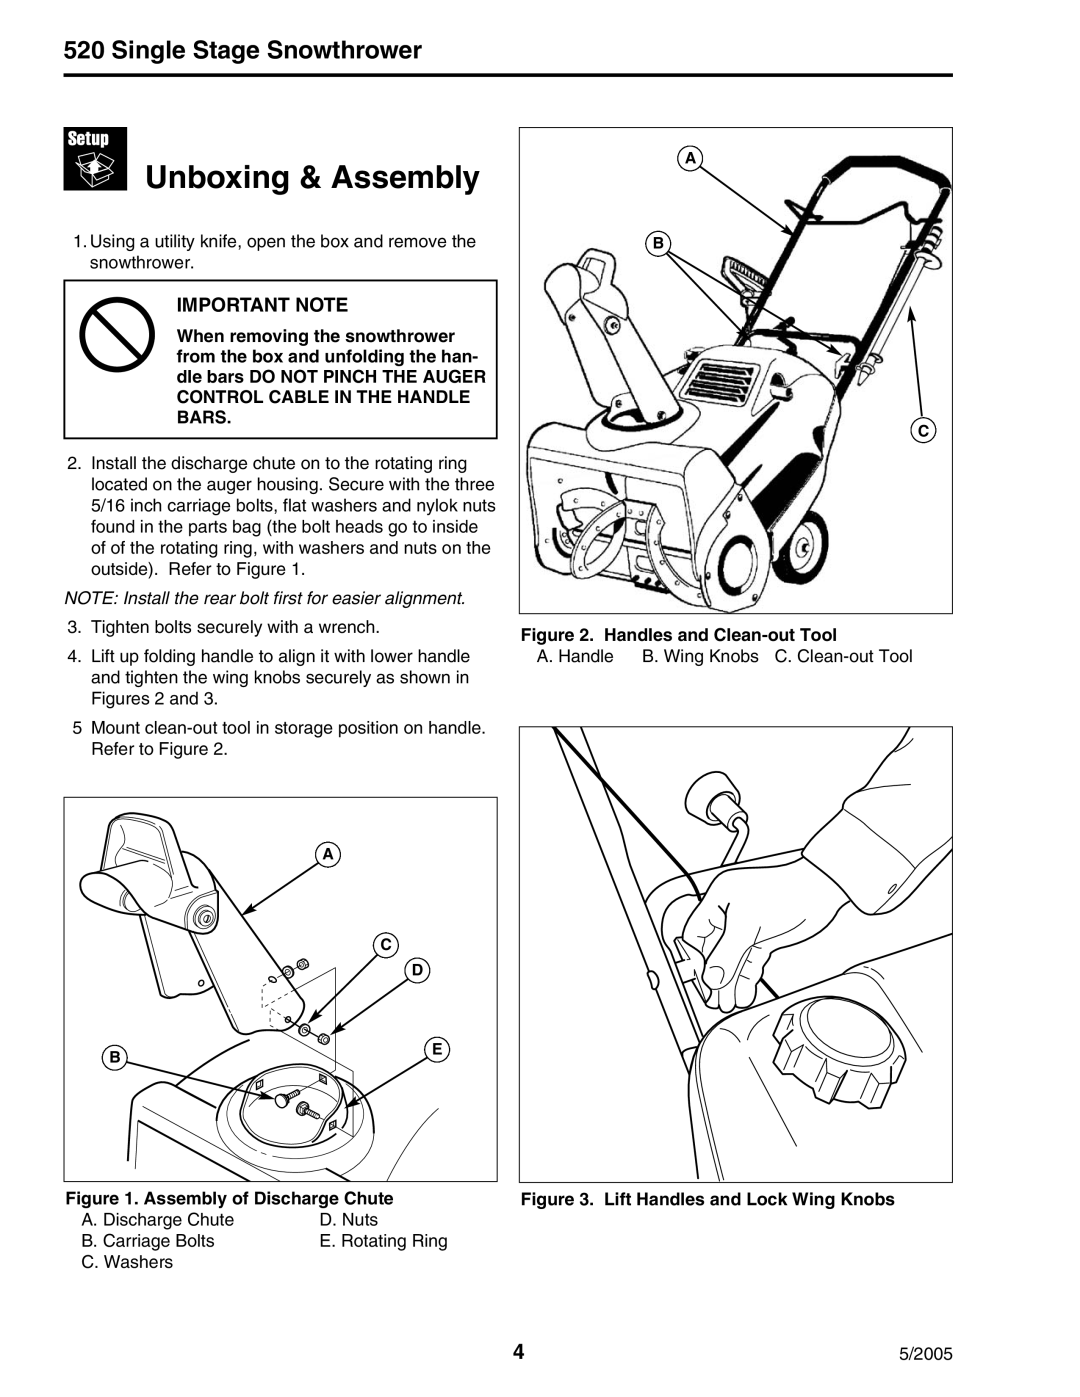
2.Install the discharge chute on to the rotating ring located on the auger housing. Secure with the three 5/16 inch carriage bolts, flat washers and nylok nuts found in the parts bag (the bolt heads go to inside of of the rotating ring, with washers and nuts on the outside). Refer to Figure 1.
NOTE: Install the rear bolt first for easier alignment.
3.Tighten bolts securely with a wrench.
4.Lift up folding handle to align it with lower handle and tighten the wing knobs securely as shown in Figures 2 and 3.
5Mount
| A |
| C |
| D |
B | E |
|
Figure 1. Assembly of Discharge Chute
A. Discharge Chute | D. Nuts |
B. Carriage Bolts | E. Rotating Ring |
C. Washers |
|
A
B |
C
Figure 2. Handles and Clean-out Tool
A. Handle B. Wing Knobs C.
Figure 3. Lift Handles and Lock Wing Knobs
4 | 5/2005 |
