Section 2 - OPERATING INSTRUCTIONS
WARNING
DO NOT attempt any maintenance, adjustments or service with engine and blade running. STOP engine and blade. Disconnect spark plug wire and secure away from spark plug. Engine and components are HOT. Avoid serious burns, allow sufficient time for all components to cool. Wear heavy leather gloves when handling or working around cutting blades. Blades are extremely sharp and can cause severe injury.
2.6RECYCLING OPERATION - OPTIONAL ACCESSORY
Recycling operation requires optional accessory.
NOTE: For best recycling results, cut up to a maximum of 1/3 of grass blade length and recycle ONLY when grass is dry.
1.Set all wheels in the highest cutting position (Notch 6).
2.Move engine speed control to “FAST” (Rabbit) position.
3.Move ground speed control to slowest speed setting.
4.Proceed mowing slowly. If grass is very dense, lower each rear wheel latch one notch lower than the front wheel latches to improve recycling performance.
2.7INSTALLATION of GRASS CATCHER
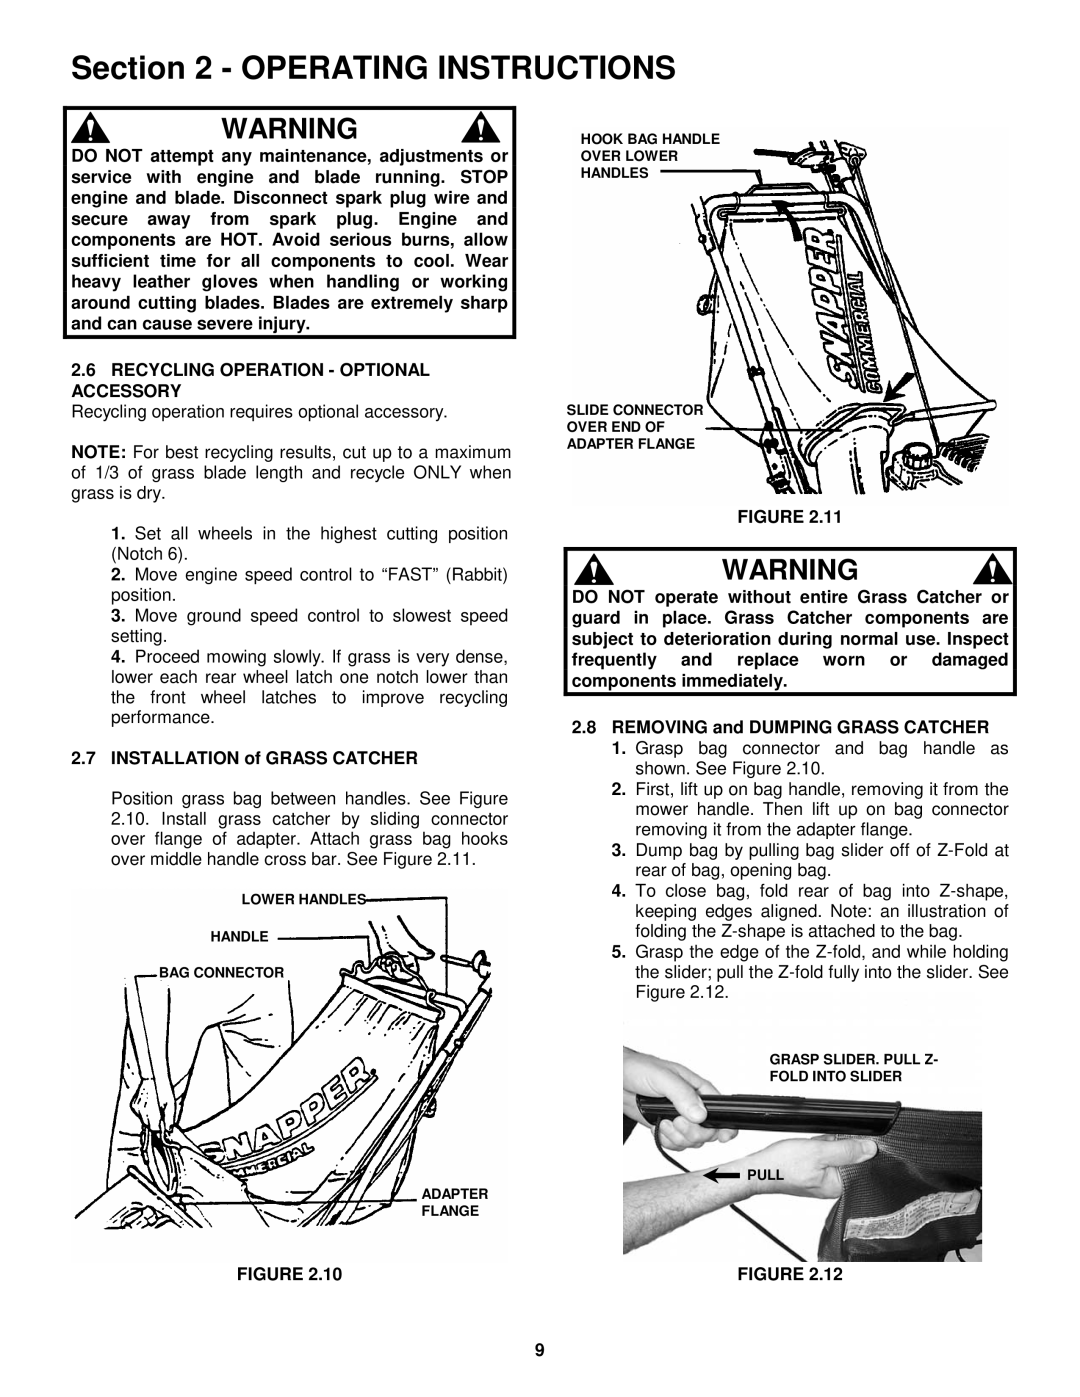
Position grass bag between handles. See Figure
2.10.Install grass catcher by sliding connector over flange of adapter. Attach grass bag hooks over middle handle cross bar. See Figure 2.11.
LOWER HANDLES
HANDLE
BAG CONNECTOR
HOOK BAG HANDLE
OVER LOWER
HANDLES
SLIDE CONNECTOR
OVER END OF
ADAPTER FLANGE
FIGURE 2.11
WARNING
DO NOT operate without entire Grass Catcher or guard in place. Grass Catcher components are subject to deterioration during normal use. Inspect frequently and replace worn or damaged components immediately.
2.8REMOVING and DUMPING GRASS CATCHER
1.Grasp bag connector and bag handle as shown. See Figure 2.10.
2.First, lift up on bag handle, removing it from the mower handle. Then lift up on bag connector removing it from the adapter flange.
3.Dump bag by pulling bag slider off of
4.To close bag, fold rear of bag into
5.Grasp the edge of the
GRASP SLIDER. PULL Z-
FOLD INTO SLIDER
ADAPTER FLANGE
![]() PULL
PULL
FIGURE 2.10 | FIGURE 2.12 |
9