Section 2 - OPERATING INSTRUCTIONS
2.2STARTING & OPERATION 2.2.2. ENGINE & BLADE (Primer Models) (Electric Start)
When the ignition key is turned to “START”, the engine will not crank over and will not start unless the blade control is engaged!
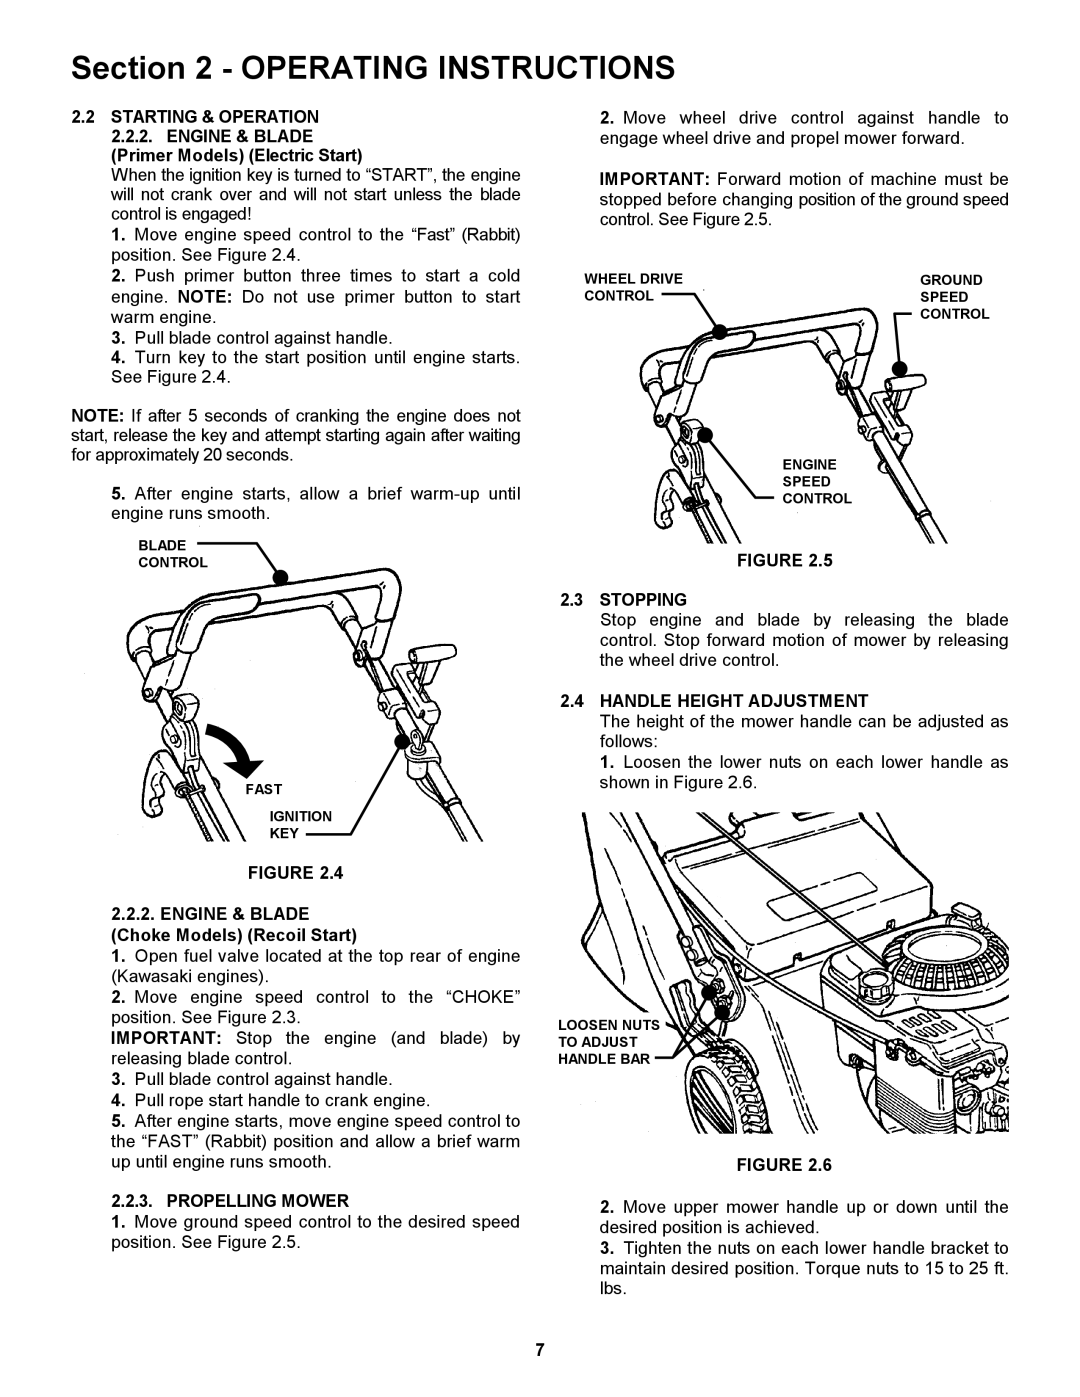
1. Move engine speed control to the “Fast” (Rabbit) position. See Figure 2.4.
2. Push primer button three times to start a cold engine. NOTE: Do not use primer button to start warm engine.
3. Pull blade control against handle.
4. Turn key to the start position until engine starts. See Figure 2.4.
NOTE: If after 5 seconds of cranking the engine does not start, release the key and attempt starting again after waiting for approximately 20 seconds.
5.After engine starts, allow a brief
BLADE
CONTROL
FAST
IGNITION
KEY
FIGURE 2.4
2.2.2.ENGINE & BLADE
(Choke Models) (Recoil Start)
1. Open fuel valve located at the top rear of engine (Kawasaki engines).
2. Move engine speed control to the “CHOKE” position. See Figure 2.3.
IMPORTANT: Stop the engine (and blade) by releasing blade control.
3. Pull blade control against handle.
4. Pull rope start handle to crank engine.
5. After engine starts, move engine speed control to the “FAST” (Rabbit) position and allow a brief warm up until engine runs smooth.
2.2.3.PROPELLING MOWER
1.Move ground speed control to the desired speed position. See Figure 2.5.
2.Move wheel drive control against handle to engage wheel drive and propel mower forward.
IMPORTANT: Forward motion of machine must be stopped before changing position of the ground speed control. See Figure 2.5.
WHEEL DRIVE | GROUND |
CONTROL | SPEED |
| CONTROL |
ENGINE
SPEED
CONTROL
FIGURE 2.5
2.3STOPPING
Stop engine and blade by releasing the blade control. Stop forward motion of mower by releasing the wheel drive control.
2.4HANDLE HEIGHT ADJUSTMENT
The height of the mower handle can be adjusted as follows:
1. Loosen the lower nuts on each lower handle as shown in Figure 2.6.
LOOSEN NUTS
TO ADJUST
HANDLE BAR
FIGURE 2.6
2.Move upper mower handle up or down until the desired position is achieved.
3.Tighten the nuts on each lower handle bracket to maintain desired position. Torque nuts to 15 to 25 ft. lbs.
7
