
EYZ16335BVE specifications
The Snapper EYZ16335BVE is a versatile and powerful lawn mower designed for both residential and commercial use. Known for its exceptional cutting ability and user-friendly features, this model stands out in the competitive outdoor power equipment market.At the heart of the Snapper EYZ16335BVE is a robust 163cc engine that delivers reliable power and efficient operation. The engine is designed to provide ample torque, ensuring that the mower can handle tough turf as well as fine lawns with ease. The self-propelled feature enhances maneuverability, allowing users to navigate through various terrains without putting extra strain on themselves.
One of the standout characteristics of the EYZ16335BVE is its 21-inch steel mowing deck, which provides superior durability and a wide cutting path for faster mowing. This model offers adjustable cutting heights, allowing users to choose between different grass lengths ranging from 1 to 4 inches. The ability to customize the cut makes it suitable for diverse grass types and can contribute to healthier lawn growth.
The Snapper EYZ16335BVE is equipped with a reliable 3-in-1 cutting system, offering options for mulching, bagging, or side discharge. This versatility allows users to manage lawn clippings efficiently based on their preferences or lawn care requirements. The mulching feature returns finely chopped clippings to the lawn, providing natural fertilization.
Ergonomically designed, this lawn mower includes a padded handle for comfort during operation. Its lightweight construction ensures that it is easy to maneuver and transport, reducing user fatigue during extended mowing sessions. The foldable handle is an additional convenience, making storage simple and efficient.
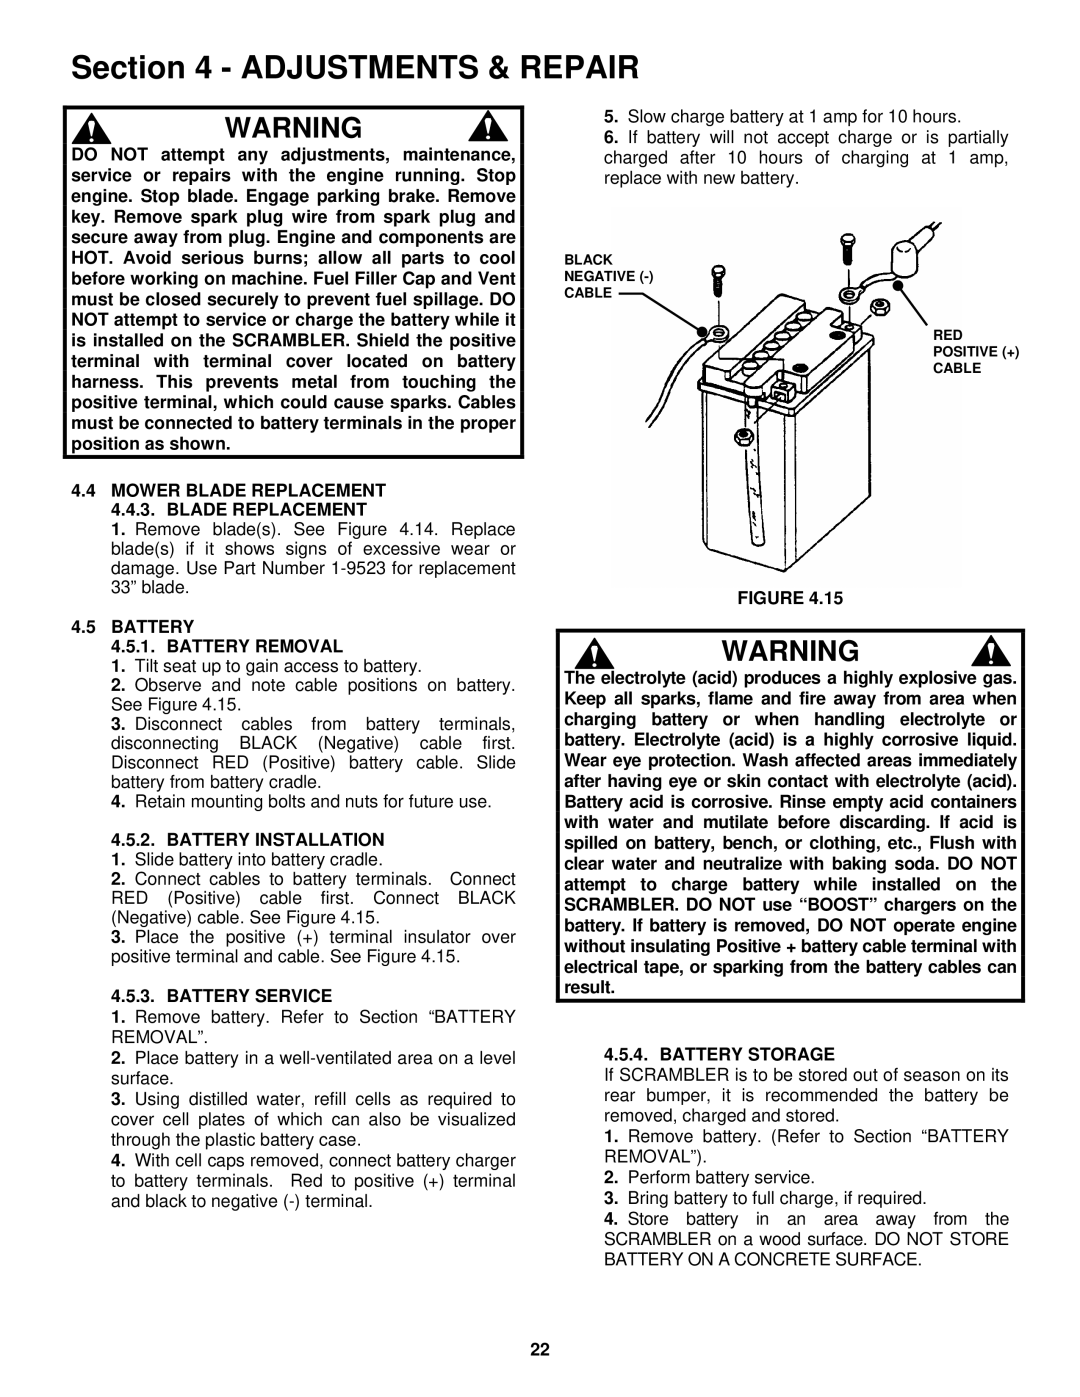
In terms of maintenance, the Snapper EYZ16335BVE is designed for ease of service. Accessible air filters and an easy-start engine design simplify routine maintenance tasks, ensuring that the mower operates at peak performance year-round.
Overall, the Snapper EYZ16335BVE embodies innovation and practicality, making it a reliable choice for homeowners and landscaping professionals. With its exceptional features, solid construction, and advanced technologies, it provides an efficient mowing solution that meets the demands of various lawn care needs. Whether tackling vast lawns or navigating smaller residential yards, the Snapper EYZ16335BVE consistently delivers results that exceed expectations.