
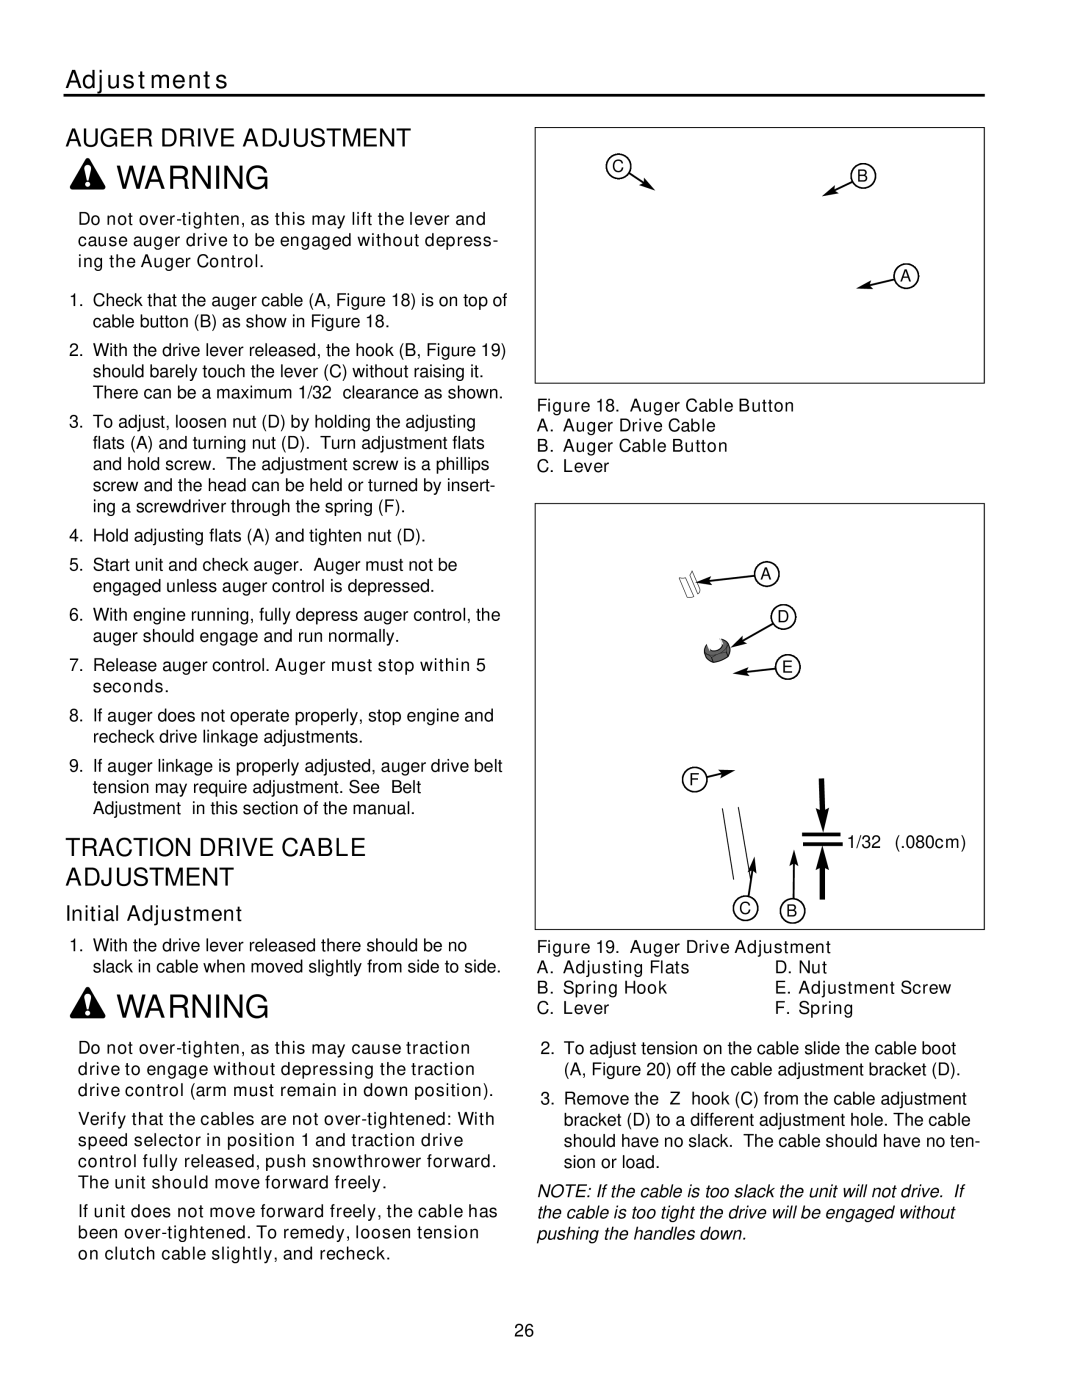
L1428EX, L1226EX, L1632E, L1530EX, 1632EX specifications
The Snapper L series of lawn mowers, including models L11226EX, L1428E, L1530E, 1632E, and 1632EX, represent a perfect blend of innovation, efficiency, and durability for both residential and commercial applications. Each model comes equipped with unique features and cutting-edge technologies designed to enhance user experience and improve lawn care results.Starting with the L11226EX, this model features a powerful engine that ensures optimal performance while cutting through grass with precision. It boasts a 26-inch cutting deck, providing a wide cutting path for faster mowing sessions. The inclusion of an adjustable height feature allows users to easily customize the mowing height to achieve their desired lawn finish. Another key feature is its easy-to-use self-propulsion system, which makes navigating uneven terrain a breeze.
The L1428E model is notable for its eco-friendly electric engine, reducing emissions while maintaining a quiet operation. It features a compact 28-inch deck, making it perfect for maneuvering through tight spaces and small yards. The ergonomic design enhances comfort and control, making longer mowing sessions less tiring. Additionally, it includes a rapid charge system, ensuring minimal downtime between uses.
Moving on to the L1530E, this model capitalizes on an efficient battery technology that delivers consistent power. Equipped with a 30-inch deck, it strikes a balance between maneuverability and coverage. The model's innovative grass collection system ensures minimal clumping, providing a neat finish. Moreover, its lightweight design allows for easy handling and transport.
The 1632E model is designed for those looking for robust performance coupled with advanced technology. With a 32-inch cutting deck, it excels in larger properties while maintaining excellent cutting quality. Its dual-blade system provides a clean cut and promotes healthy grass growth. The mower's user-friendly dashboard features intuitive controls, allowing operators to switch between modes efficiently.
Lastly, the 1632EX variant comes with enhanced features, including an intuitive smart-cut technology that intelligently adjusts the mower's speed based on grass thickness. This ensures optimal energy consumption while achieving superior cutting results. This model also includes a sturdy build that withstands tough conditions, along with oversized rear wheels for increased stability and traction.
Overall, each of these Snapper L series mowers is engineered with performance, comfort, and eco-responsibility in mind, making them excellent choices for any lawn care enthusiast. Whether tackling small yards or large properties, these mowers deliver the reliability and efficiency required for superior lawn maintenance.