Section 4 - REPAIR & ADJUSTMENTS
WARNING
DO NOT attempt any adjustments, maintenance, service, or repairs with engine running. Stop auger. Stop engine. Remove key. Remove spark plug wire and secure wire away from spark plug.
4.1.3.AUGER BELT REPLACEMENT (Continued From Previous Page)
5.Reinstall belt guide.
IMPORTANT: Make sure when reinstalling belt guide that it does not touch drive pulley. Belt guide should an equal amount of clearance on both belt guide fingers. See Figure 4.6.
6.Refer to Section “Auger Belt Adjustment/Replacement”.
7.Reinstall belt cover and tighten screws securely. DO NOT overtighten.
BELT GUIDE | DRIVE PULLEY |
|
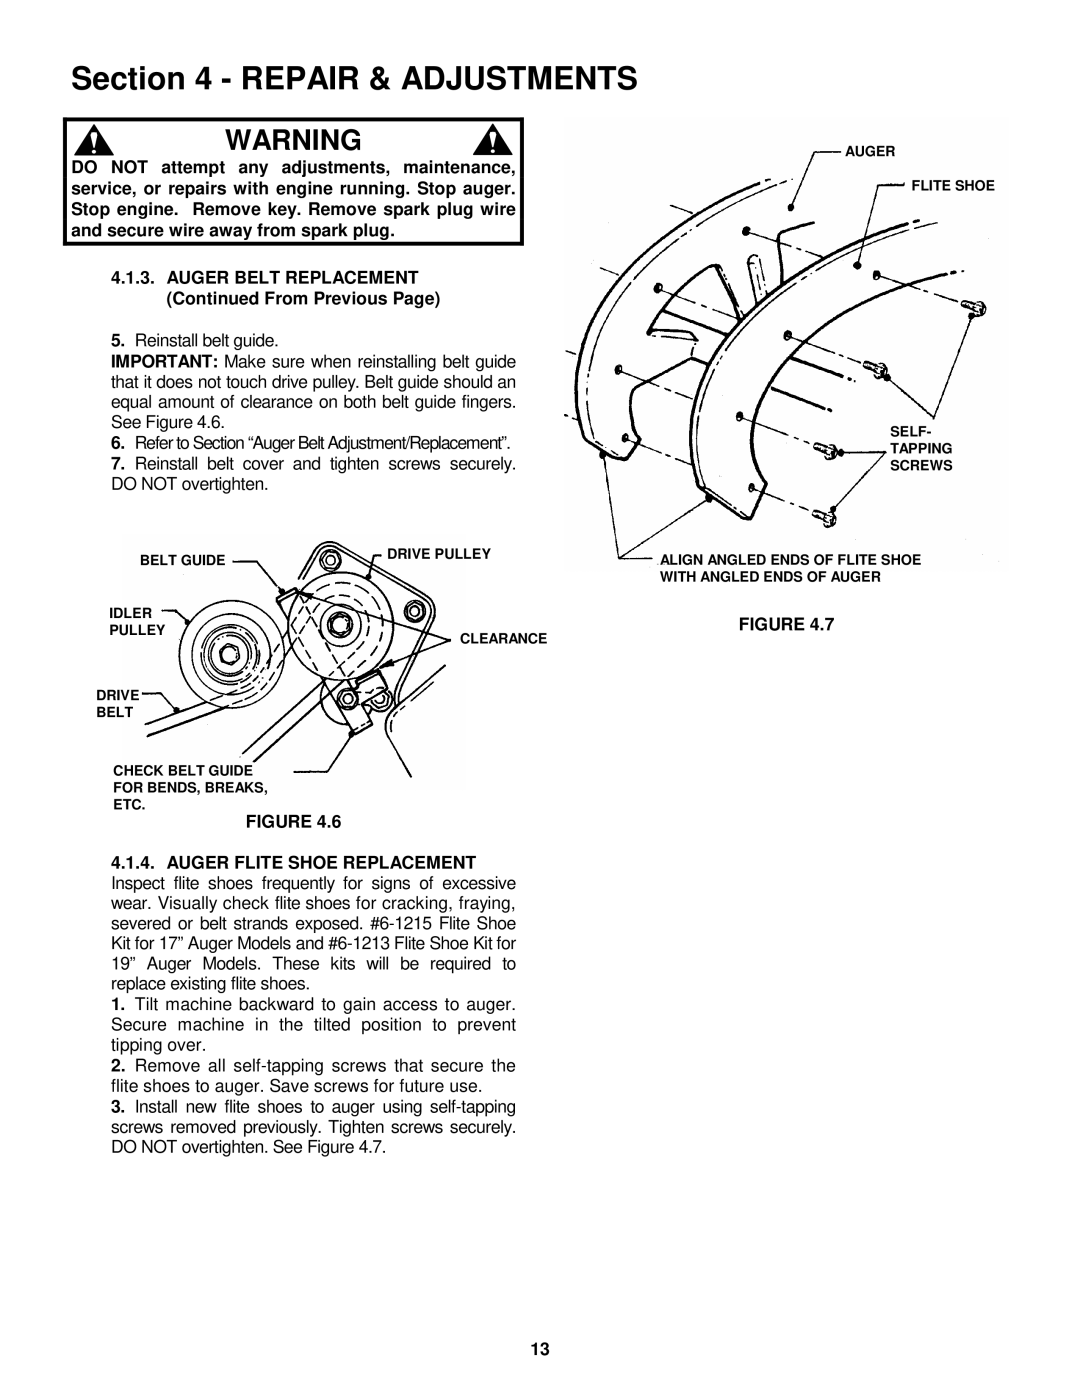
AUGER
FLITE SHOE
SELF-
TAPPING
SCREWS
ALIGN ANGLED ENDS OF FLITE SHOE WITH ANGLED ENDS OF AUGER
IDLER PULLEY
DRIVE
BELT
CLEARANCE
FIGURE 4.7
CHECK BELT GUIDE
FOR BENDS, BREAKS,
ETC.
FIGURE 4.6
4.1.4.AUGER FLITE SHOE REPLACEMENT Inspect flite shoes frequently for signs of excessive wear. Visually check flite shoes for cracking, fraying, severed or belt strands exposed.
1. Tilt machine backward to gain access to auger. Secure machine in the tilted position to prevent tipping over.
2. Remove all
3. Install new flite shoes to auger using
13