Section 2 - OPERATING INSTRUCTIONS
WARNING
Before attempting any adjustments to the cutting height, STOP the engine, remove the spark plug wire from the spark plug and secure wire away from plug. DO NOT make any adjustments with engine or blade running. Be extremely careful when performing adjustments around engine. Engine is extremely hot and can cause severe burns. Wear heavy leather gloves when handling or working around cutting blades. Blades are extremely sharp and can cause severe injury.
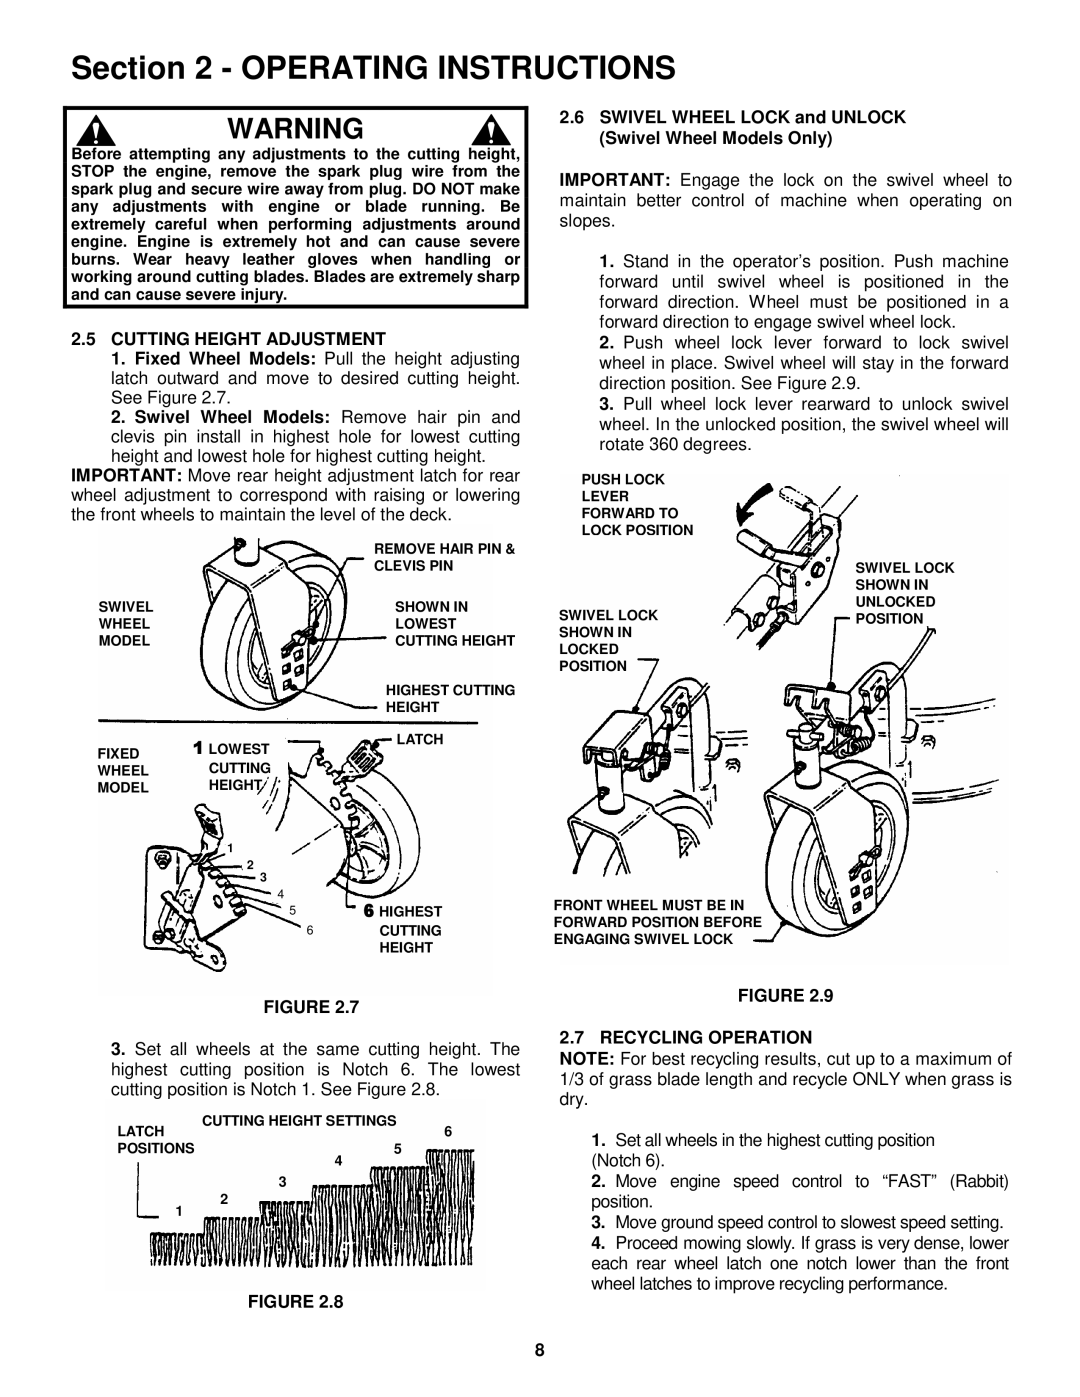
2.5CUTTING HEIGHT ADJUSTMENT
1.Fixed Wheel Models: Pull the height adjusting latch outward and move to desired cutting height. See Figure 2.7.
2.Swivel Wheel Models: Remove hair pin and clevis pin install in highest hole for lowest cutting height and lowest hole for highest cutting height.
IMPORTANT: Move rear height adjustment latch for rear wheel adjustment to correspond with raising or lowering the front wheels to maintain the level of the deck.
| REMOVE HAIR PIN & |
| CLEVIS PIN |
SWIVEL | SHOWN IN |
WHEEL | LOWEST |
MODEL | CUTTING HEIGHT |
| HIGHEST CUTTING |
| HEIGHT |
| LATCH |
FIXED | 1 LOWEST |
WHEEL | CUTTING |
MODEL | HEIGHT |
2.6SWIVEL WHEEL LOCK and UNLOCK (Swivel Wheel Models Only)
IMPORTANT: Engage the lock on the swivel wheel to maintain better control of machine when operating on slopes.
1.Stand in the operator’s position. Push machine forward until swivel wheel is positioned in the forward direction. Wheel must be positioned in a forward direction to engage swivel wheel lock.
2.Push wheel lock lever forward to lock swivel wheel in place. Swivel wheel will stay in the forward direction position. See Figure 2.9.
3.Pull wheel lock lever rearward to unlock swivel wheel. In the unlocked position, the swivel wheel will rotate 360 degrees.
PUSH LOCK
LEVER
FORWARD TO
LOCK POSITION
SWIVEL LOCK SHOWN IN
UNLOCKED
SWIVEL LOCKPOSITION SHOWN IN
LOCKED
POSITION
1
2
3
4 | 6 HIGHEST |
5 | |
6 | CUTTING |
| HEIGHT |
FIGURE 2.7
3.Set all wheels at the same cutting height. The highest cutting position is Notch 6. The lowest cutting position is Notch 1. See Figure 2.8.
LATCH | CUTTING HEIGHT SETTINGS |
6 | |
POSITIONS | 5 |
4
3
2
1
FIGURE 2.8
FRONT WHEEL MUST BE IN
FORWARD POSITION BEFORE
ENGAGING SWIVEL LOCK
FIGURE 2.9
2.7 RECYCLING OPERATION
NOTE: For best recycling results, cut up to a maximum of 1/3 of grass blade length and recycle ONLY when grass is dry.
1.Set all wheels in the highest cutting position (Notch 6).
2.Move engine speed control to “FAST” (Rabbit) position.
3.Move ground speed control to slowest speed setting.
4.Proceed mowing slowly. If grass is very dense, lower each rear wheel latch one notch lower than the front wheel latches to improve recycling performance.
8