
YZ16424BVE, YZ20484BVE, YZ20484BVE, YZ16424BVE specifications
The Snapper YZ16424BVE and YZ20484BVE lawn mowers represent a notable advancement in residential and commercial landscaping technology. Engineered for efficiency, both models showcase cutting-edge features that enhance performance while ensuring user comfort.The YZ16424BVE boasts a robust 24-horsepower engine, providing ample power for tackling various lawn conditions. This model is equipped with a 42-inch cutting deck, allowing for quick and efficient mowing of medium to large yards. Its dual-blade system offers superior mulch and bagging capabilities, giving users the flexibility to choose how they want to care for their lawns. The YZ16424BVE also features adjustable cutting heights, giving users precise control over their lawn's appearance.
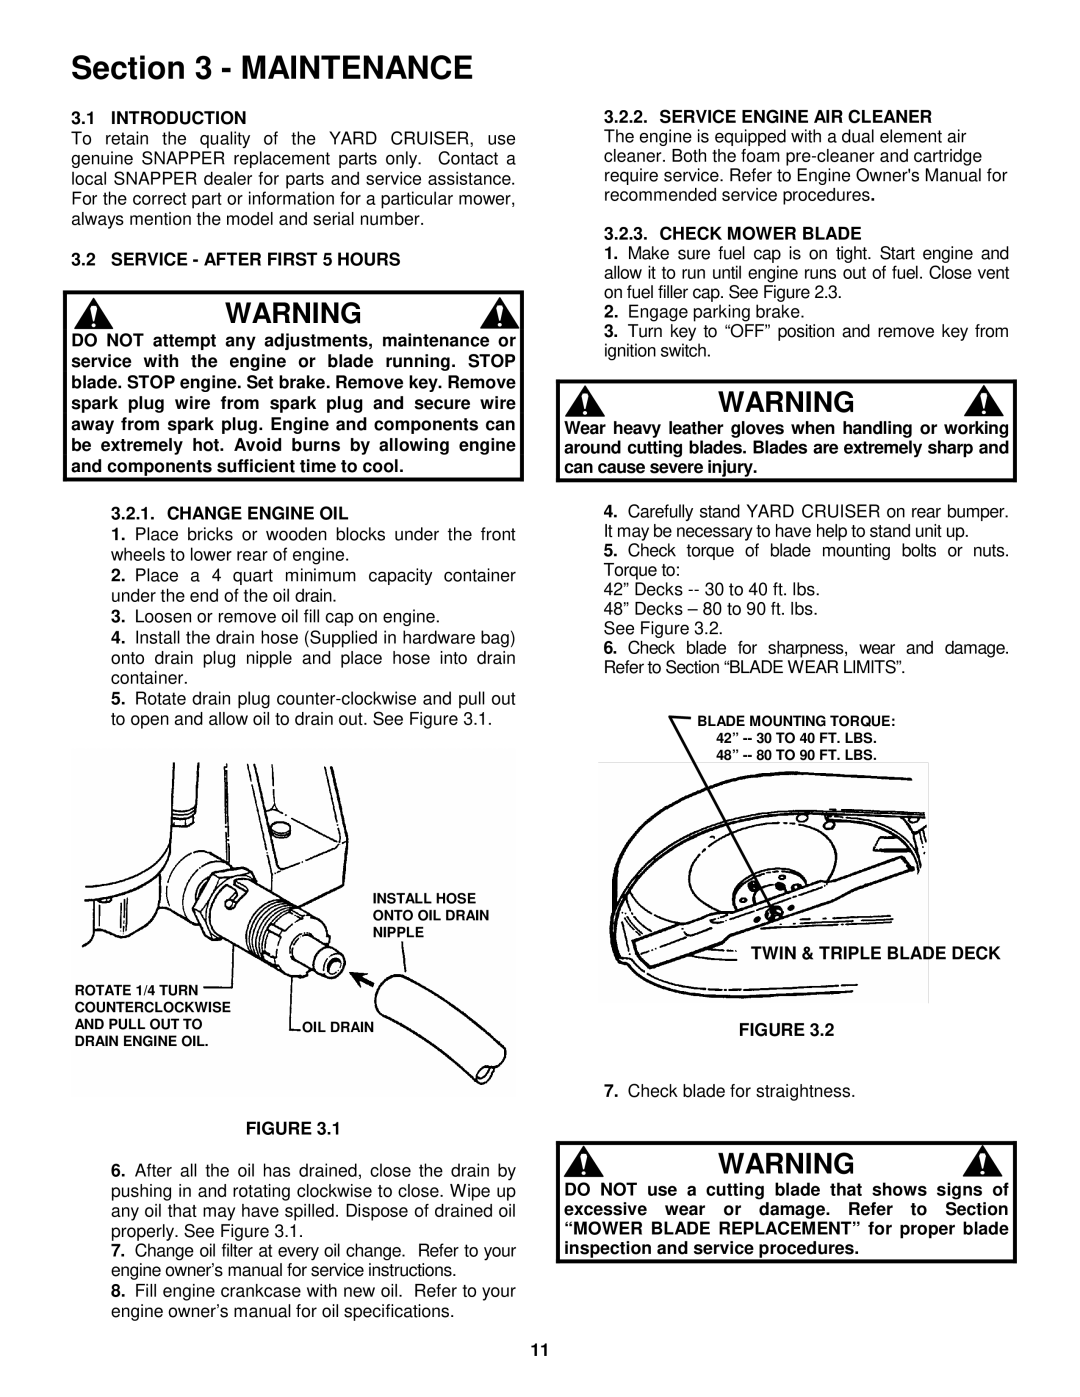
On the other hand, the YZ20484BVE takes it a step further with a formidable 48-inch cutting deck and a 24-horsepower engine. This model is tailored for larger properties, significantly reducing mowing time without compromising on quality. The YZ20484BVE incorporates Snapper's innovative ReadyStart technology, which eliminates the need for priming the engine. This ensures hassle-free startups every time, making it an ideal choice for those who prefer a quick and straightforward mowing experience.
Both models are designed with user comfort in mind. Featuring ergonomic, adjustable seating, they provide a comfortable ride even during extended mowing sessions. The smooth maneuverability of the zero-turn steering allows for precise control, enabling users to navigate around obstacles effortlessly. This feature reduces the effort required to achieve a perfectly manicured lawn.
Durability is also a significant highlight of both the YZ16424BVE and YZ20484BVE. Built with high-quality materials, these mowers are designed to withstand the rigors of regular use. Their reinforced frames and heavy-duty wheels ensure stability and reliability across various terrains.
In summary, Snapper's YZ16424BVE and YZ20484BVE models are powerful, efficient, and user-friendly lawn mowers that cater to different yard sizes and needs. With advanced technologies, customizable features, and robust construction, they stand out as exceptional choices for anyone looking to maintain a beautiful lawn with ease and precision. Whether you're managing a small garden or a sprawling estate, these mowers deliver the performance needed to achieve landscaping excellence.