INSTALLATION—SLIDING
INSTALLING THE UNIT IN A SLIDING WINDOW (CONT.)
10. Clamp plastic window panel between a board and a work table, and cut along cutting line with a fine tooth saw. Remove any burrs with a file.
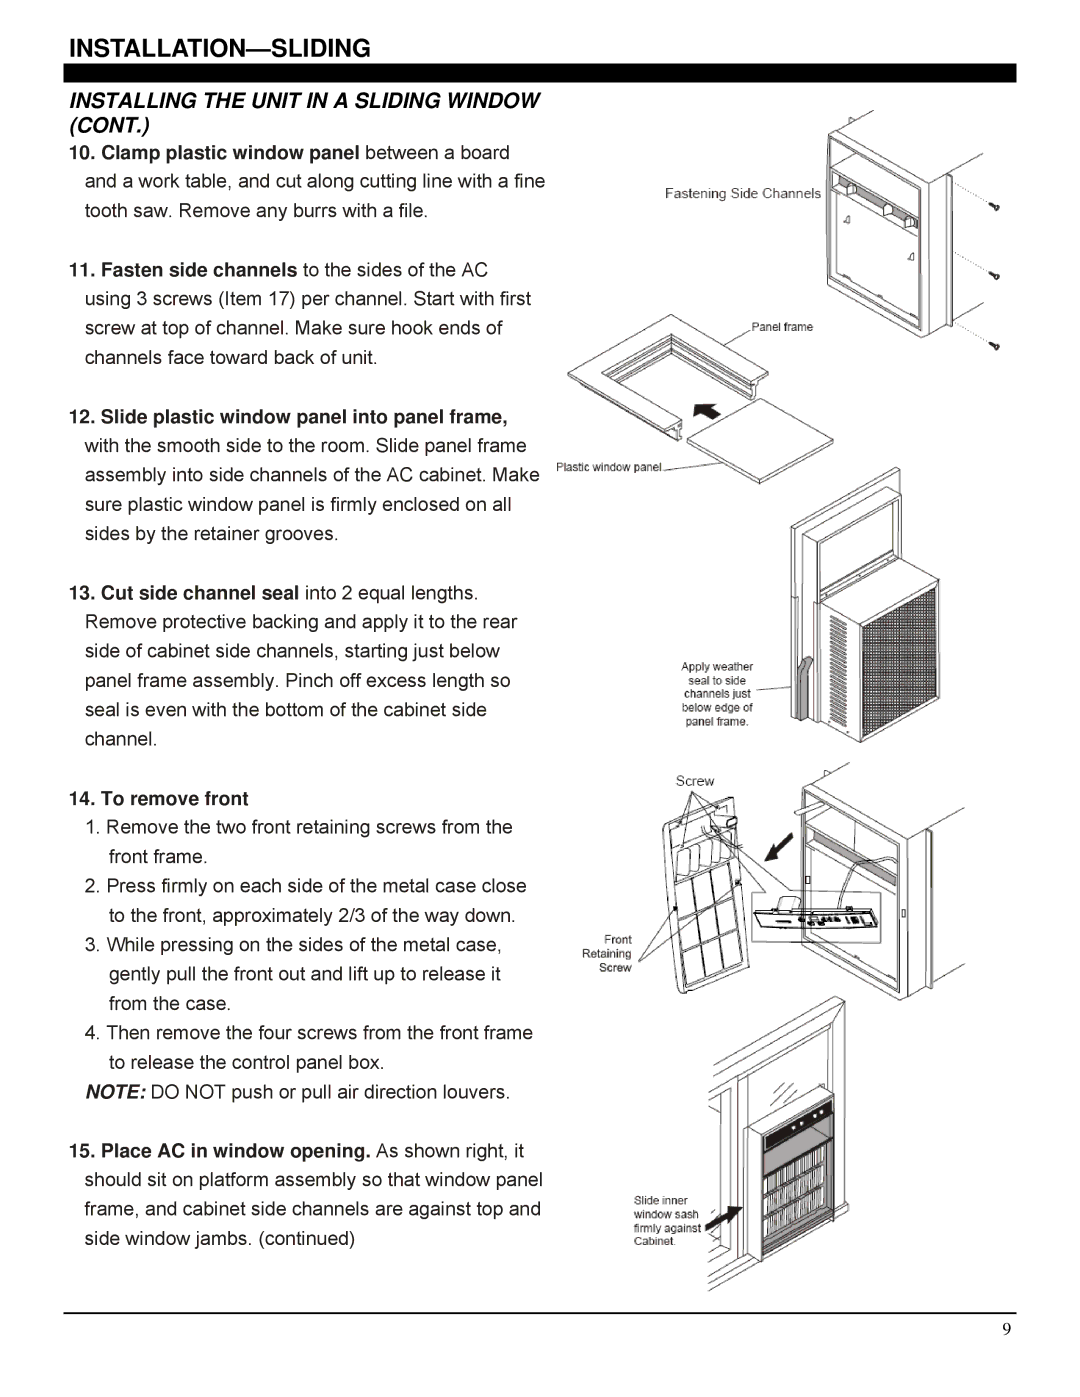
11.Fasten side channels to the sides of the AC using 3 screws (Item 17) per channel. Start with first screw at top of channel. Make sure hook ends of channels face toward back of unit.
12.Slide plastic window panel into panel frame, with the smooth side to the room. Slide panel frame assembly into side channels of the AC cabinet. Make sure plastic window panel is firmly enclosed on all sides by the retainer grooves.
13.Cut side channel seal into 2 equal lengths. Remove protective backing and apply it to the rear side of cabinet side channels, starting just below panel frame assembly. Pinch off excess length so seal is even with the bottom of the cabinet side channel.
14.To remove front
1.Remove the two front retaining screws from the front frame.
2.Press firmly on each side of the metal case close to the front, approximately 2/3 of the way down.
3.While pressing on the sides of the metal case, gently pull the front out and lift up to release it from the case.
4.Then remove the four screws from the front frame to release the control panel box.
NOTE: DO NOT push or pull air direction louvers.
15.Place AC in window opening. As shown right, it should sit on platform assembly so that window panel frame, and cabinet side channels are against top and side window jambs. (continued)
9