2 | Product Guide |
Adding the SUB to your Sonos System
You can easily add the SONOS SUB to an existing Sonos system.
•You can associate the SUB with any amplified Sonos player, including a CONNECT:AMP (ZP120), PLAY:3, PLAY:5, or ZP100. You cannot associate it with an
•The SUB is compatible with Sonos software versions 3.8 and later. Be sure to check for software updates before add- ing the SUB to your Sonos system.
1.Carefully unpack the package contents.
Caution: Subwoofers are heavy. Exercise caution when unpacking your SONOS SUB. Use the acoustic slot as a handle to lift the SUB out of the box. (You should always bend your knees when lifting heavy objects to avoid undue stress on your back.)
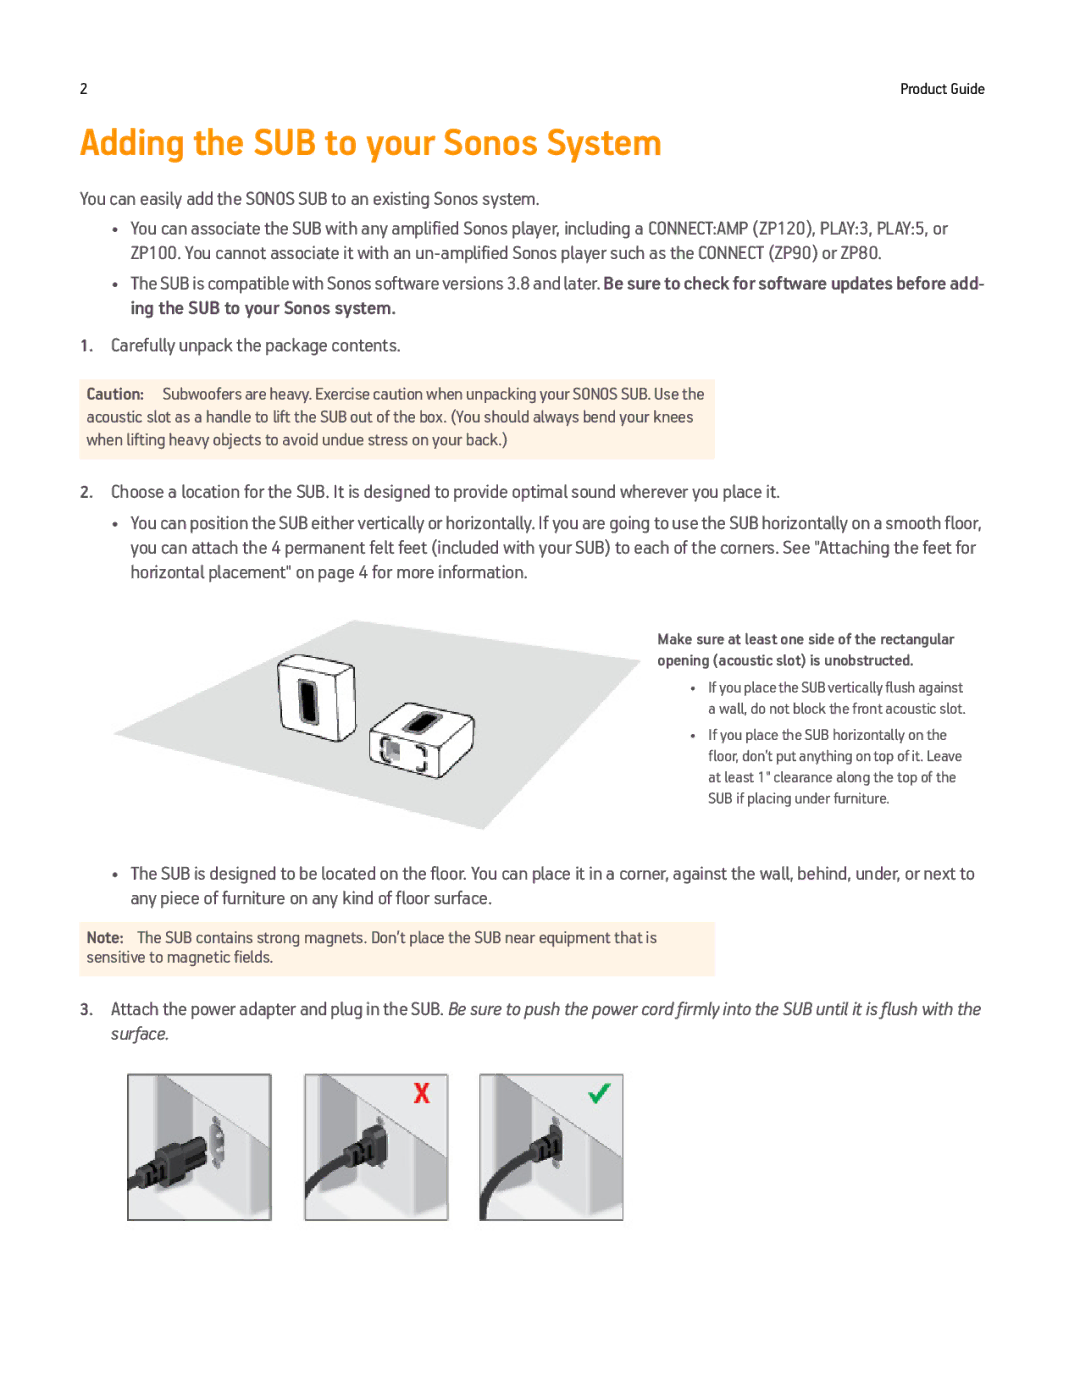
2.Choose a location for the SUB. It is designed to provide optimal sound wherever you place it.
•You can position the SUB either vertically or horizontally. If you are going to use the SUB horizontally on a smooth floor, you can attach the 4 permanent felt feet (included with your SUB) to each of the corners. See "Attaching the feet for horizontal placement" on page 4 for more information.
Make sure at least one side of the rectangular opening (acoustic slot) is unobstructed.
• If you place the SUB vertically flush against a wall, do not block the front acoustic slot.
• If you place the SUB horizontally on the floor, don’t put anything on top of it. Leave at least 1" clearance along the top of the SUB if placing under furniture.
•The SUB is designed to be located on the floor. You can place it in a corner, against the wall, behind, under, or next to any piece of furniture on any kind of floor surface.
Note: The SUB contains strong magnets. Don’t place the SUB near equipment that is sensitive to magnetic fields.
3.Attach the power adapter and plug in the SUB. Be sure to push the power cord firmly into the SUB until it is flush with the surface.