ELECTRICAL SPECIFICATIONS

Heater and Blower Only

!Power 24 VAC, Class 2 Only

For BRCSDP12

53 watts at 24 VAC (heater and blower) Input Connectors:

BNC

(2)screw-down connectors RJ-45 Connector

Camera Power

Refer to the camera's installation guide.

PREPARING PENDANT MOUNT MODEL

GENERAL INSTRUCTIONS:

Tools Required: .100" Flat Head Screwdriver

Phillips Head Screwdriver

1Carefully remove the housing from the packaging material. Check to be sure all parts are present.

2This unit includes a 1 1/2" NPT housing coupling that can be used with a standard 1 1/2" NPT pipe. The housing can be used with other brackets designed with 1 1/2" male pipe threads, such as the SNCWM20 wall mount bracket.

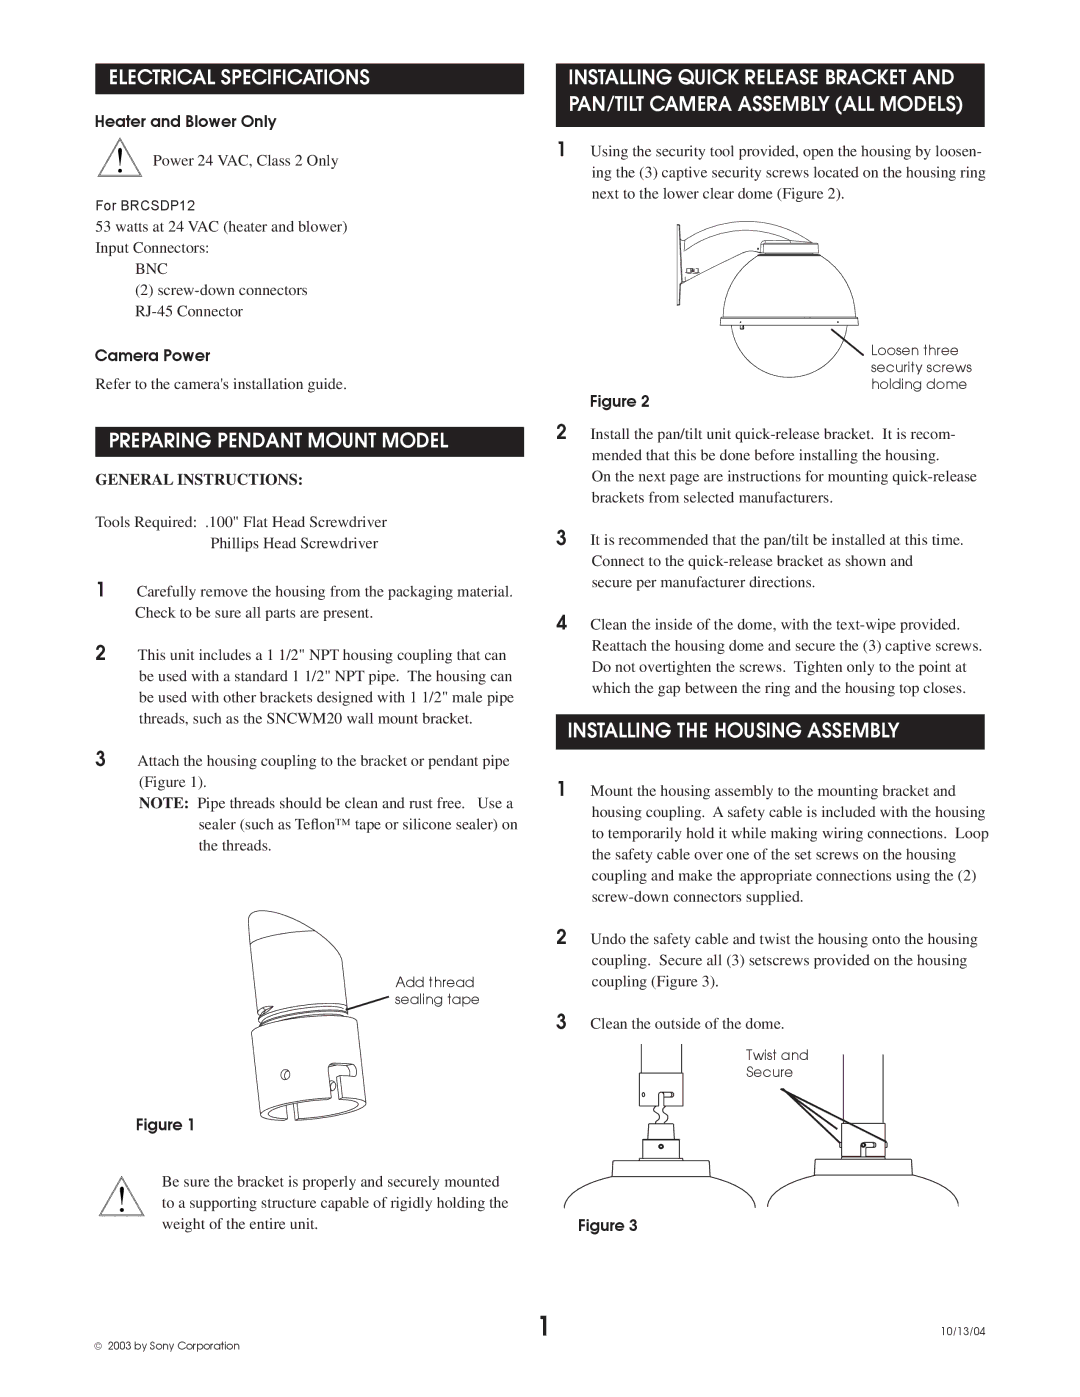
3Attach the housing coupling to the bracket or pendant pipe (Figure 1).

NOTE: Pipe threads should be clean and rust free. Use a sealer (such as Teflon™ tape or silicone sealer) on the threads.

Add thread

sealing tape

Figure 1

Be sure the bracket is properly and securely mounted

!to a supporting structure capable of rigidly holding the weight of the entire unit.

INSTALLING QUICK RELEASE BRACKET AND PAN/TILT CAMERA ASSEMBLY (ALL MODELS)

1Using the security tool provided, open the housing by loosen- ing the (3) captive security screws located on the housing ring next to the lower clear dome (Figure 2).

Loosen three security screws holding dome

Figure 2

2Install the pan/tilt unit quick-release bracket. It is recom- mended that this be done before installing the housing.

On the next page are instructions for mounting quick-release brackets from selected manufacturers.

3It is recommended that the pan/tilt be installed at this time. Connect to the quick-release bracket as shown and secure per manufacturer directions.

4Clean the inside of the dome, with the text-wipe provided. Reattach the housing dome and secure the (3) captive screws. Do not overtighten the screws. Tighten only to the point at which the gap between the ring and the housing top closes.

INSTALLING THE HOUSING ASSEMBLY

1Mount the housing assembly to the mounting bracket and housing coupling. A safety cable is included with the housing to temporarily hold it while making wiring connections. Loop the safety cable over one of the set screws on the housing coupling and make the appropriate connections using the (2) screw-down connectors supplied.

2Undo the safety cable and twist the housing onto the housing coupling. Secure all (3) setscrews provided on the housing coupling (Figure 3).

3Clean the outside of the dome.

Twist and

Secure

Figure 3

1

10/13/04

© 2003 by Sony Corporation

Page 2
Image 2
Sony BRCSDP12 instruction manual Electrical Specifications, Preparing Pendant Mount Model, Installing the Housing Assembly

BRCSDP12 specifications

The Sony BRC-SDP12 is a cutting-edge PTZ (Pan-Tilt-Zoom) camera that stands out in professional broadcasting and video production environments. Equipped with a robust set of features and advanced technologies, it caters to a wide range of applications, including live events, educational setups, and corporate environments.

One of the most notable features of the BRC-SDP12 is its impressive 12x optical zoom lens, which allows for capturing detailed images from a significant distance. This high optical zoom capability, paired with a 1/2.5-inch Exmor R CMOS sensor, ensures excellent image quality, delivering vivid colors and sharp details, even in low-light conditions. The low-light performance is further enhanced by the camera's sensitivity, enabling it to function effectively in various lighting scenarios.

With its versatile pan and tilt capabilities, the BRC-SDP12 can cover a wide area. The camera offers a pan range of 200 degrees and a tilt range of 120 degrees, allowing for dynamic shot compositions. Moreover, the speed of pan and tilt movements can be adjusted, ensuring smooth transitions and professional-grade video capture. This is particularly beneficial for live sports, theater performances, or any event where quick and precise camera movements are required.

The BRC-SDP12 also features advanced connectivity options. It supports both SDI and HDMI outputs, making it compatible with a wide range of broadcasting equipment. Furthermore, it supports IP streaming, allowing for remote control and monitoring over a network, enhancing the flexibility and usability of the camera in various setups.

In terms of user experience, the BRC-SDP12 is equipped with a user-friendly interface that simplifies operation. It also includes presets for up to 256 positions, which can be easily recalled for quick access to specific camera angles. This feature is particularly useful in situations where rapid changes in shot composition are necessary.

Overall, the Sony BRC-SDP12 combines advanced imaging technologies, versatile control options, and user-friendly features, making it an ideal choice for professionals seeking a reliable PTZ camera that meets the demands of modern video production. Its build quality and performance ensure longevity in various environments, solidifying its place as a valuable asset in any video production toolkit.