
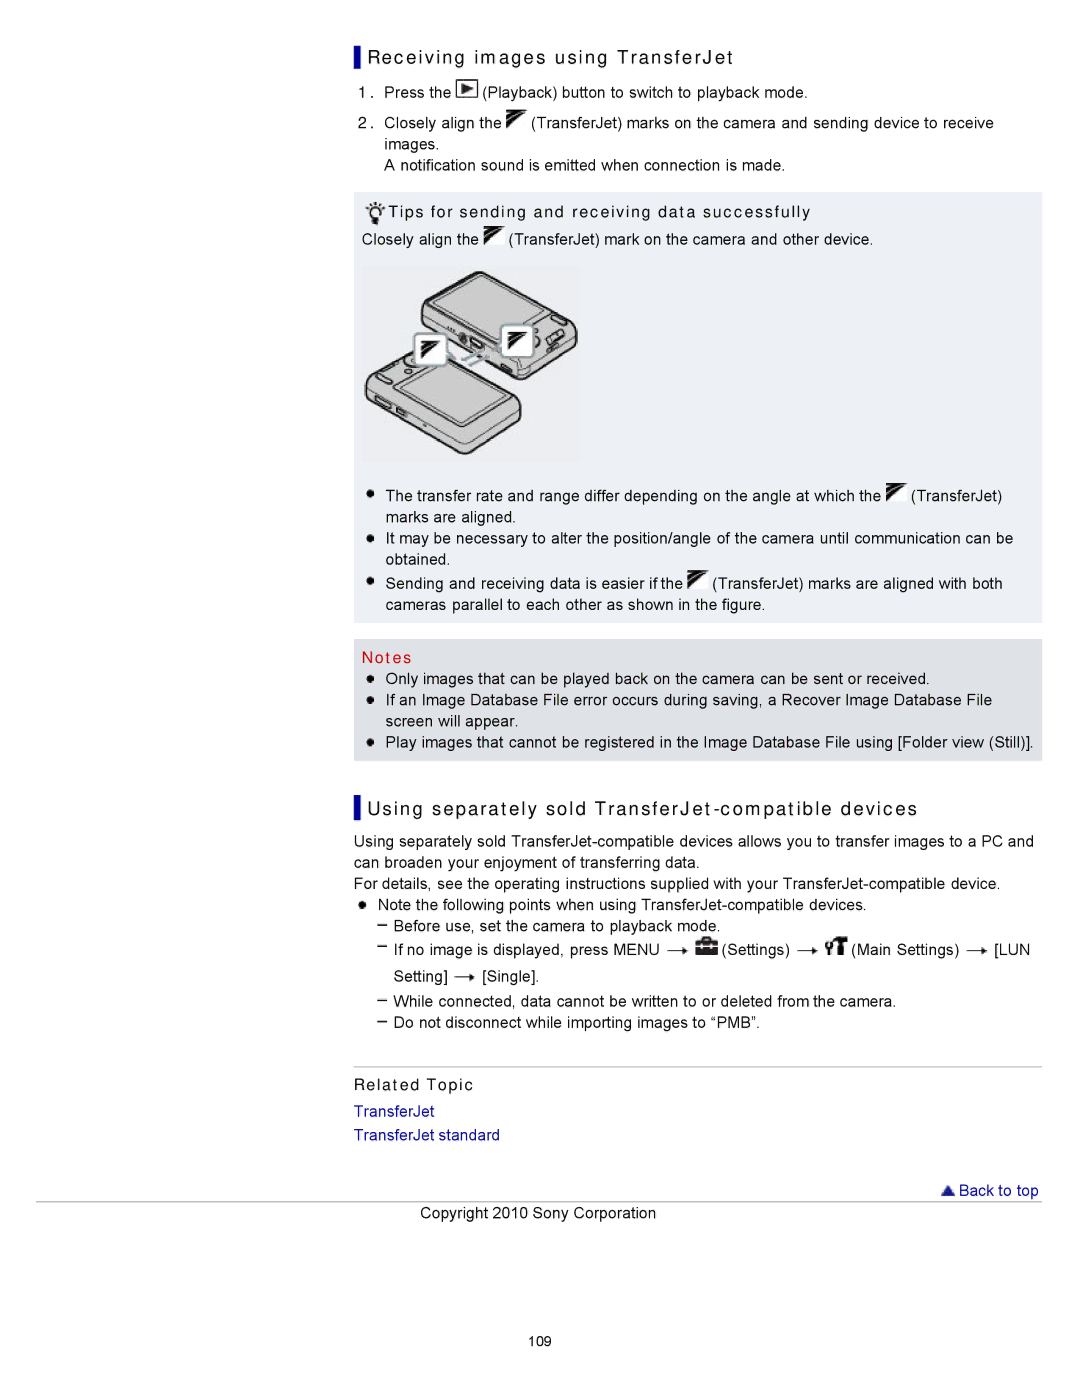
DSC-W570D, DSC-W580, DSC-W570 specifications
The Sony DSC-W570, DSC-W580, and DSC-W570D are compact digital cameras that offer a combination of quality, performance, and ease of use, ideal for both beginners and those looking for a reliable point-and-shoot device. Each model is designed with features that cater to various photography needs while maintaining a user-friendly interface.The Sony DSC-W570 stands out with its 16.1-megapixel Super HAD CCD sensor, which delivers sharp and vibrant images. The camera is equipped with a 5x optical zoom lens, allowing you to capture everything from sweeping landscapes to detailed close-ups. One of the key features of the DSC-W570 is its 2.7-inch LCD screen, which provides a clear view for composing shots and reviewing images. This model also includes a sweep panorama mode, enabling users to capture wide scenes effortlessly by sweeping the camera across the landscape.
Meanwhile, the DSC-W580 enhances the shooting experience with similar specifications but ups the ante in terms of functionality. It features a 16.2-megapixel sensor that ensures even finer image detail, ensuring that your photos look great both on-screen and in print. With a 5x optical zoom and Optical SteadyShot image stabilization, this camera minimizes blur, making it easier to shoot in varying lighting conditions. The 3-inch LCD screen on the W580 offers improved visibility, making it easier to shoot in sunny environments. This model also includes multiple shooting modes and creative filters that allow photographers to experiment with their images creatively.
Lastly, the Sony DSC-W570D, while closely related to the other models, may include additional features or bundled accessories, depending on the market. It provides similar specifications with an emphasis on usability and performance. Each of these cameras embodies Sony’s commitment to innovation, combining advanced technologies like Face Detection, which optimizes focus and exposure for individuals, and Smile Shutter technology that captures smiles the moment they happen.
In summary, the Sony DSC-W570, DSC-W580, and DSC-W570D are versatile and user-friendly cameras that cater to a wide range of photographic needs. With their impressive sensors, optical zoom capabilities, and features designed to enhance the photography experience, these cameras remain popular choices for casual photographers looking to capture life’s moments with ease and quality. Whether you're shooting stunning landscapes, family gatherings, or everyday scenes, these models deliver reliable performance in a compact design.