About This Manual
The instructions in this manual are for the
Preparing Power Sources
Choose one of the following power sources.
Dry Batteries
| ] |
} | } |
] |
|
Make sure that nothing is connected to the DC IN 3V jack.
1Open the battery compartment lid.
2Insert two R6 (size AA) batteries with correct polarity and close the lid.
If the battery compartment lid is accidentally detached
Attach it as illustrated.
When to replace the batteries
Replace the batteries with new ones when the BATT (battery) lamp dims and the sound is distorted.
Battery life (Approx. hours)
Batteries | Recording |
|
|
Sony R6P (SR) | 5.5 |
|
|
Sony alkaline LR6 (SG) | 19 |
|
|
6.0 | |
|
|
House current
to the wall outlet
DC IN 3V
AC power adaptor (supplied with M- 579V only) or
Connect the AC power adaptor to DC IN 3V and to a wall outlet. Use the AC power adaptor (supplied with M- 579V only) or the
Polarity of the plug
Recording
EAR |
| |
| Microphone | |
| REC/BATT | |
TAPE | r | |
CPAUSE | ||
SPEED | 0CUE/REVIEW ) | |
TAPE | ||
p6 | ||
COUNTER | ||
| ||
| VOR |
1
2Press p6 and insert a standard microcassette with the side to start recording facing the lid.
3Select the desired tape speed.
2.4cm for optimum sound (recommended for normal use): A
1.2cm for longer recording time: A
4
H: To record at meeting or in a quiet and/or spacious place.
L: To record for dictation or in a noisy place.
When the sound is not loud enough, set it to OFF, or the unit may not start recording.
5Press r. Recording starts. Recording level is fixed.
To | Press or slide |
Stop recording | p6 |
Start recording during | rduring playback (the unit |
playback | becomes in the recording mode) |
Review the portion just | Push up 0CUE/)REVIEW |
recorded | toward )REVIEW during the |
| recording. Release the button at the |
| point to start playback. |
Pause recording | Slide CPAUSE in the direction |
| of the arrow. The BATT lamp goes |
| off. |
Take out a cassette | p6 |
Note
Select the 2.4 cm tape speed for recording, if you play back the recorded tape with another unit. Otherwise, the sound quality may be changed.
Notes on VOR (Voice Operated Recording)
•The VOR system depends on the environmental conditions. If you cannot get the desired results, set VOR to OFF.
•When you use the system in a noisy place, the unit will stay in the recording mode. If the sound is too soft, on the contrary, the unit will not start recording. Set VOR to H (high) or L (low) depending on the conditions.
To monitor the sound
Connect the earphone (not supplied) to EAR jack. The monitor volume cannot be adjusted by VOL.
To prevent a cassette from being accidentally recorded over
Break out and remove the cassette tabs. To reuse the cassette for recording, cover the tab hole with adhesive tape.
m | m | m |
|
|
Playing a Tape
1Insert a cassette with the side to start playing facing the lid.
2Select the tape speed to the same speed as that used for recording.
3Press 9.
4Adjust the volume.
EAR | VOL | |
| REC/BATT | |
TAPE | CPAUSE | |
9 | ||
SPEED | ||
0CUE/REVIEW ) | ||
| ||
| p6 |
To | Press or slide |
Stop playback/stop fast | p6 |
forward or rewind* |
|
Pause playback | Slide CPAUSE in the direction of |
| the arrow. The BATT lamp goes off. |
|
|
Fast forward | Slide 0CUE/)REVIEW toward |
| 0CUE during stop.** |
|
|
Rewind | Slide 0CUE/)REVIEW toward |
| )REVIEW during stop.** |
|
|
Search forward during | Keep 0CUE/)REVIEW pushed |
playback (CUE) | down during playback and release it |
| at the point you want.** |
Search backward during | Keep 0CUE/)REVIEW pushed |
playback (REVIEW) | up during playback and release it at |
| the point you want.** |
*If you leave the unit after the tape has been wound or
rewound, the batteries will be consumed rapidly. Be sure to depress p6.
**The tape moves faster in the rewind/REVIEW mode than in the fast forward/CUE mode.
At the end of the tape
In the recording or playback mode, the tape stops at the end of the tape and the locked buttons will be released automatically (Automatic
After fast forward or rewind, be sure to return 0CUE/ )REVIEW to the center.
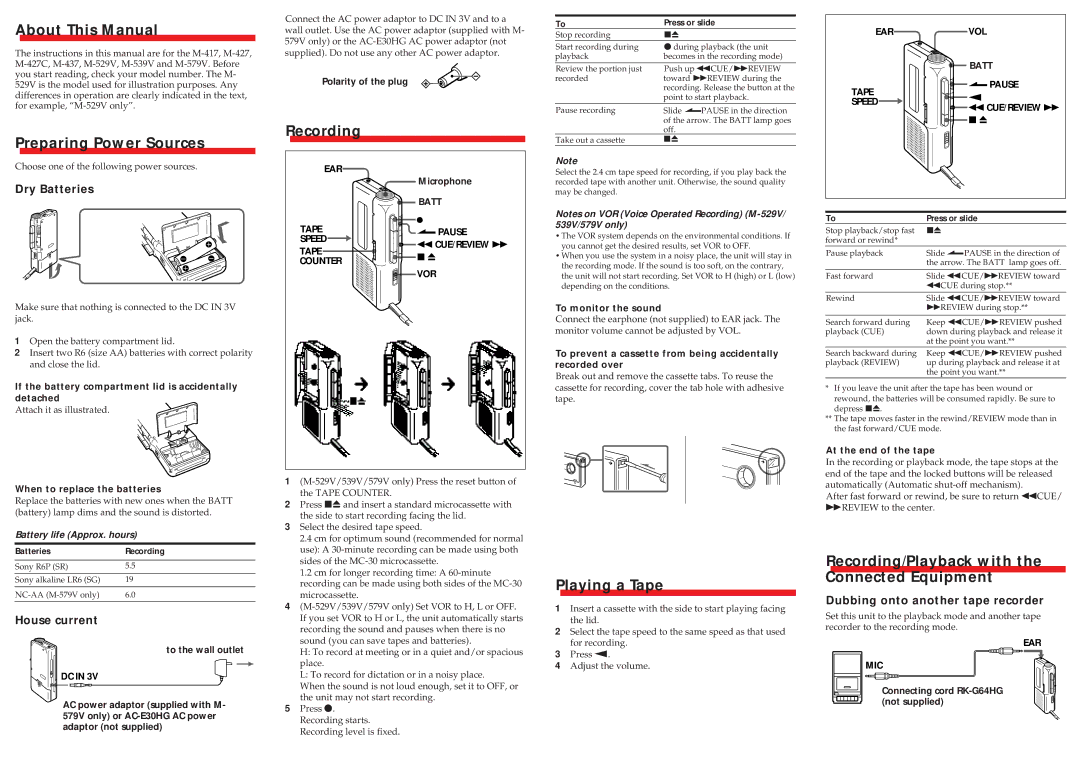
Recording/Playback with the Connected Equipment
Dubbing onto another tape recorder
Set this unit to the playback mode and another tape recorder to the recording mode.
EAR
MIC
Connecting cord