Installation
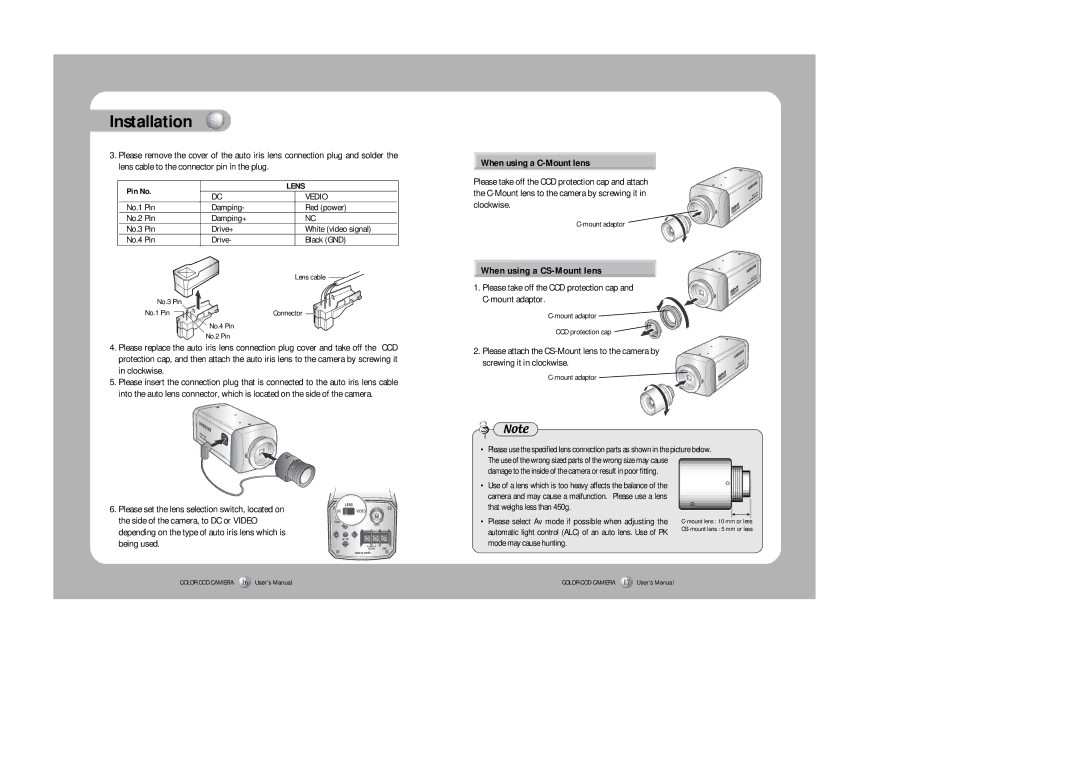
3.Please remove the cover of the auto iris lens connection plug and solder the lens cable to the connector pin in the plug.
Pin No. |
| LENS | |
DC | VEDIO | ||
| |||
No.1 Pin | Damping- | Red (power) | |
No.2 Pin | Damping+ | NC | |
No.3 Pin | Drive+ | White (video signal) | |
No.4 Pin | Drive- | Black (GND) | |
|
| Lens cable | |
No.3 Pin |
|
| |
No.1 Pin |
| Connector |
No.4 Pin
No.2 Pin
4.Please replace the auto iris lens connection plug cover and take off the CCD protection cap, and then attach the auto iris lens to the camera by screwing it in clockwise.
5.Please insert the connection plug that is connected to the auto iris lens cable into the auto lens connector, which is located on the side of the camera.
 When using a
 C-Mount lens
Please take off the CCD protection cap and attach the
 When using a
 CS-Mount lens
1. Please take off the CCD protection cap and
CCD protection cap
2. Please attach the
Note
• Please use the specified lens connection parts as shown in the picture below. The use of the wrong sized parts of the wrong size may cause
damage to the inside of the camera or result in poor fitting.
6. Please set the lens selection switch, located on the side of the camera, to DC or VIDEO depending on the type of auto iris lens which is being used.
•Use of a lens which is too heavy affects the balance of the camera and may cause a malfunction. Please use a lens that weighs less than 450g.
•Please select Av mode if possible when adjusting the automatic light control (ALC) of an auto lens. Use of PK mode may cause hunting.
COLOR CCD CAMERA 16 User’s Manual
COLOR CCD CAMERA 17 User’s Manual
