SFM1
Securing the Flat Panel to the Wall Mount
WARNING: At least (2) qualified personnel are strongly recommended for installation of this product. Failure to do so could result in serious injury and possible damage to the flat panel.
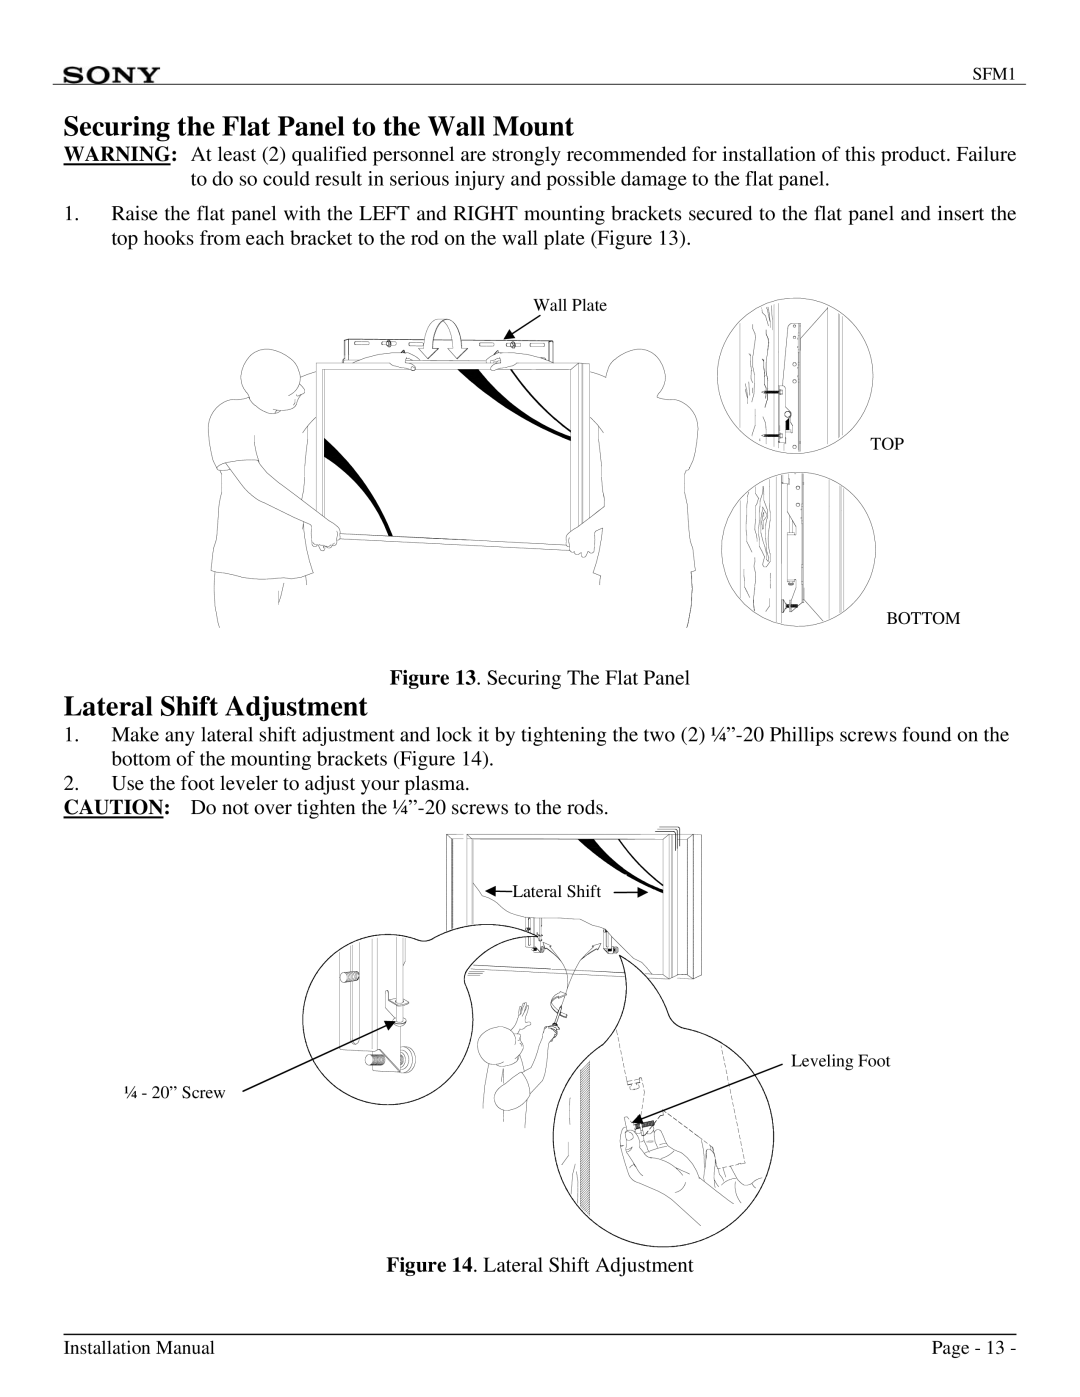
1.Raise the flat panel with the LEFT and RIGHT mounting brackets secured to the flat panel and insert the top hooks from each bracket to the rod on the wall plate (Figure 13).
Wall Plate
TOP
BOTTOM
Figure 13. Securing The Flat Panel
Lateral Shift Adjustment
1.Make any lateral shift adjustment and lock it by tightening the two (2)
2.Use the foot leveler to adjust your plasma.
CAUTION: Do not over tighten the
Lateral Shift
Leveling Foot
¼ - 20” Screw
Figure 14. Lateral Shift Adjustment
Installation Manual | Page - 13 - |