Installation
Connect all devices BEFORE switching on the Area 5.1
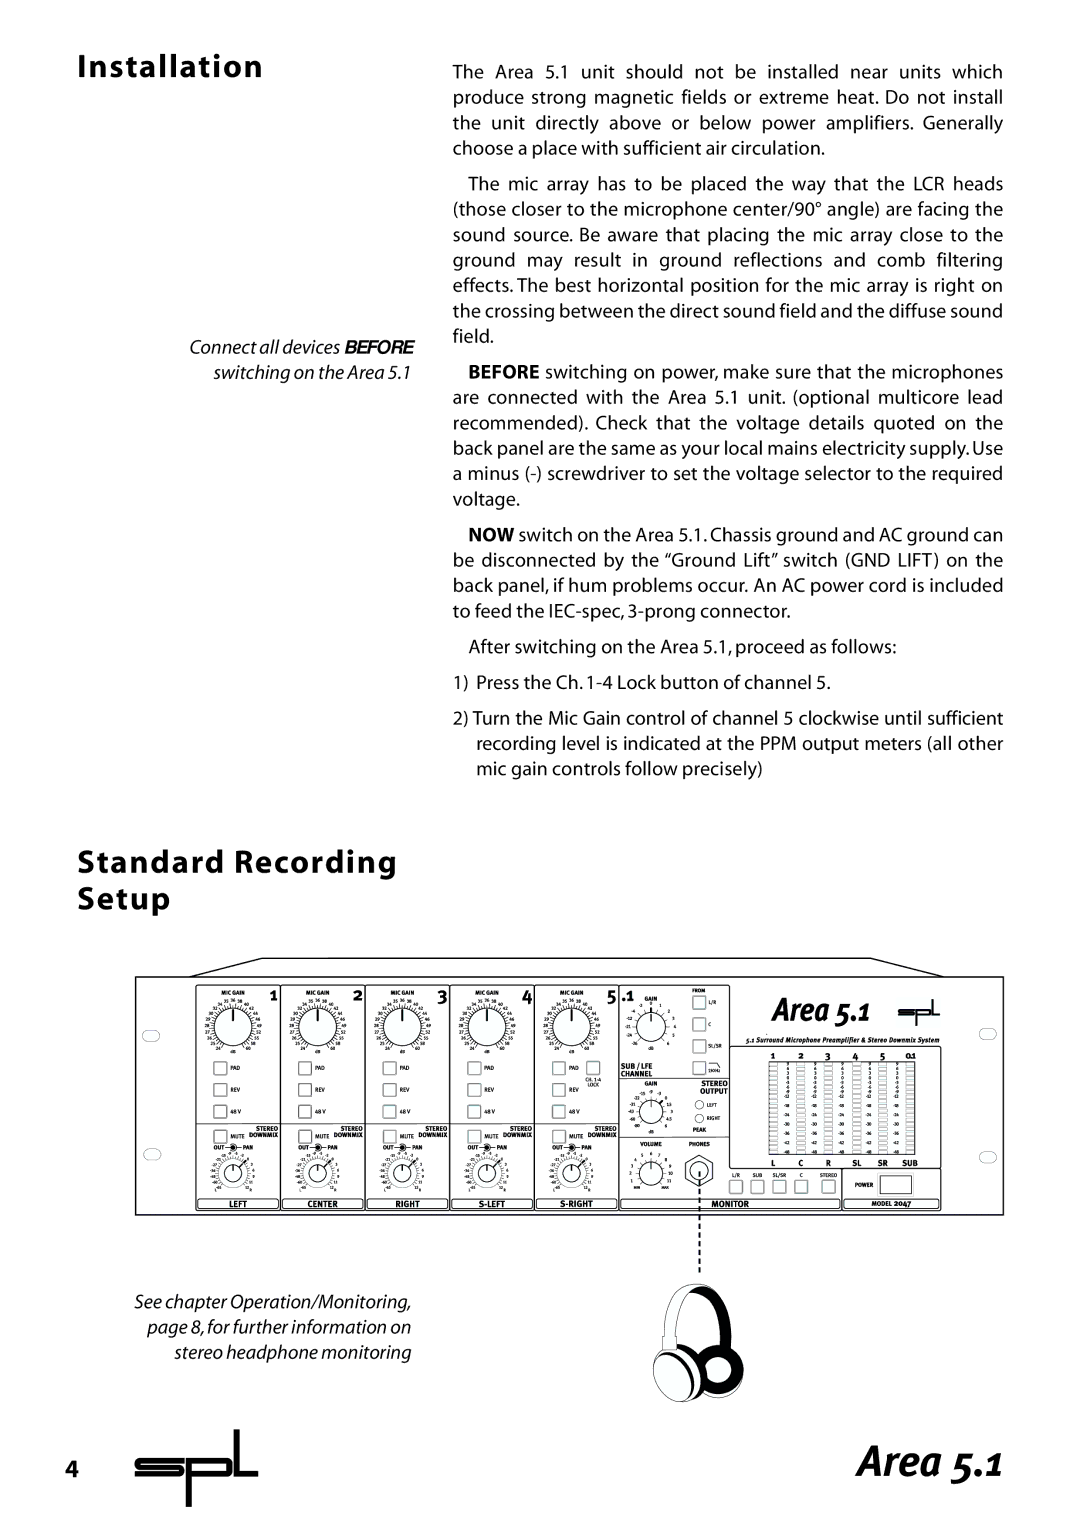
Standard Recording Setup
The Area 5.1 unit should not be installed near units which produce strong magnetic fields or extreme heat. Do not install the unit directly above or below power amplifiers. Generally choose a place with sufficient air circulation.
The mic array has to be placed the way that the LCR heads (those closer to the microphone center/90° angle) are facing the sound source. Be aware that placing the mic array close to the ground may result in ground reflections and comb filtering effects. The best horizontal position for the mic array is right on the crossing between the direct sound field and the diffuse sound field.
BEFORE switching on power, make sure that the microphones are connected with the Area 5.1 unit. (optional multicore lead recommended). Check that the voltage details quoted on the back panel are the same as your local mains electricity supply. Use a minus
NOW switch on the Area 5.1. Chassis ground and AC ground can be disconnected by the “Ground Lift” switch (GND LIFT) on the back panel, if hum problems occur. An AC power cord is included to feed the
After switching on the Area 5.1, proceed as follows:
1)Press the Ch.
2)Turn the Mic Gain control of channel 5 clockwise until sufficient recording level is indicated at the PPM output meters (all other mic gain controls follow precisely)
See chapter Operation/Monitoring, page 8, for further information on stereo headphone monitoring
4