CONNECTIONS
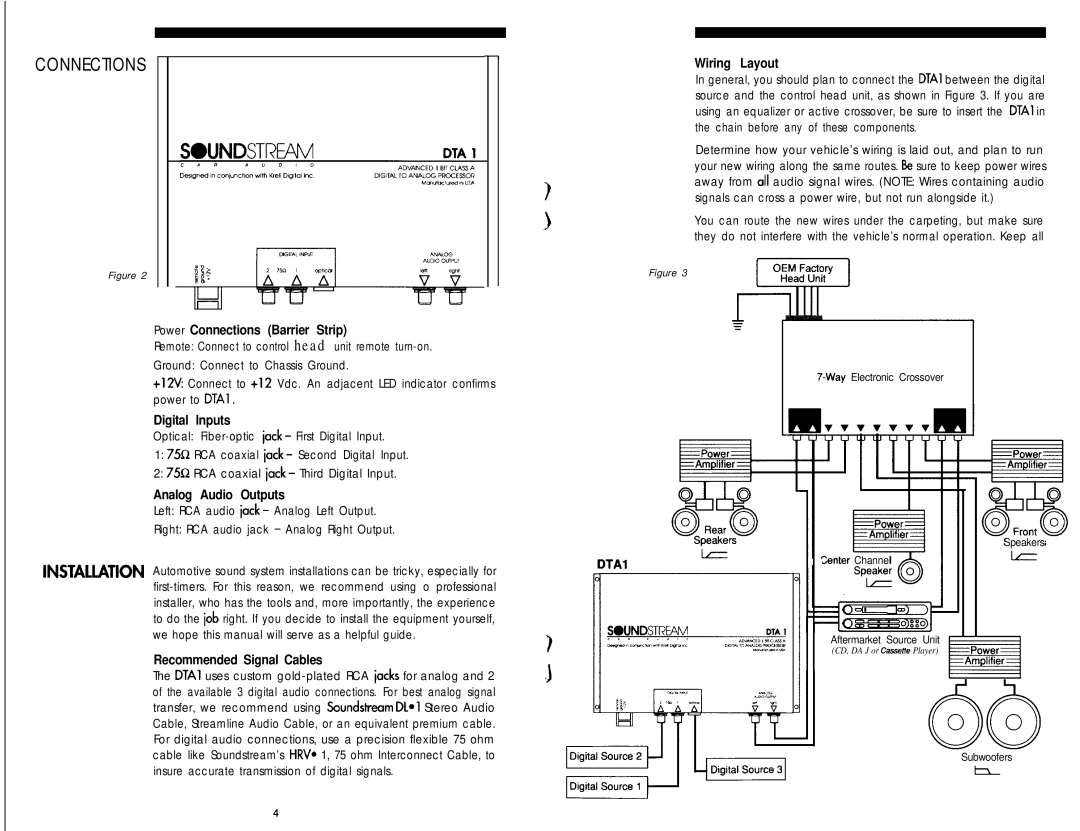
Wiring Layout
In general, you should plan to connect the DTAl between the digital source and the control head unit, as shown in Figure 3. If you are using an equalizer or active crossover, be sure to insert the DTAl in the chain before any of these components.
Determine how your vehicle’s wiring is laid out, and plan to run your new wiring along the same routes. Be sure to keep power wires away from all audio signal wires. (NOTE: Wires containing audio signals can cross a power wire, but not run alongside it.)
You can route the new wires under the carpeting, but make sure they do not interfere with the vehicle’s normal operation. Keep all
Figure 2
Power Connections (Barrier Strip)
Remote: Connect to control head unit remote
Ground: Connect to Chassis Ground.
+12V Connect to +12 Vdc. An adjacent LED indicator confirms power to DTAl .
Digital Inputs
Optical:
1:75Q RCA coaxial lack - Second Digital Input.
2:75~ RCA coaxial lack - Third Digital Input.
Analog Audio Outputs
Left: RCA audio lack - Analog Left Output.
Right: RCA audio jack - Analog Right Output.
INSTALIATION Automotive sound system installations can be tricky, especially for
installer, who has the tools and, more importantly, the experience to do the lob right. If you decide to install the equipment yourself, we hope this manual will serve as a helpful guide.
Recommended Signal Cables
The DTAl uses custom
Figure 3
Speakers
DTAl | Zenter Channel |
| |
|
|
Aftermarket Source Unit
(CD, DA J or Cassene Player)
Subwoofers
4