4. |
|
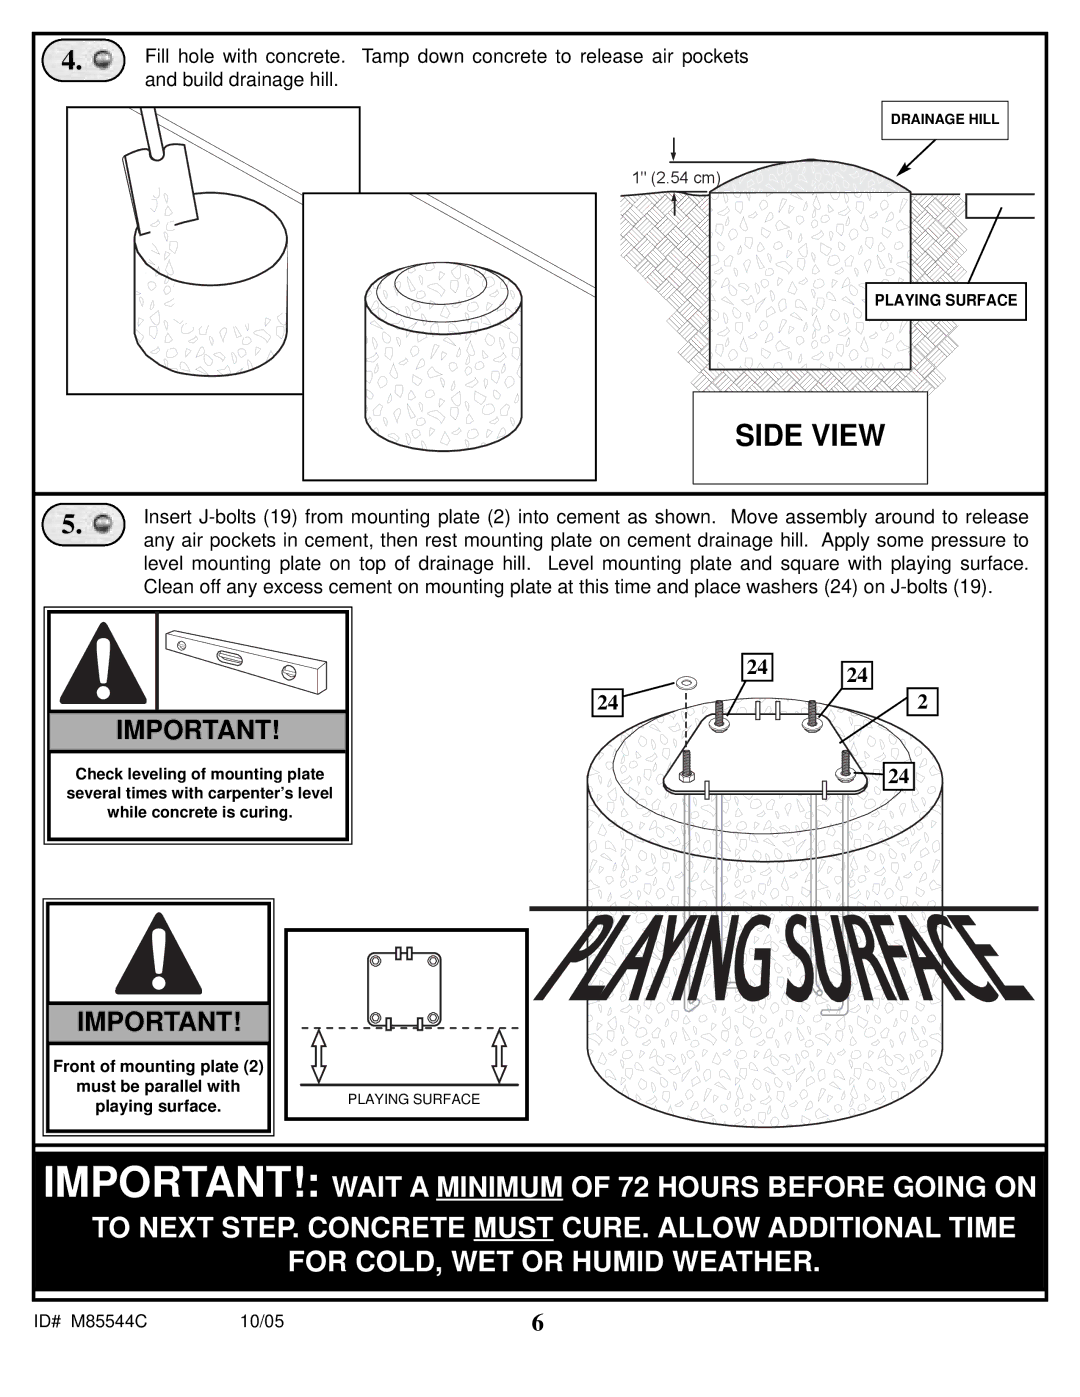
Fill hole with concrete. Tamp down concrete to release air pockets | |
| and build drainage hill. |
DRAINAGE HILL
1" (2.54 ![]() cm)
cm) ![]()
![]()
![]()
![]()
![]()
![]()
PLAYING SURFACE
| SIDE VIEW |
5. | Insert |
| any air pockets in cement, then rest mounting plate on cement drainage hill. Apply some pressure to |
level mounting plate on top of drainage hill. Level mounting plate and square with playing surface. Clean off any excess cement on mounting plate at this time and place washers (24) on
IMPORTANT!
Check leveling of mounting plate several times with carpenter’s level while concrete is curing.
IMPORTANT! |
| |
Front of mounting plate (2) |
| |
must be parallel with | PLAYING SURFACE | |
playing surface. | ||
|
24
24
24
![]() 2
2
24
IMPORTANT!: WAIT A MINIMUM OF 72 HOURS BEFORE GOING ON
TO NEXT STEP. CONCRETE MUST CURE. ALLOW ADDITIONAL TIME
FOR COLD, WET OR HUMID WEATHER.
ID# M85544C | 10/05 | 6 |