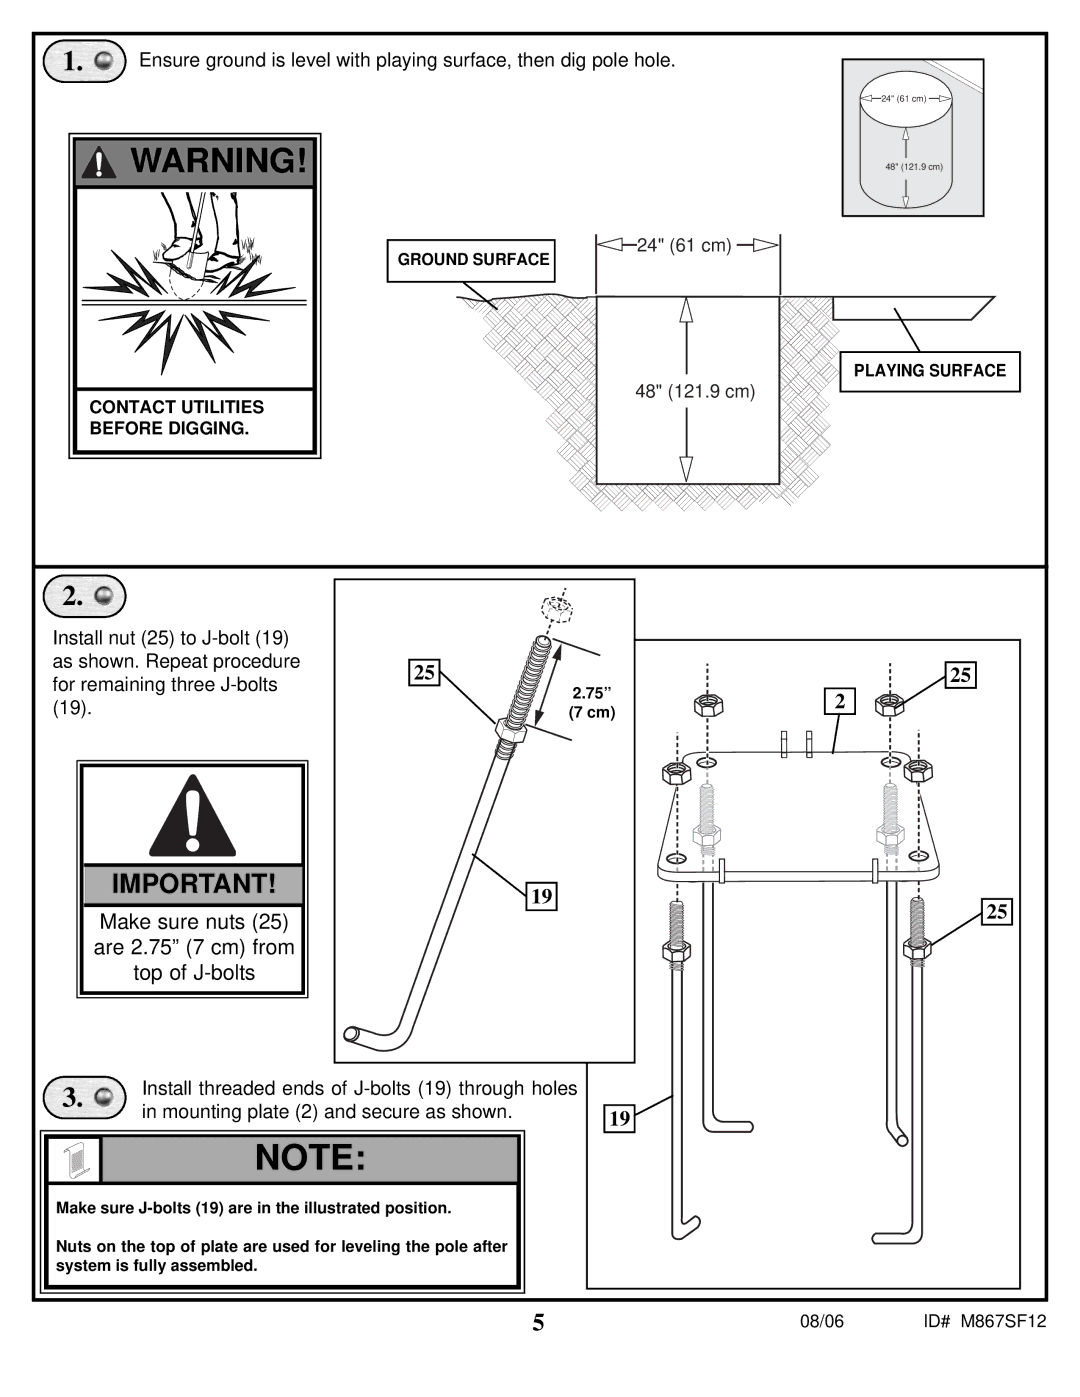
1. | Ensure ground is level with playing surface, then dig pole hole. |
![]() 24" (61 cm)
24" (61 cm) ![]()
![]() WARNING!
WARNING!
GROUND SURFACE
![]() 24" (61 cm)
24" (61 cm)
48" (121.9 cm)
PLAYING SURFACE
CONTACT UTILITIES BEFORE DIGGING.
48" (121.9 cm)
2.
Install nut (25) to
IMPORTANT!
Make sure nuts (25) are 2.75” (7 cm) from top of J-bolts
25
2.75”
(7 cm)
19
25
2
25
3. | Install threaded ends of | |
in mounting plate (2) and secure as shown. | ||
| ||
|
|
NOTE:
Make sure
Nuts on the top of plate are used for leveling the pole after system is fully assembled.
19![]()
5 | 08/06 | ID# M867SF12 |
