INSTALLING YOUR WASHER-DRYER
IMPORTANT
In the accessories bag you will also find a spanner that is to be used for removing brackets and leveling
REMOVING SHIPPING BRACKETS
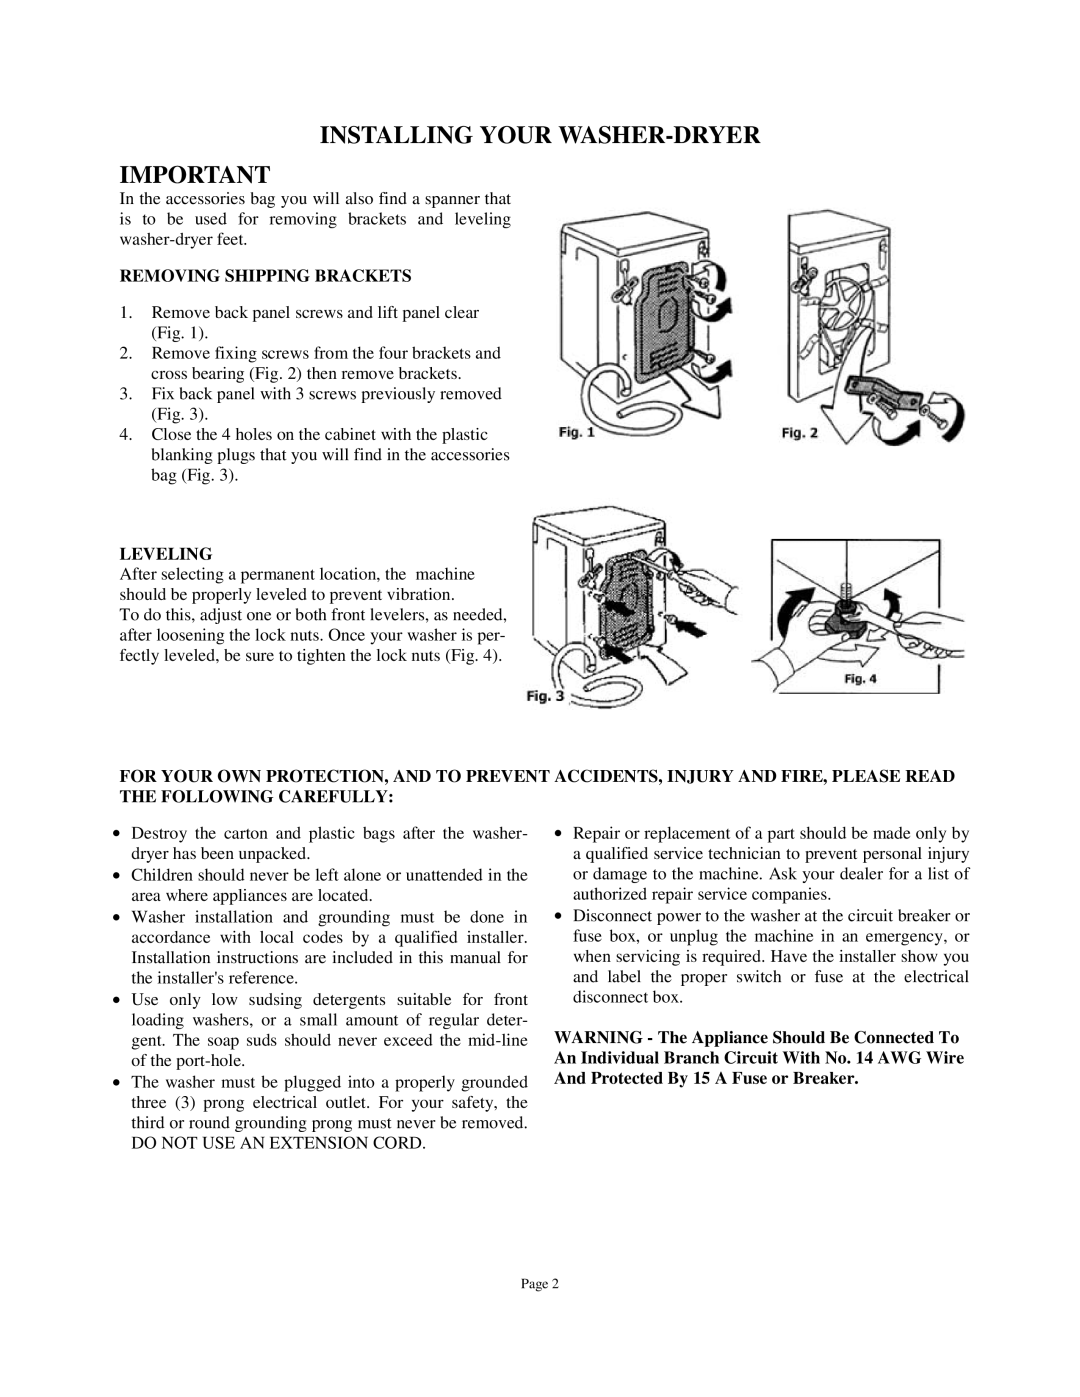
1.Remove back panel screws and lift panel clear (Fig. 1).
2.Remove fixing screws from the four brackets and cross bearing (Fig. 2) then remove brackets.
3.Fix back panel with 3 screws previously removed (Fig. 3).
4.Close the 4 holes on the cabinet with the plastic blanking plugs that you will find in the accessories bag (Fig. 3).
LEVELING
After selecting a permanent location, the machine should be properly leveled to prevent vibration.
To do this, adjust one or both front levelers, as needed, after loosening the lock nuts. Once your washer is per- fectly leveled, be sure to tighten the lock nuts (Fig. 4).
FOR YOUR OWN PROTECTION, AND TO PREVENT ACCIDENTS, INJURY AND FIRE, PLEASE READ THE FOLLOWING CAREFULLY:
• | Destroy the carton and plastic bags after the washer- | • Repair or replacement of a part should be made only by |
| dryer has been unpacked. | a qualified service technician to prevent personal injury |
• Children should never be left alone or unattended in the | or damage to the machine. Ask your dealer for a list of | |
| area where appliances are located. | authorized repair service companies. |
• Washer installation and grounding must be done in | • Disconnect power to the washer at the circuit breaker or | |
| accordance with local codes by a qualified installer. | fuse box, or unplug the machine in an emergency, or |
| Installation instructions are included in this manual for | when servicing is required. Have the installer show you |
| the installer's reference. | and label the proper switch or fuse at the electrical |
• Use only low sudsing detergents suitable for front | disconnect box. | |
| loading washers, or a small amount of regular deter- | WARNING - The Appliance Should Be Connected To |
| gent. The soap suds should never exceed the | |
| of the | An Individual Branch Circuit With No. 14 AWG Wire |
• | The washer must be plugged into a properly grounded | And Protected By 15 A Fuse or Breaker. |
three (3) prong electrical outlet. For your safety, the third or round grounding prong must never be removed.
DO NOT USE AN EXTENSION CORD.
Page 2