Description of Functions
At this point, you’re pretty much ready to start mixing. So if you’re a
21
20
19
15 | 16 | 22 | 23 | 22 | 11 | 2 |
1
4
3a
5
3b
18 | 17 | 13 | 8 | 14 | 9 | 12 | 8 | 14 | 10 | 7 | 6 |
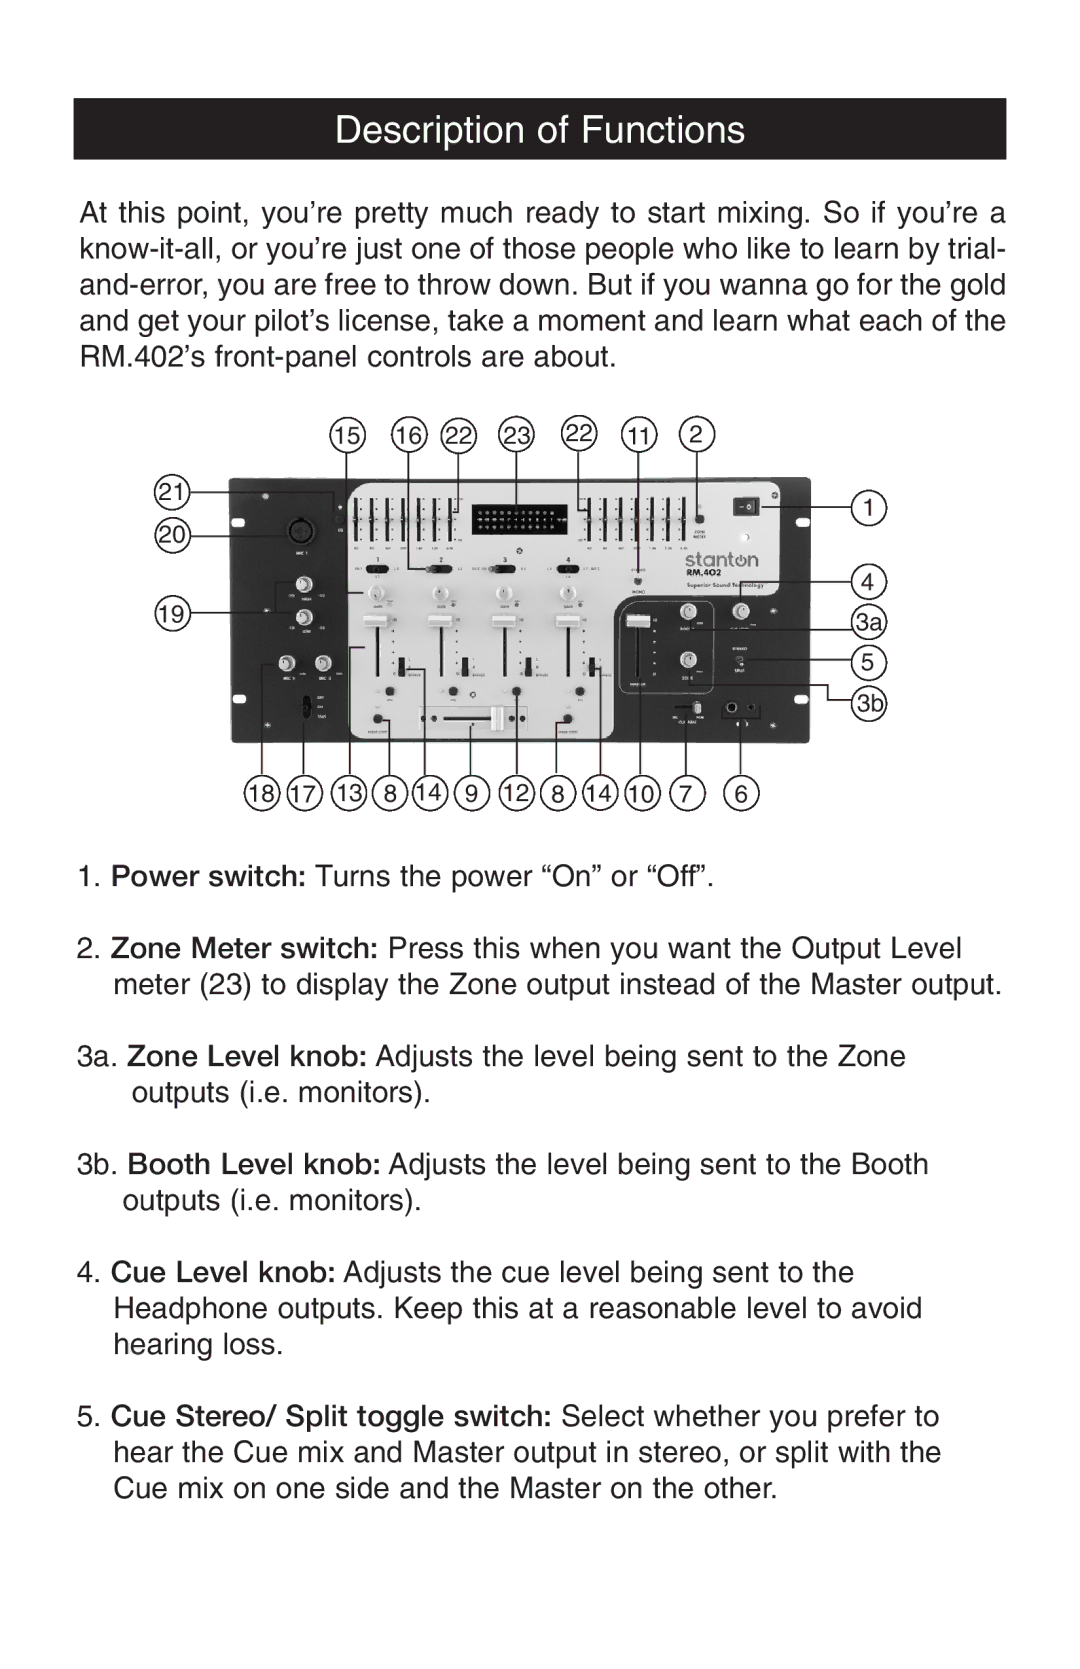
1.Power switch: Turns the power “On” or “Off”.
2.Zone Meter switch: Press this when you want the Output Level meter (23) to display the Zone output instead of the Master output.
3a. Zone Level knob: Adjusts the level being sent to the Zone outputs (i.e. monitors).
3b. Booth Level knob: Adjusts the level being sent to the Booth outputs (i.e. monitors).
4.Cue Level knob: Adjusts the cue level being sent to the Headphone outputs. Keep this at a reasonable level to avoid hearing loss.
5.Cue Stereo/ Split toggle switch: Select whether you prefer to hear the Cue mix and Master output in stereo, or split with the Cue mix on one side and the Master on the other.