2SF-15HA Automatic Sheet Feeder
Preparing the printer
❏Enter the printer’s EDS Mode and make the setting that tells the printer that the ASF is installed (with
❏Unplug the printer from its AC power source.
❏Open the mute cover of the printer.
❏Push the release lever back to the
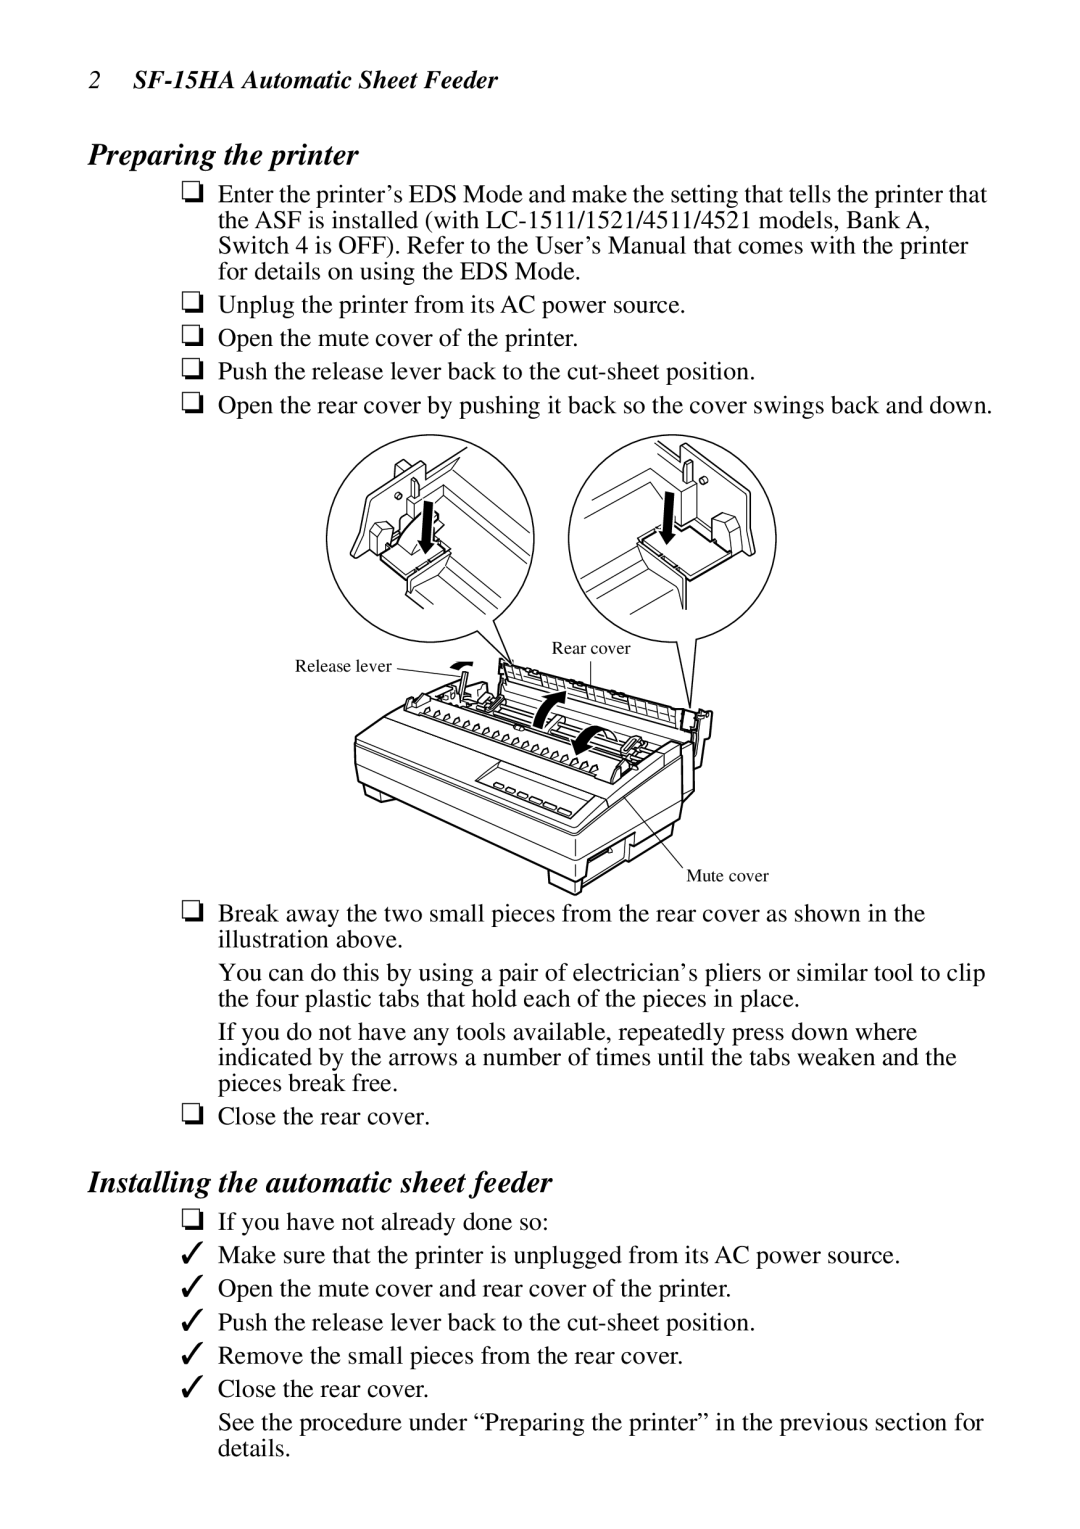
❏Open the rear cover by pushing it back so the cover swings back and down.
Rear cover
Release lever
Mute cover
❏Break away the two small pieces from the rear cover as shown in the illustration above.
You can do this by using a pair of electrician’s pliers or similar tool to clip the four plastic tabs that hold each of the pieces in place.
If you do not have any tools available, repeatedly press down where indicated by the arrows a number of times until the tabs weaken and the pieces break free.
❏Close the rear cover.
Installing the automatic sheet feeder
❏If you have not already done so:
✓Make sure that the printer is unplugged from its AC power source.
✓Open the mute cover and rear cover of the printer.
✓Push the release lever back to the
✓Remove the small pieces from the rear cover.
✓Close the rear cover.
See the procedure under “Preparing the printer” in the previous section for details.
