Installing the low-voltage 3-button switch (standard)
The Stewart Filmscreen
Preparing the connection
Before making the electrical connections, you need:
KAn available 120V AC constant power source
KA
Making the connection
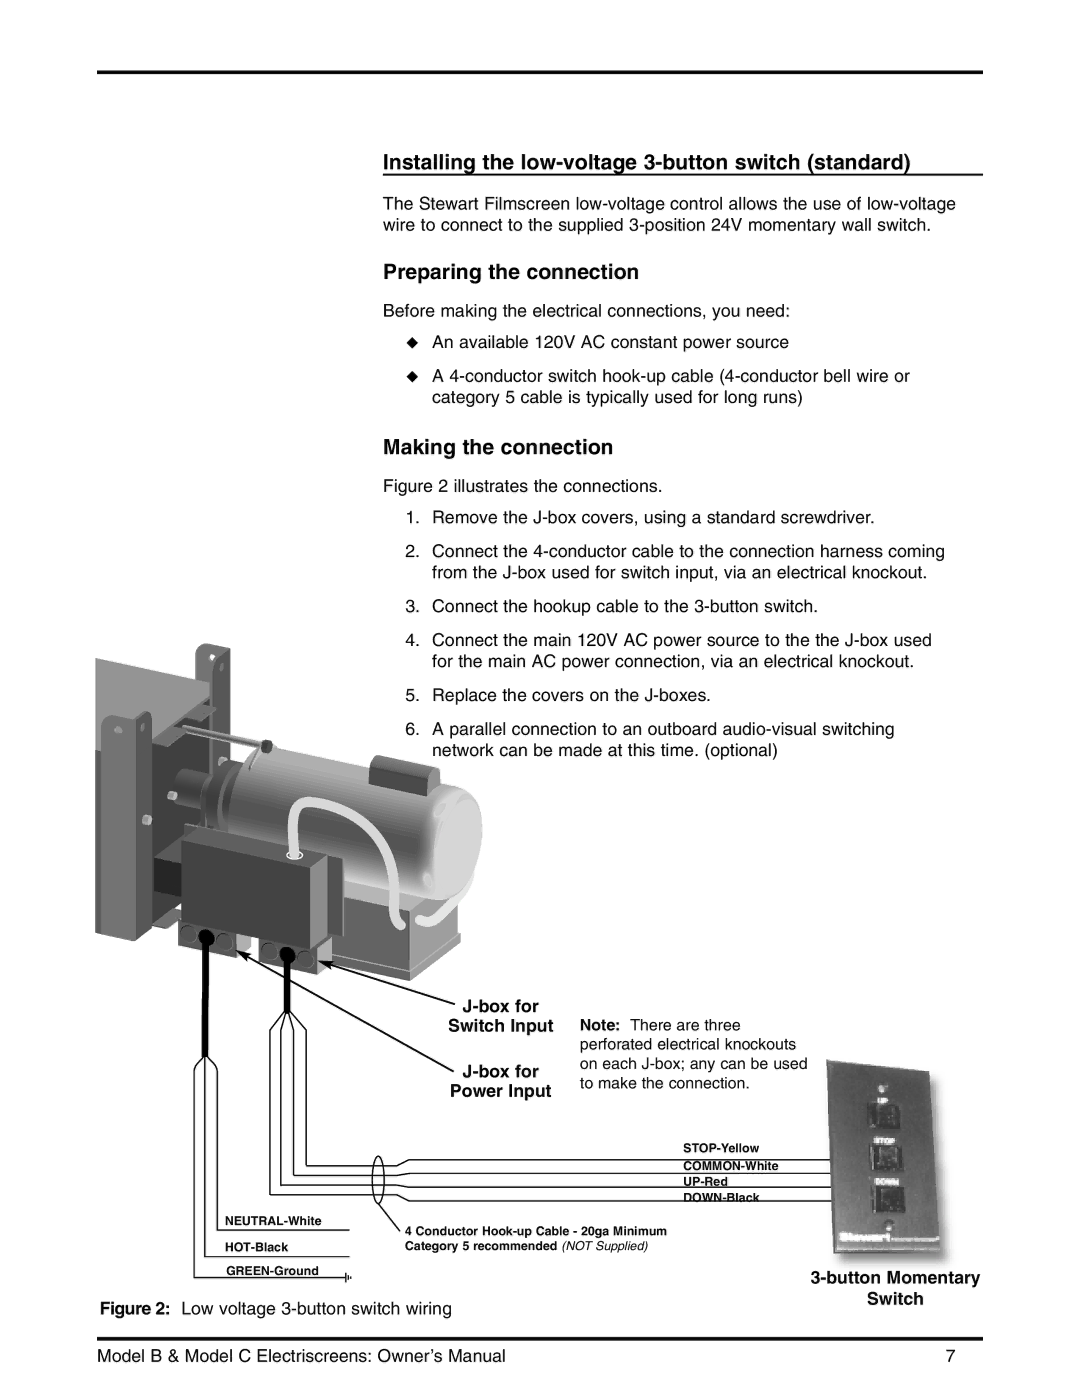
Figure 2 illustrates the connections.
1.Remove the J-box covers, using a standard screwdriver.
2.Connect the 4-conductor cable to the connection harness coming from the J-box used for switch input, via an electrical knockout.
3.Connect the hookup cable to the 3-button switch.
4.Connect the main 120V AC power source to the the J-box used for the main AC power connection, via an electrical knockout.
5.Replace the covers on the J-boxes.
6.A parallel connection to an outboard audio-visual switching network can be made at this time. (optional)
J-box for
Switch Input Note: There are three perforated electrical knockouts
on each | ||
to make the connection. | ||
Power Input | ||
| ||
| ||
| ||
| ||
|
4 Conductor
Figure 2: Low voltage 3-button switch wiring
Switch
Model B & Model C Electriscreens: Owner’s Manual | 7 |