
7126, 7125 specifications
Stovax, a renowned name in the wood burning and multi-fuel stove market, offers a range of products designed to meet modern heating needs while incorporating traditional aesthetics. Among their popular models are the Stovax 7125 and 7126, both known for their efficiency and elegant design.The Stovax 7125 and 7126 stoves are distinguished by their intelligent engineering and advanced combustion technology. Both models feature an impressive output capacity, making them suitable for various room sizes. They provide an exceptional heat transfer rate, ensuring that spaces are warmed quickly and efficiently, even in larger settings.
One of the standout features of these stoves is their clean burn technology. This innovative system minimizes emissions and maximizes fuel efficiency, resulting in a more environmentally friendly burning experience. The reduced particulate matter not only benefits the environment but also enhances indoor air quality, making these stoves a practical choice for eco-conscious consumers.
Aesthetically, the Stovax 7125 and 7126 boast a contemporary design, complete with large glass viewing windows that allow users to enjoy the mesmerizing flames. The precision cast iron construction ensures durability while adding a touch of elegance to both modern and traditional interiors. The availability of different finishes enables seamless integration into any home décor.
Another key characteristic of these models is their versatility. Both stoves are designed for wood burning, yet they can also accommodate other fuels, including smokeless coal. This flexibility provides users with the option to choose their preferred fuel type based on availability or personal preference.
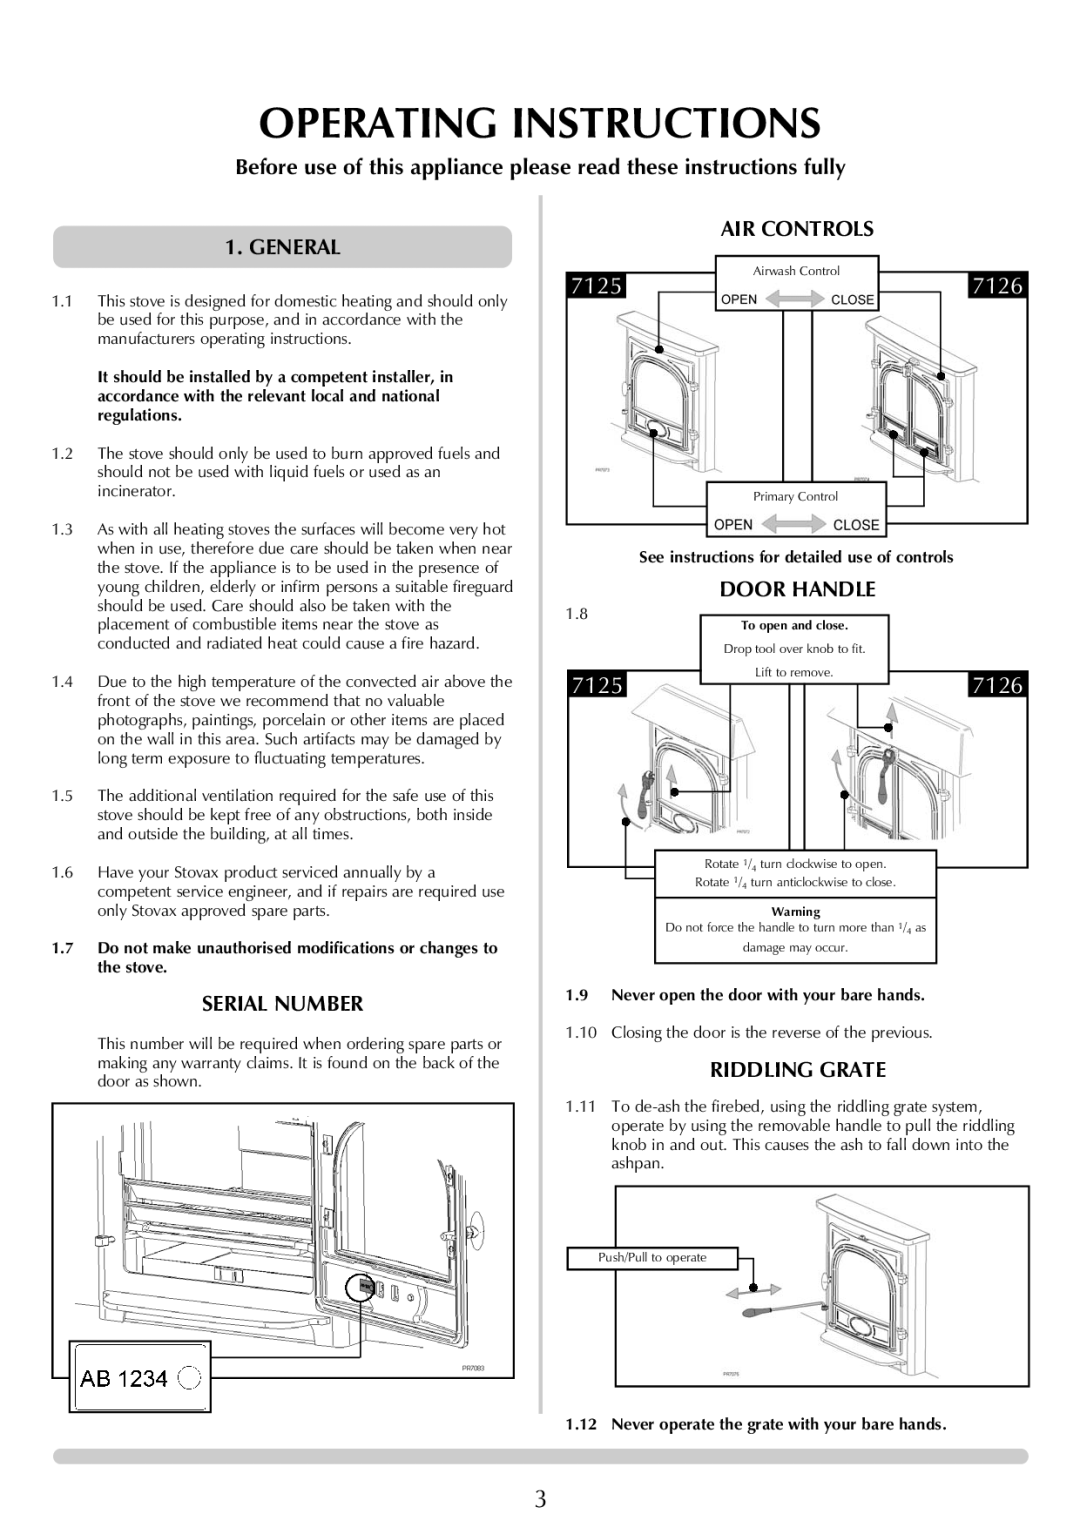
The adjustable air controls facilitate easy management of the fire, allowing users to optimize the flame and heat output according to their needs. This user-friendly feature enhances the overall experience, as it puts control firmly in the hands of the user.
Moreover, with a nominal heat output rating that aligns with current efficiency standards, the Stovax 7125 and 7126 are eligible for use in smoke-free zones, ensuring compliance with local regulations. These models are designed to exceed the expectations of those seeking an efficient, stylish, and sustainable heating solution for their homes.
In conclusion, the Stovax 7125 and 7126 present a compelling combination of aesthetic appeal, advanced technology, and environmental consciousness. Their blend of features makes them a noteworthy consideration for anyone looking to invest in a high-quality, functional, and attractive stove.