MOUNTING INSTRUCTIONS
For use on sheetrock or wood walls only.
The Sunbeam® Wall Mount hair dryer is designed for installation on sheetrock or wood walls only.To mount onto wall, be sure there are no hidden electrical circuits or pipes in the mounting location.
F O L L O W T H E S E I N S T R U C T I O N S
1. Remove wall bracket from the unit.
M O U N T I N G
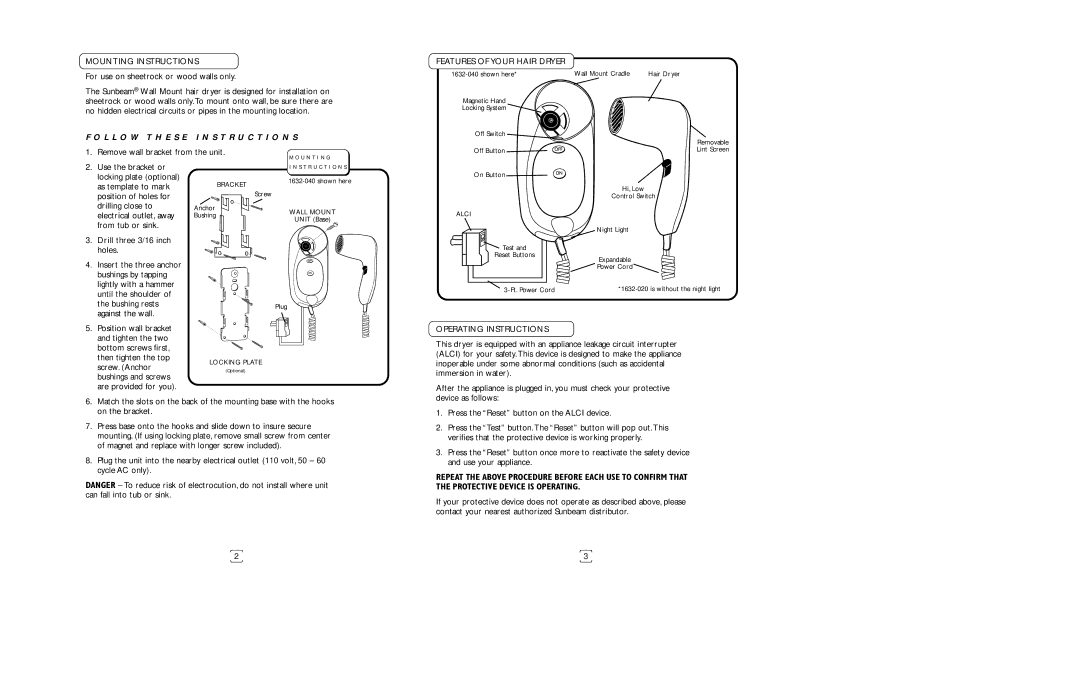
FEATURES OF YOUR HAIR DRYER
Wall Mount Cradle | Hair Dryer |
Magnetic Hand
Locking System ![]()
Off Switch |
|
| Removable |
Off Button | Lint Screen |
2. Use the bracket or |
locking plate (optional) |
as template to mark |
BRACKET
I N S T R U C T I O N S
On Button ![]()
Hi, Low
position of holes for |
drilling close to |
electrical outlet, away |
from tub or sink. |
| Screw | |
Anchor | WALL MOUNT | |
Bushing | ||
UNIT (Base) | ||
|
ALCI
Control Switch
Night Light
3.Drill three 3/16 inch holes.
![]() Test and
Test and
Reset Buttons
Expandable
4.Insert the three anchor bushings by tapping lightly with a hammer until the shoulder of the bushing rests against the wall.
5.Position wall bracket and tighten the two bottom screws first, then tighten the top screw. (Anchor bushings and screws are provided for you).
Plug |
LOCKING PLATE
(Optional)
![]()
![]() Power Cord
Power Cord ![]()
![]()
OPERATING INSTRUCTIONS
This dryer is equipped with an appliance leakage circuit interrupter (ALCI) for your safety.This device is designed to make the appliance inoperable under some abnormal conditions (such as accidental immersion in water).
After the appliance is plugged in, you must check your protective device as follows:
6.Match the slots on the back of the mounting base with the hooks on the bracket.
7.Press base onto the hooks and slide down to insure secure mounting. (If using locking plate, remove small screw from center of magnet and replace with longer screw included).
8.Plug the unit into the nearby electrical outlet (110 volt, 50 – 60 cycle AC only).
DANGER – To reduce risk of electrocution, do not install where unit can fall into tub or sink.
1.Press the “Reset” button on the ALCI device.
2.Press the “Test” button.The “Reset” button will pop out.This verifies that the protective device is working properly.
3.Press the “Reset” button once more to reactivate the safety device and use your appliance.
REPEAT THE ABOVE PROCEDURE BEFORE EACH USE TO CONFIRM THAT THE PROTECTIVE DEVICE IS OPERATING.
If your protective device does not operate as described above, please contact your nearest authorized Sunbeam distributor.
2 | 3 |