D
D1
E
42
DP
KR
DP 
 KR DP
KR DP
48
DQ
Front
49
Long End |
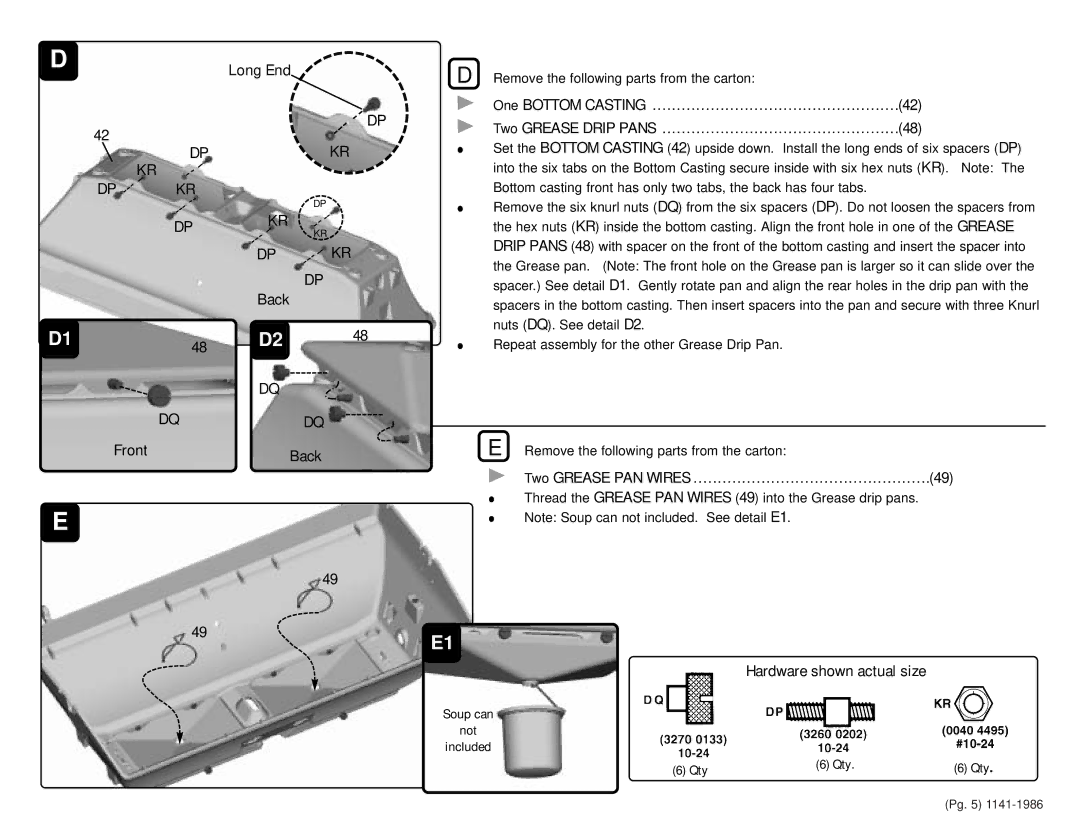
| D Remove the following parts from the carton: |
| |
|
| DP | One BOTTOM CASTING | .(42) |
|
| Two GREASE DRIP PANS | .(48) | |
|
|
| ||
| KR |
| Set the BOTTOM CASTING (42) upside down. Install the long ends of six spacers (DP) | |
|
|
| into the six tabs on the Bottom Casting secure inside with six hex nuts (KR). Note: The | |
|
|
| Bottom casting front has only two tabs, the back has four tabs. |
|
KR | DP |
| Remove the six knurl nuts (DQ) from the six spacers (DP). Do not loosen the spacers from | |
KR |
| the hex nuts (KR) inside the bottom casting. Align the front hole in one of the GREASE | ||
DP | KR |
| DRIP PANS (48) with spacer on the front of the bottom casting and insert the spacer into | |
| the Grease pan. (Note: The front hole on the Grease pan is larger so it can slide over the | |||
| DP |
| ||
Back |
| spacer.) See detail D1. Gently rotate pan and align the rear holes in the drip pan with the | ||
|
| spacers in the bottom casting. Then insert spacers into the pan and secure with three Knurl | ||
D2 |
| 48 | nuts (DQ). See detail D2. |
|
| Repeat assembly for the other Grease Drip Pan. |
| ||
|
|
| ||
DQ |
|
|
|
|
| DQ |
|
|
|
|
| E Remove the following parts from the carton: |
| |
| Back |
|
| |
|
|
| Two GREASE PAN WIRES | .......(49) |
|
|
| Thread the GREASE PAN WIRES (49) into the Grease drip pans. | |
|
|
| Note: Soup can not included. See detail E1. |
|
49
E1
Hardware shown actual size
Soup can
not
included
(6) Qty | (6) Qty. | (6) Qty. |
(Pg. 5)
