Using your Sunbeam Travel Iron

Before first use

Remove any adhesive stickers, plastic covers or cardboard sleeves from the soleplate. Ensure that all adhesive is removed by rubbing the soleplate with a cloth dampened with methylated spirits. Fill the water tank and empty the water. This will rinse out any foreign particles remaining in the water tank from the manufacturing process.

NOTE: When turned on for the first time, your new iron may give off vapours for up to 10 minutes. This is due to the initial heating of the materials used. It is safe, not detrimental to the performance of the iron, and will not reoccur.

Filling the iron with water

Before filling the iron with water ensure the power is turned off and the plug is removed from the power outlet. The iron can be filled with water when hot.

1.Turn the STEAM/DRY dial to DRY.

2.Place the iron horizontally with the soleplate facing down and open the water inlet cover.

NOTE: Do not leave the iron unattended when the soleplate is facing down.

3.Slowly pour water into the water inlet until the maximum water level is reached. Do not exceed the maximum water level indicator. Push the water inlet cover firmly to close.

NOTE: The special soleplate design allows you to use tap water with your Travel iron without affecting the steam performance. However in very hard water areas, Sunbeam recommend the use of distilled water, or water which has been demineralised.

For best performance, we recommend the use of Sunbeam Water Klean, available from Sunbeam Service Centres and selected retailers. This will produce up to 30 litres of demineralised water.

Do not fill the iron with fabric conditioner, starches or any other solution as these will damage the steam mechanism. Do not use contaminated water.

Using your iron

Always ensure that the iron is set to the correct voltage for the country of use before plugging it into the power outlet.

NOTE: Using an incorrect voltage may cause serious harm to your appliance. Ensure that you are aware of the required voltage before entering a new country.

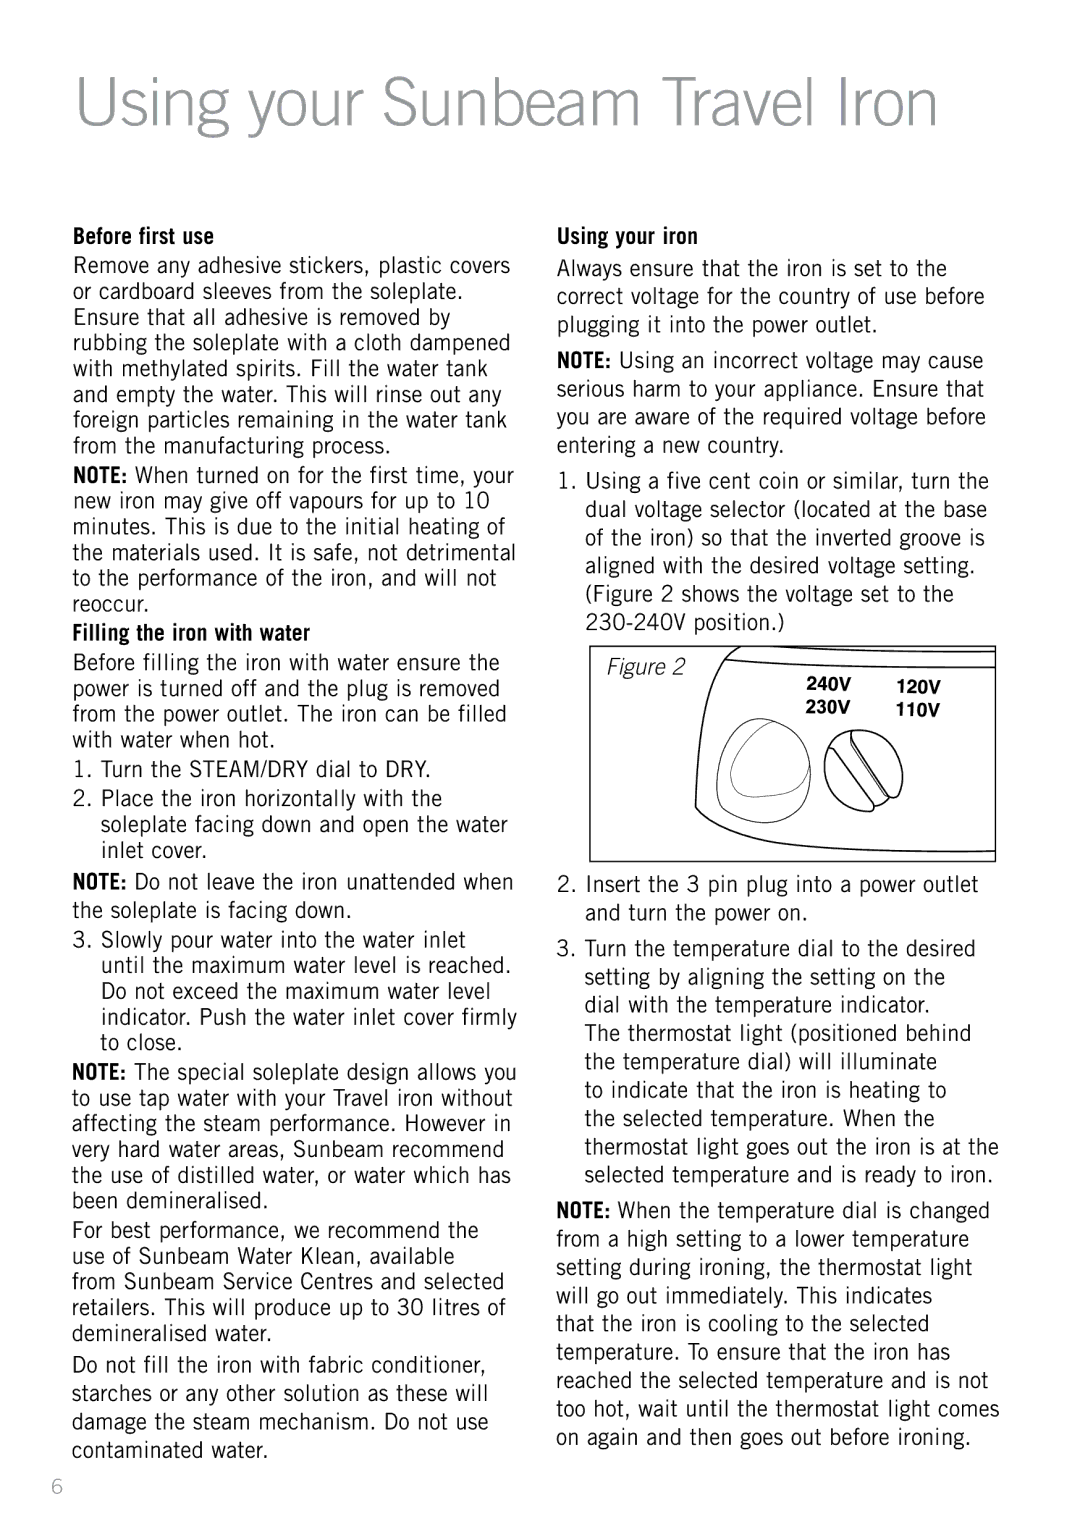
1.Using a five cent coin or similar, turn the dual voltage selector (located at the base of the iron) so that the inverted groove is aligned with the desired voltage setting.

(Figure 2 shows the voltage set to the 230-240V position.)

Figure 2

2.Insert the 3 pin plug into a power outlet and turn the power on.

3.Turn the temperature dial to the desired setting by aligning the setting on the dial with the temperature indicator. The thermostat light (positioned behind the temperature dial) will illuminate

to indicate that the iron is heating to the selected temperature. When the thermostat light goes out the iron is at the selected temperature and is ready to iron.

NOTE: When the temperature dial is changed from a high setting to a lower temperature setting during ironing, the thermostat light will go out immediately. This indicates that the iron is cooling to the selected temperature. To ensure that the iron has reached the selected temperature and is not too hot, wait until the thermostat light comes on again and then goes out before ironing.

6

Page 6
Image 6
Sunbeam SR2300 manual Using your Sunbeam Travel Iron, Before first use, Filling the iron with water, Using your iron

SR2300 specifications

The Sunbeam SR2300 is a versatile and powerful kitchen appliance that has gained popularity among home cooks and professional chefs alike. This countertop item combines innovative technology with user-friendly features, making food preparation a seamless experience.

One of the standout characteristics of the Sunbeam SR2300 is its robust motor. The appliance is equipped with a 230-watt motor, providing ample power for a variety of cooking tasks, from mixing and blending to whipping and kneading. This motor comes with multiple speed settings, allowing users to adjust the intensity based on their specific needs, whether they're gently folding ingredients or whisking egg whites to perfection.

The SR2300 features a sleek and modern design, making it an attractive addition to any kitchen. Its compact size allows it to fit comfortably on most countertops, and its lightweight construction means that it can be easily moved or stored when not in use. Despite its small footprint, it does not compromise on functionality.

One of the key technologies integrated into the Sunbeam SR2300 is its SmartMix technology. This innovative feature ensures that the weight of the mixer is balanced over the bowl while mixing, which reduces the strain on the user's hands and arms. As a result, even the most demanding tasks can be accomplished with minimal effort.

The appliance comes with a variety of attachments that enhance its versatility. These include traditional beaters, dough hooks, and a whisk attachment, allowing users to tackle a wide range of recipes with ease. The easy-to-release mechanism ensures that switching between attachments is quick and hassle-free.

Additionally, the SR2300 is designed with safety in mind. It features a power indicator light, which lets the user know when the appliance is in operation, and the non-slip base provides stability during use. This feature is crucial when mixing heavier ingredients, ensuring that the appliance remains steady and secure.

Cleaning the Sunbeam SR2300 is also convenient, as most attachments are dishwasher safe. This makes post-cooking cleanup a breeze, allowing users to spend more time enjoying their creations and less time on maintenance.

In summary, the Sunbeam SR2300 stands out as a reliable kitchen aid equipped with powerful performance, user-friendly features, and advanced technology. Whether you're an aspiring chef or a seasoned home cook, this appliance is designed to enhance your culinary creativity and make cooking more efficient and enjoyable.