I X . S E T U P & A D J U S T M E N T
I X . S E T U P & A D J U S T M E N T
Note: The Shadow ST/DT is shipped fully assem- bled except for the following items which may need to be attached or adjusted before final adjust- ments are made. Setting the chair on a flat surface (such as a workbench or table) helps make these procedures easier.
Note on Torque Setting: Unless otherwise, use a torque setting of 60 in./lbs. when assembling this wheelchair.
A. WHEELS
Depress the
▲ | W A R N I N G S |
! |
The axle is not secure until the outside
B. WHEEL LOCKS
Shadow ST/DT wheelchairs are shipped with wheel locks mounted. Wheel locks are installed at the factory unless you have requested otherwise.
Note on Torque Setting: Use a torque setting of
100 in./lbs. when assembling wheel locks.
Low-Mount Scissor Wheel Locks:
The wheel lock mounts on a
High-Mount Push-to-Lock or Scissor Wheel Locks:
The wheel lock mounts on a
▲ | W A R N I N G S |
! |
Using wheel locks for braking is dangerous. Use wheel locks for parking ONLY. When properly adjusted, wheel locks prevent the rear wheels from turning when the chair is parked. Always adjust the wheel locks after making any changes to the rear cam- ber tube position. Wheel locks should be embedded into the tires to prevent wheel movement (when in the locked position).
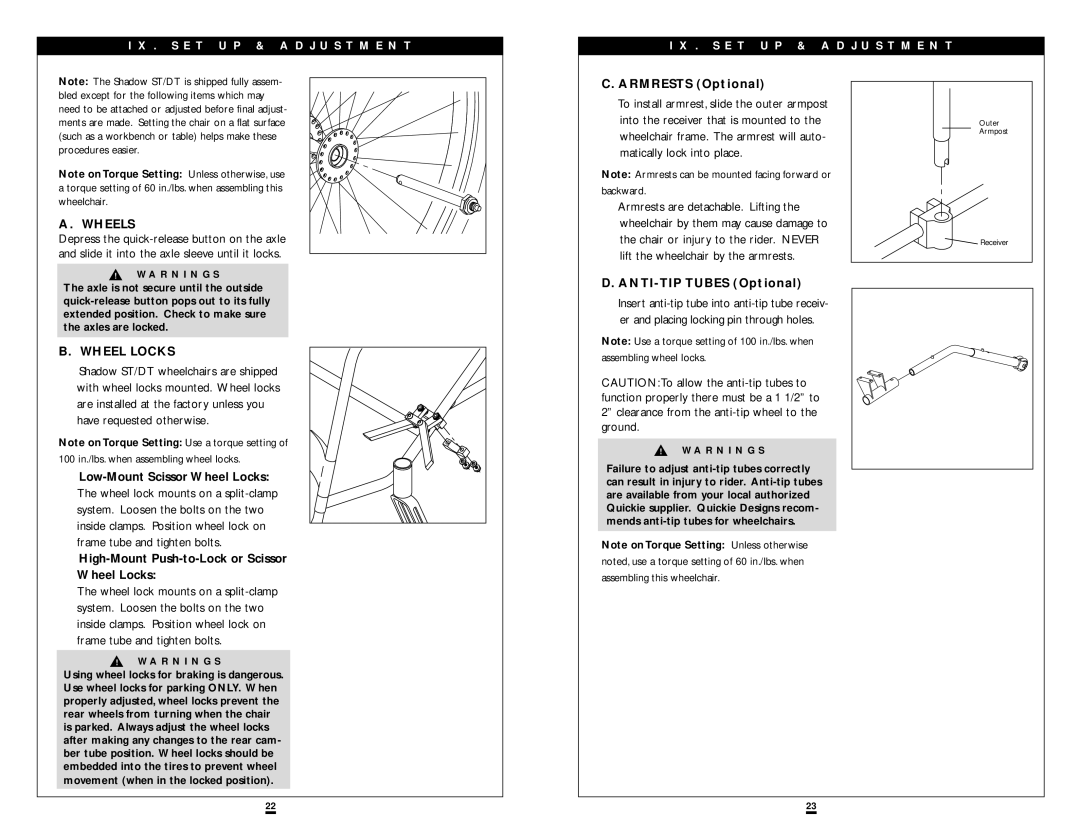
C. ARMRESTS (Optional)
To install armrest, slide the outer armpost into the receiver that is mounted to the wheelchair frame. The armrest will auto- matically lock into place.
Note: Armrests can be mounted facing forward or
backward.
Armrests are detachable. Lifting the wheelchair by them may cause damage to the chair or injury to the rider. NEVER lift the wheelchair by the armrests.
D. ANTI-TIP TUBES (Optional)
Insert
Note: Use a torque setting of 100 in./lbs. when
assembling wheel locks.
CAUTION:To allow the
▲ | W A R N I N G S |
! |
Failure to adjust
Note on Torque Setting: Unless otherwise
noted, use a torque setting of 60 in./lbs. when
assembling this wheelchair.
Outer
Armpost
Receiver |
22 | 23 |