SVAT ELECTRONICS now you can see
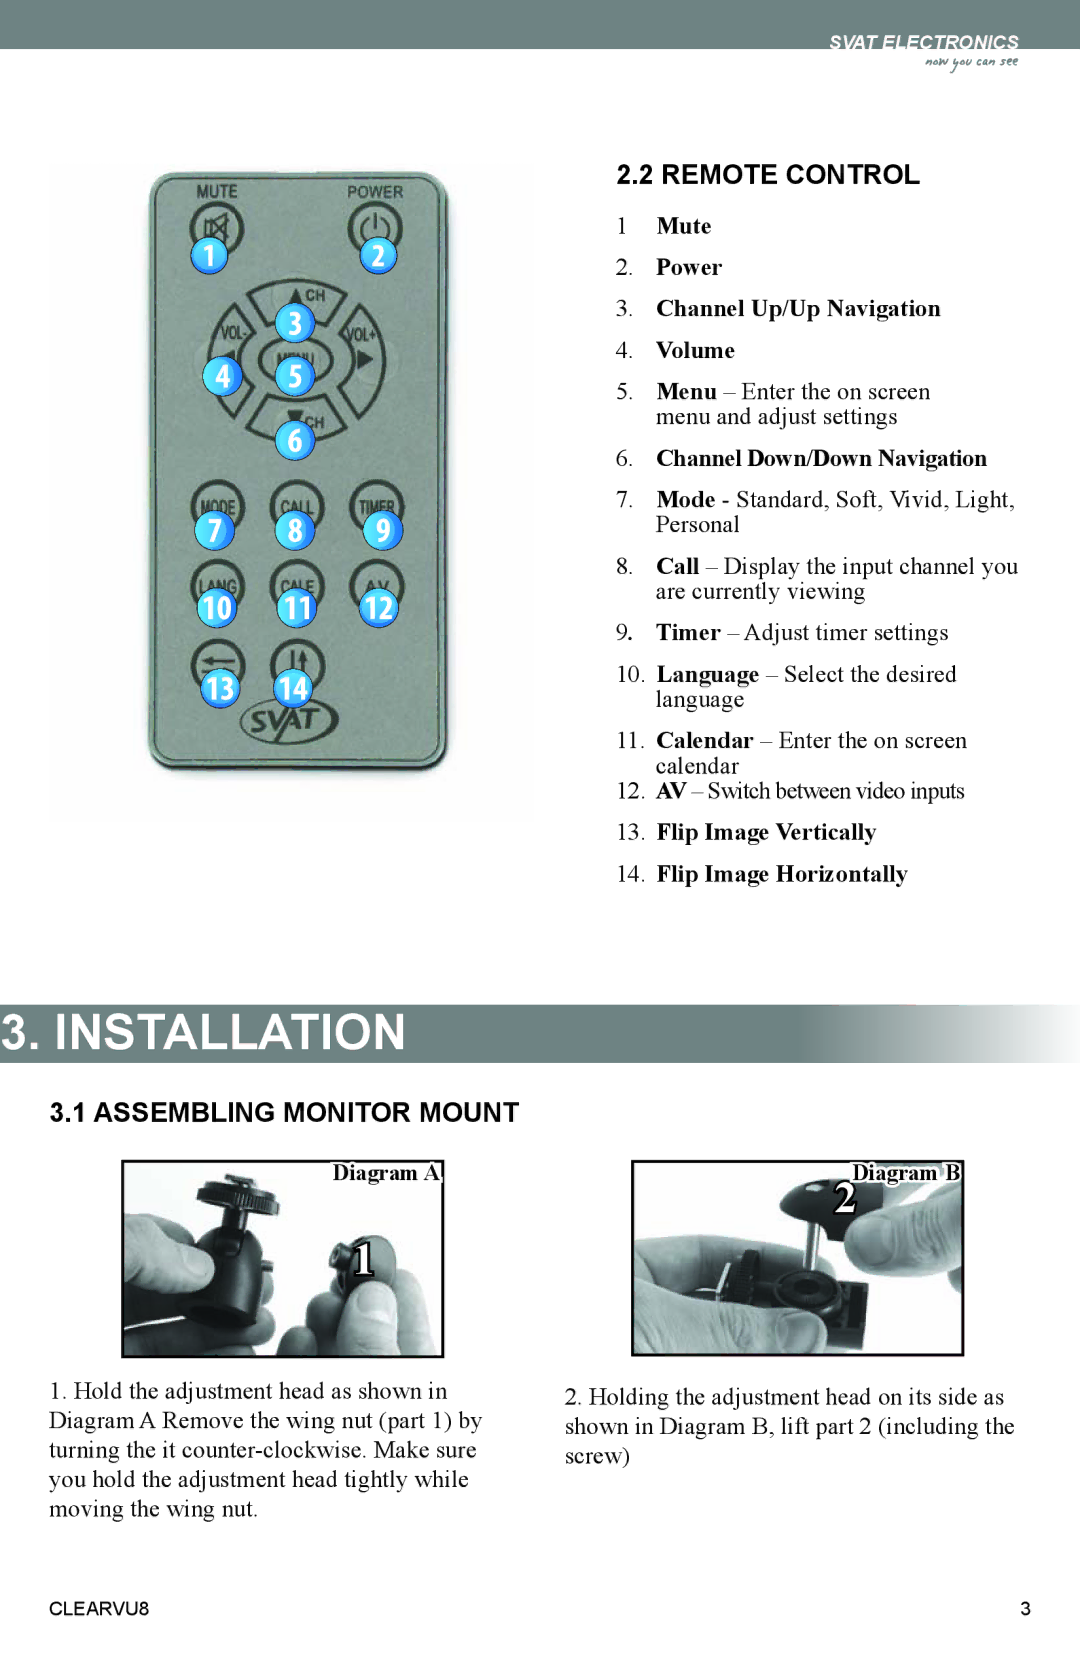
2.2 REMOTE CONTROL
1Mute
2.Power
3.Channel Up/Up Navigation
4.Volume
5.Menu – Enter the on screen menu and adjust settings
6.Channel Down/Down Navigation
7.Mode - Standard, Soft, Vivid, Light,
Personal
8.Call – Display the input channel you are currently viewing
9. Timer – Adjust timer settings
10.Language – Select the desired language
11.Calendar – Enter the on screen calendar
12.AV – Switch between video inputs
13.Flip Image Vertically
14.Flip Image Horizontally
3.INSTALLATION
3.1ASSEMBLING MONITOR MOUNT
Diagram A
1
2Diagram B
1.Hold the adjustment head as shown in Diagram A Remove the wing nut (part 1) by turning the it
2.Holding the adjustment head on its side as shown in Diagram B, lift part 2 (including the screw)
CLEARVU8 | 3 |
