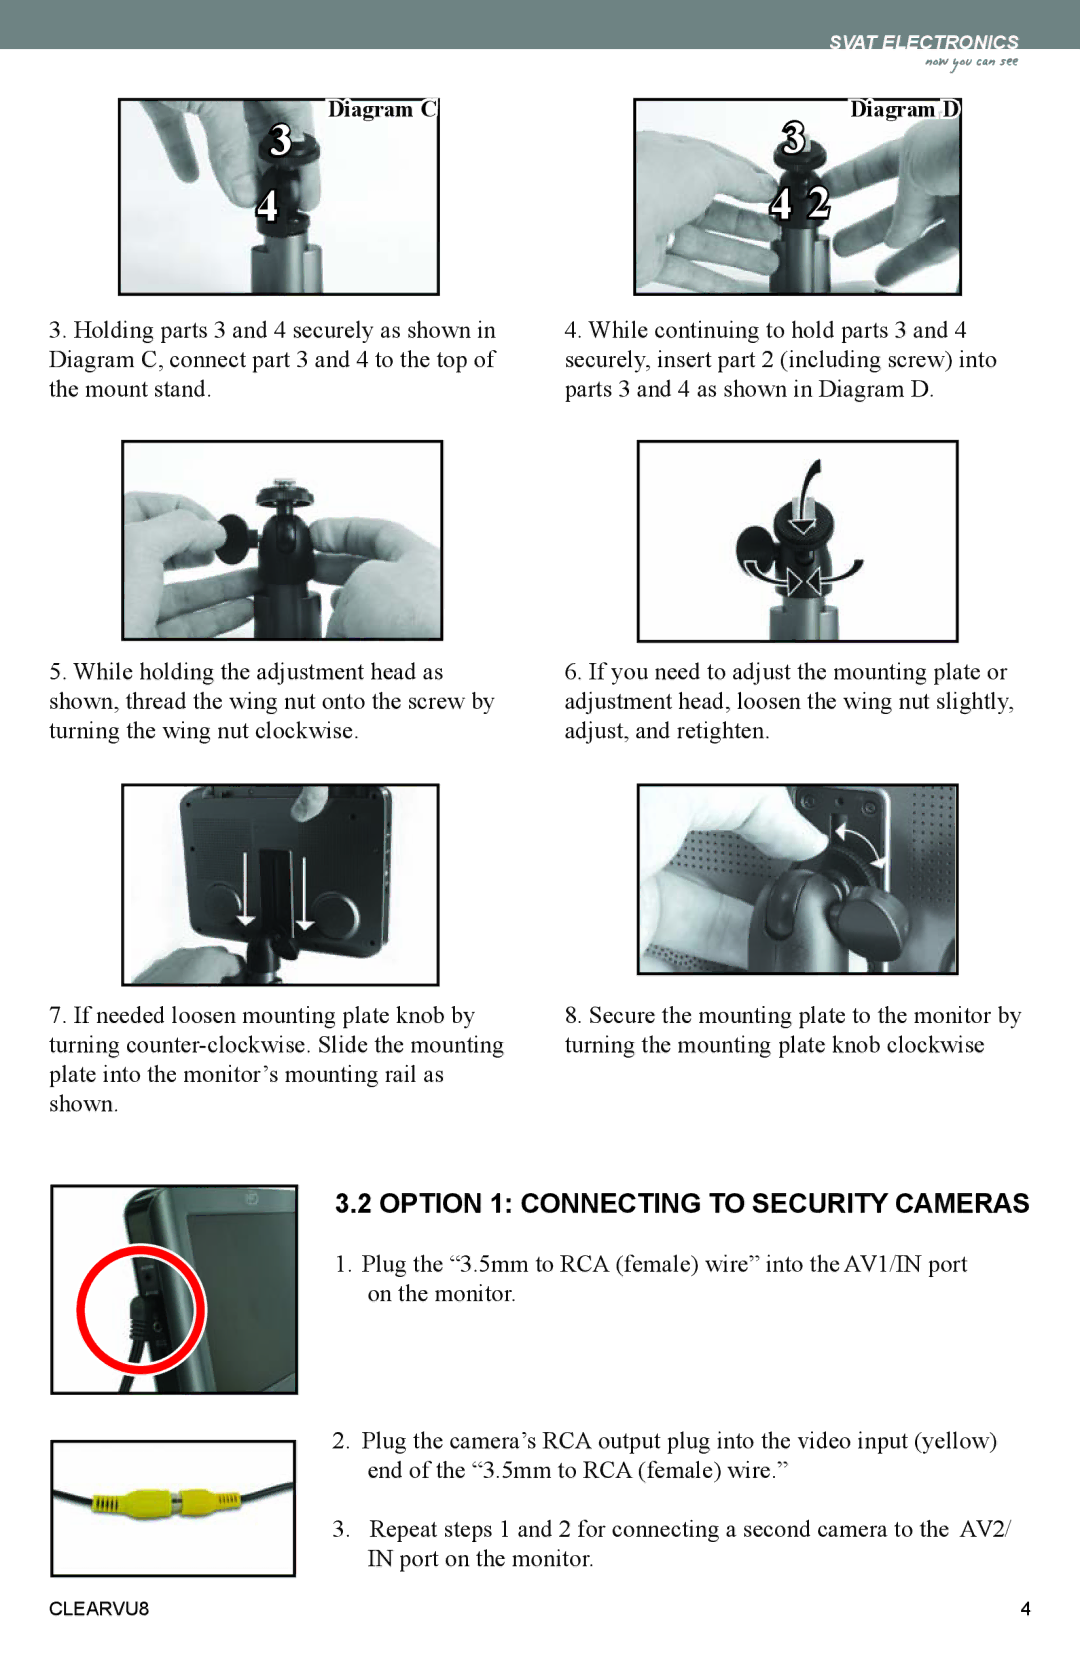
3 Diagram C
4
SVAT ELECTRONICS now you can see
3 Diagram D
4 2
3.Holding parts 3 and 4 securely as shown in Diagram C, connect part 3 and 4 to the top of the mount stand.
5.While holding the adjustment head as shown, thread the wing nut onto the screw by turning the wing nut clockwise.
7.If needed loosen mounting plate knob by turning
4.While continuing to hold parts 3 and 4 securely, insert part 2 (including screw) into parts 3 and 4 as shown in Diagram D.
6.If you need to adjust the mounting plate or adjustment head, loosen the wing nut slightly, adjust, and retighten.
8.Secure the mounting plate to the monitor by turning the mounting plate knob clockwise
3.2 OPTION 1: CONNECTING TO SECURITY CAMERAS
1.Plug the “3.5mm to RCA (female) wire” into the AV1/IN port on the monitor.
2.Plug the camera’s RCA output plug into the video input (yellow) end of the “3.5mm to RCA (female) wire.”
3.Repeat steps 1 and 2 for connecting a second camera to the AV2/ IN port on the monitor.
CLEARVU8 | 4 |