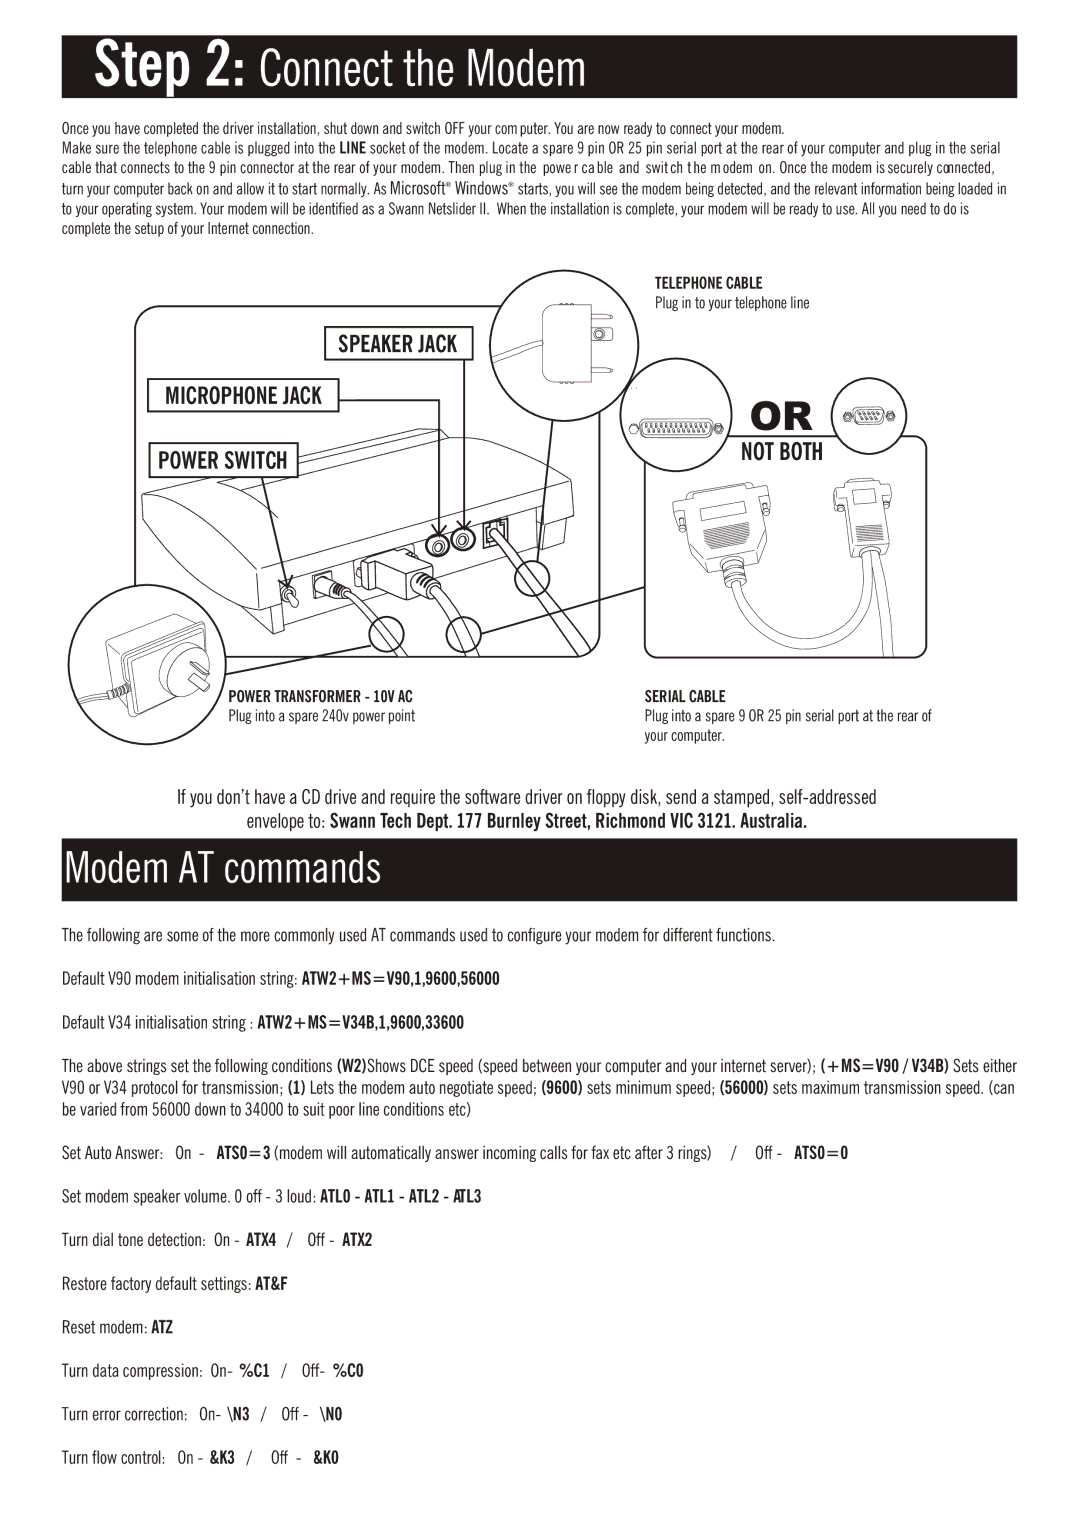
Step 2: Connect the Modem
Once you have completed the driver installation, shut down and switch OFF your com puter. You are now ready to connect your modem.
Make sure the telephone cable is plugged into the LINE socket of the modem. Locate a spare 9 pin OR 25 pin serial port at the rear of your computer and plug in the serial cable that connects to the 9 pin connector at the rear of your modem. Then plug in the powe r ca ble and swit ch t he m odem on. Once the modem is securely connected, turn your computer back on and allow it to start normally. As Microsoft® Windows® starts, you will see the modem being detected, and the relevant information being loaded in to your operating system. Your modem will be identified as a Swann Netslider II. When the installation is complete, your modem will be ready to use. All you need to do is complete the setup of your Internet connection.
MICROPHONE JACK
POWER SWITCH
TELEPHONE CABLE
Plug in to your telephone line
SPEAKER JACK
OR
NOT BOTH
POWER TRANSFORMER - 10V AC | SERIAL CABLE |
Plug into a spare 240v power point | Plug into a spare 9 OR 25 pin serial port at the rear of |
| your computer. |
If you don’t have a CD drive and require the software driver on floppy disk, send a stamped,
envelope to: Swann Tech Dept. 177 Burnley Street, Richmond VIC 3121. Australia.
Modem AT commands
The following are some of the more commonly used AT commands used to configure your modem for different functions.
Default V90 modem initialisation string: ATW2+MS=V90,1,9600,56000
Default V34 initialisation string : ATW2+MS=V34B,1,9600,33600
The above strings set the following conditions (W2)Shows DCE speed (speed between your computer and your internet server); (+MS=V90 / V34B) Sets either V90 or V34 protocol for transmission; (1) Lets the modem auto negotiate speed; (9600) sets minimum speed; (56000) sets maximum transmission speed. (can be varied from 56000 down to 34000 to suit poor line conditions etc)
Set Auto Answer: On - ATS0=3 (modem will automatically answer incoming calls for fax etc after 3 rings) / Off - ATS0=0
Set modem speaker volume. 0 off - 3 loud: ATL0 - ATL1 - ATL2 - ATL3
Turn dial tone detection: On - ATX4 / Off - ATX2
Restore factory default settings: AT&F
Reset modem: ATZ |
|
Turn data compression: On- %C1 | / Off- %C0 |
Turn error correction: On- \N3 / | Off - \N0 |
Turn flow control: On - &K3 / Off - &K0
