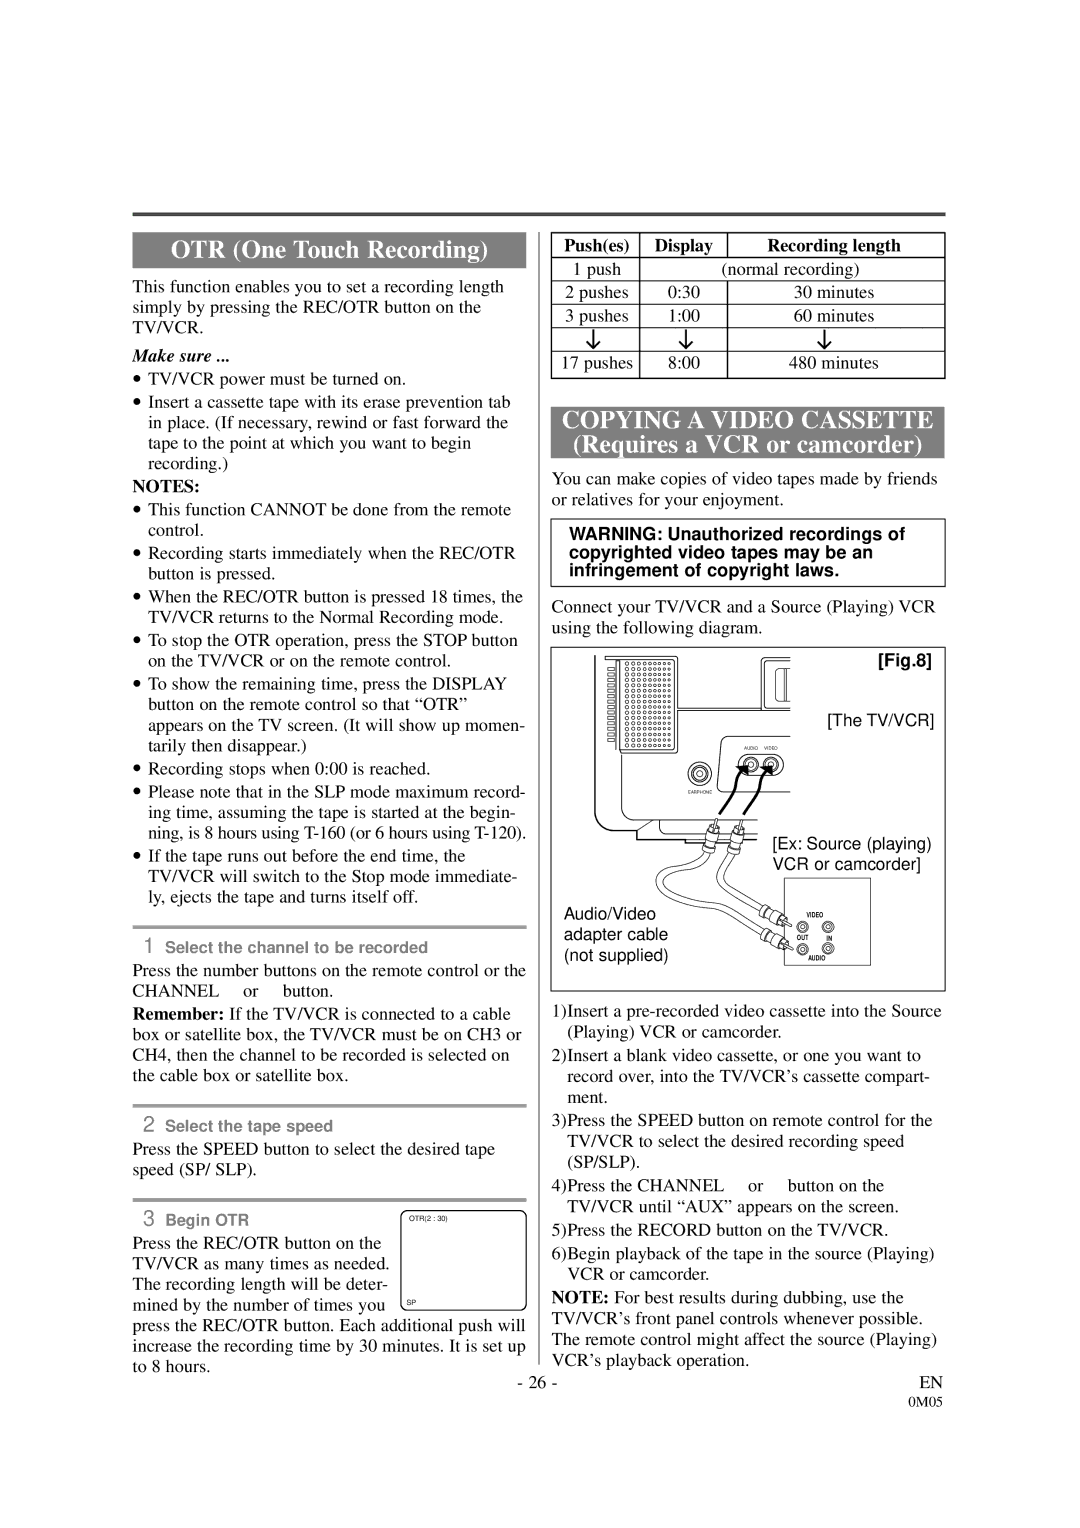
OTR (One Touch Recording) |
| Push(es) | Display |
| Recording length |
|
| 1 push |
| (normal recording) | |
This function enables you to set a recording length |
| ||||
|
|
|
|
| |
| 2 pushes | 0:30 |
| 30 minutes | |
simply by pressing the REC/OTR button on the |
|
| |||
| 3 pushes | 1:00 |
| 60 minutes | |
TV/VCR. |
|
| |||
|
|
|
|
| |
Make sure ... |
|
|
|
|
|
| 17 pushes | 8:00 |
| 480 minutes | |
|
|
| |||
•TV/VCR power must be turned on.
•Insert a cassette tape with its erase prevention tab
in place. (If necessary, rewind or fast forward the | COPYING A VIDEO CASSETTE | |||
tape to the point at which you want to begin | (Requires a VCR or camcorder) | |||
recording.) |
| You can make copies of video tapes made by friends | ||
NOTES: |
| |||
| or relatives for your enjoyment. | |||
• This function CANNOT be done from the remote | ||||
|
| |||
control. |
| WARNING: Unauthorized recordings of | ||
• Recording starts immediately when the REC/OTR | copyrighted video tapes may be an | |||
button is pressed. |
| infringement of copyright laws. | ||
• When the REC/OTR button is pressed 18 times, the | Connect your TV/VCR and a Source (Playing) VCR | |||
TV/VCR returns to the Normal Recording mode. | ||||
using the following diagram. |
| |||
• To stop the OTR operation, press the STOP button |
| |||
| [Fig.8] | |||
on the TV/VCR or on the remote control. |
| |||
• To show the remaining time, press the DISPLAY |
|
| ||
button on the remote control so that “OTR” |
| [The TV/VCR] | ||
appears on the TV screen. (It will show up momen- |
| |||
tarily then disappear.) |
| AUDIO | VIDEO | |
|
|
| ||
• Recording stops when 0:00 is reached. |
|
| ||
• Please note that in the SLP mode maximum record- | EARPHONE |
| ||
|
| |||
ing time, assuming the tape is started at the begin- |
|
| ||
ning, is 8 hours using |
| [Ex: Source (playing) | ||
• If the tape runs out before the end time, the |
| |||
| VCR or camcorder] | |||
TV/VCR will switch to the Stop mode immediate- |
|
| ||
ly, ejects the tape and turns itself off. | Audio/Video |
| ||
|
| VIDEO | ||
|
|
| ||
1 Select the channel to be recorded | adapter cable | OUT IN | ||
(not supplied) | AUDIO | |||
Press the number buttons on the remote control or the | ||||
|
| |||
CHANNEL K or L button. |
| 1)Insert a | ||
Remember: If the TV/VCR is connected to a cable | ||||
box or satellite box, the TV/VCR must be on CH3 or | (Playing) VCR or camcorder. | |||
CH4, then the channel to be recorded is selected on | 2)Insert a blank video cassette, or one you want to | |||
the cable box or satellite box. |
| record over, into the TV/VCR’s cassette compart- | ||
|
| ment. |
| |
2 Select the tape speed |
| 3)Press the SPEED button on remote control for the | ||
Press the SPEED button to select the desired tape | TV/VCR to select the desired recording speed | |||
(SP/SLP). |
| |||
speed (SP/ SLP). |
|
| ||
| 4)Press the CHANNEL K or L button on the | |||
|
| |||
3 Begin OTR | OTR(2 : 30) | TV/VCR until “AUX” appears on the screen. | ||
5)Press the RECORD button on the TV/VCR. | ||||
| ||||
Press the REC/OTR button on the |
| |||
| 6)Begin playback of the tape in the source (Playing) | |||
TV/VCR as many times as needed. |
| |||
| VCR or camcorder. |
| ||
The recording length will be deter- |
|
| ||
| NOTE: For best results during dubbing, use the | |||
mined by the number of times you | SP | |||
| TV/VCR’s front panel controls whenever possible. | |||
press the REC/OTR button. Each additional push will | ||||
The remote control might affect the source (Playing) | ||||
increase the recording time by 30 minutes. It is set up | ||||
VCR’s playback operation. |
| |||
to 8 hours. |
|
| ||
- 26 - | EN | |||
| ||||
