Installation
Charging the Battery Pack
The rechargeable
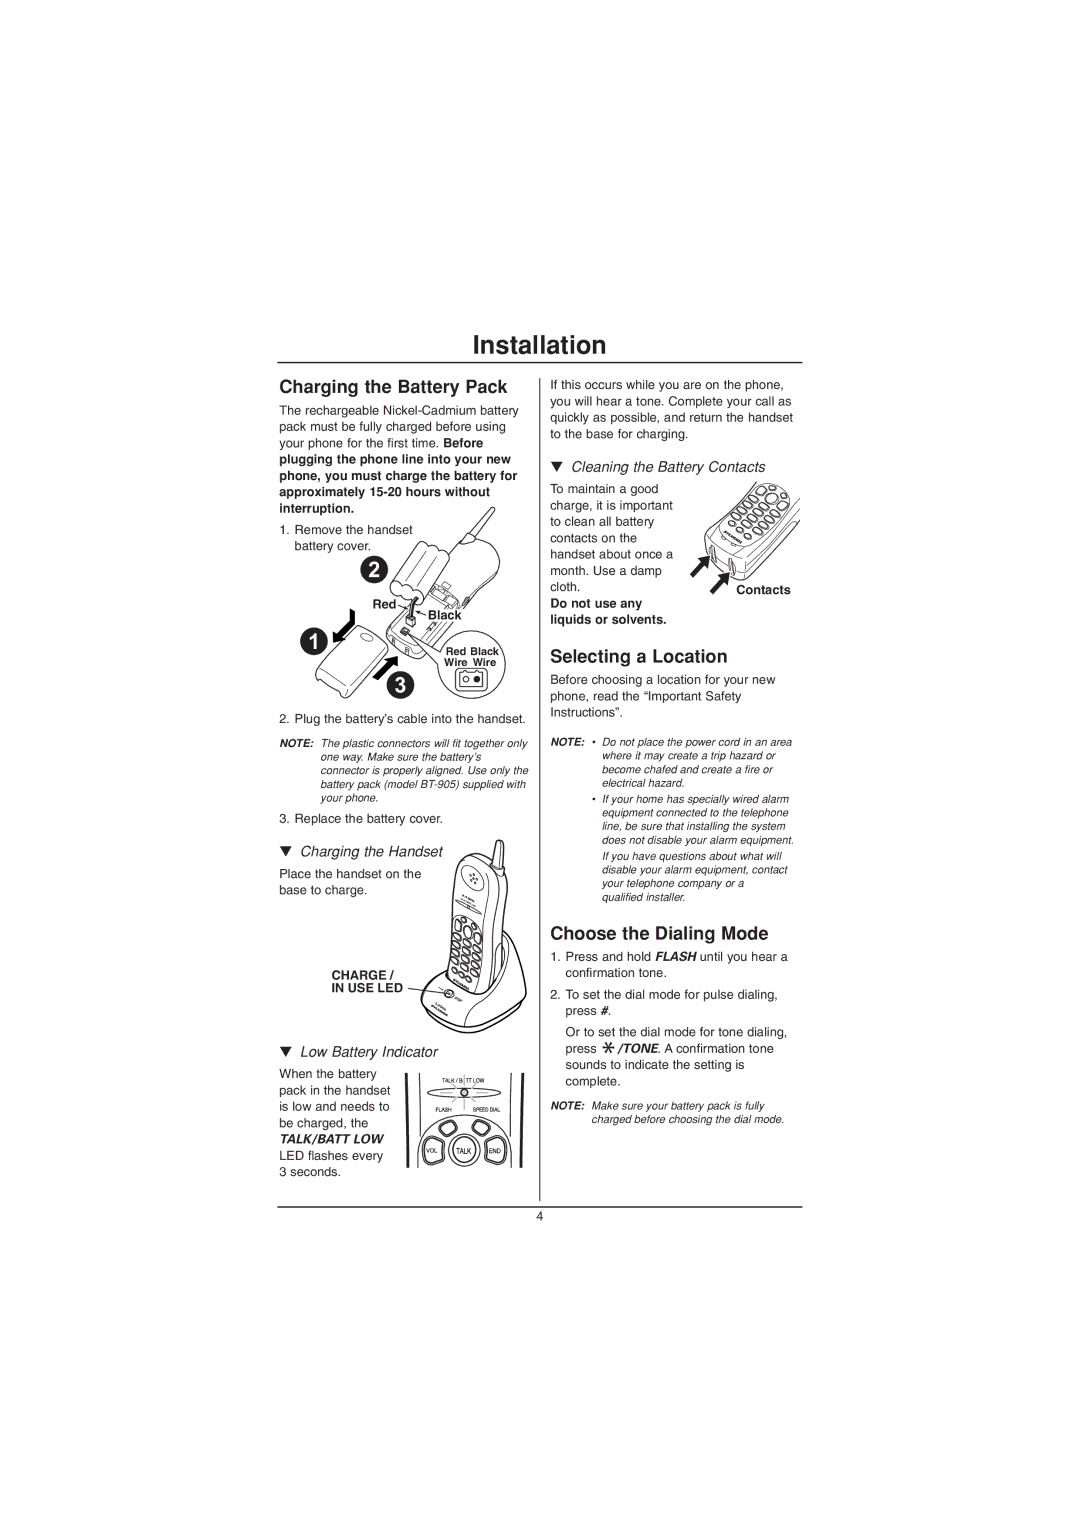
1.Remove the handset battery cover.
2
Red ![]()
![]() Black
Black
1
Red Black
Wire Wire
3
2. Plug the battery’s cable into the handset.
NOTE: The plastic connectors will fit together only one way. Make sure the battery’s connector is properly aligned. Use only the battery pack (model
3. Replace the battery cover.
▼ Charging the Handset
Place the handset on the base to charge.
CHARGE /
IN USE LED ![]()
![]()
![]()
![]()
▼Low Battery Indicator
When the battery pack in the handset is low and needs to be charged, the
TALK/BATT LOW
LED flashes every 3 seconds.
If this occurs while you are on the phone, you will hear a tone. Complete your call as quickly as possible, and return the handset to the base for charging.
▼Cleaning the Battery Contacts
To maintain a good |
|
charge, it is important |
|
to clean all battery |
|
contacts on the |
|
handset about once a |
|
month. Use a damp |
|
cloth. | Contacts |
Do not use any |
|
liquids or solvents. |
|
Selecting a Location
Before choosing a location for your new phone, read the “Important Safety Instructions”.
NOTE: • Do not place the power cord in an area where it may create a trip hazard or become chafed and create a fire or electrical hazard.
•If your home has specially wired alarm equipment connected to the telephone line, be sure that installing the system does not disable your alarm equipment. If you have questions about what will disable your alarm equipment, contact your telephone company or a qualified installer.
Choose the Dialing Mode
1.Press and hold FLASH until you hear a confirmation tone.
2.To set the dial mode for pulse dialing, press #.
Or to set the dial mode for tone dialing,
press */TONE. A confirmation tone sounds to indicate the setting is
complete.
NOTE: Make sure your battery pack is fully charged before choosing the dial mode.
4
