INSTALLING THE BATTERIES
1)Open the battery compartment cover by pressing the cover on the remote unit in the direction of the arrow.
2)Insert 2 “AA” penlight batteries into the battery compartment in the direction indicated by the polarity
3)Replace the cover.
EXTERNAL INPUT MODE
When using an external input signal (another VCR or video camera), connect the player’s audio/video out- put cables to the AUDIO IN/ VIDEO IN jacks of your TV/VCR. Then press the CHANNEL K or L button until “AUX” appears on the screen.
AUX
MOBILE CONNECTION
WARNING: The driver should never watch the TV/VCR while operating a motor vehicle.
CAUTION: If you use the TV/VCR with the vehicle’s engine off, recharge the vehicle’s battery after about every 4 hours of use to prevent it from running down. After you fin- ish using the TV/VCR be sure you unplug the
1)The supplied indoor antenna is adequate when your vehicle is stationary. For best reception on the road, use a
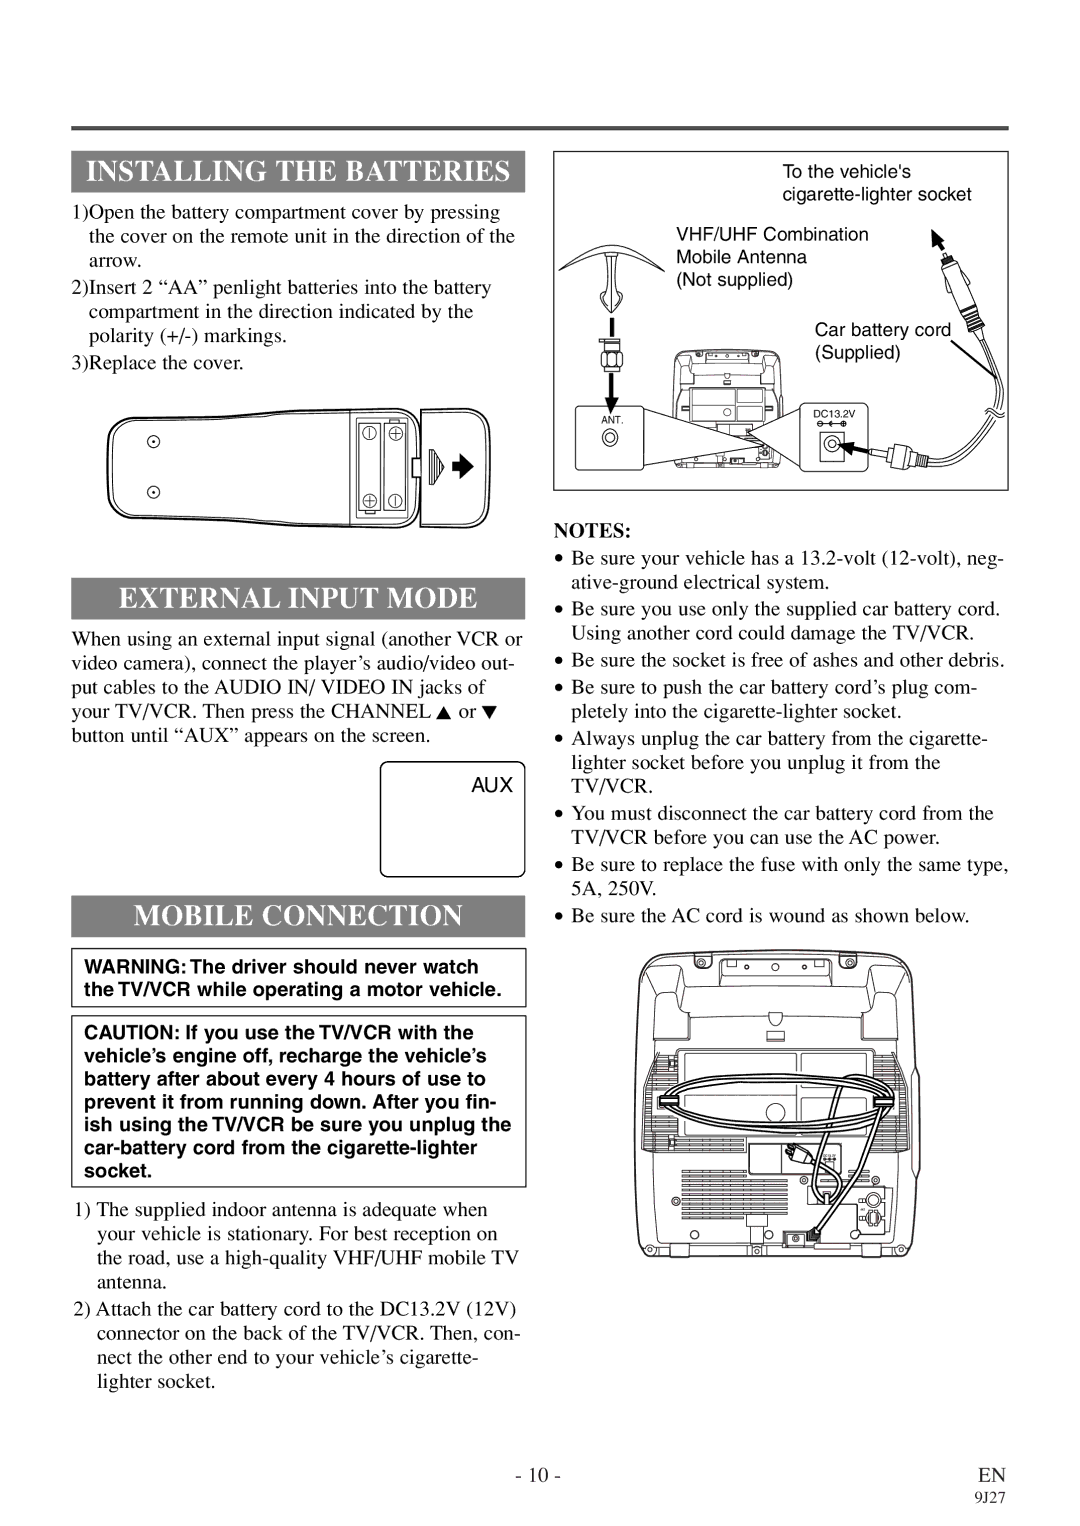
2)Attach the car battery cord to the DC13.2V (12V) connector on the back of the TV/VCR. Then, con- nect the other end to your vehicle’s cigarette- lighter socket.
| To the vehicle's |
| |
| VHF/UHF Combination |
| Mobile Antenna |
| (Not supplied) |
| Car battery cord |
| (Supplied) |
ANT. | DC13.2V |
| |
NOTES: |
|
•Be sure your vehicle has a
•Be sure you use only the supplied car battery cord. Using another cord could damage the TV/VCR.
•Be sure the socket is free of ashes and other debris.
•Be sure to push the car battery cord’s plug com- pletely into the
•Always unplug the car battery from the cigarette- lighter socket before you unplug it from the TV/VCR.
•You must disconnect the car battery cord from the TV/VCR before you can use the AC power.
•Be sure to replace the fuse with only the same type, 5A, 250V.
•Be sure the AC cord is wound as shown below.
- 10 - | EN |
| 9J27 |
