T A L K S W I T C H Q U I C K G U I D E
NETWORKING
TALKSWITCH
C T .T S 0 0 5 . 5 1 6 . E N – 0 2
NETWORKING TALKSWITCH 48-CAs/48-CVAs
1. ATTACH TALKSWITCH UNITS TO A LAN
Connect your TalkSwitch
NOTE: TalkSwitch unit enclosures are not designed for stacking. We recommend
Option #1: Ethernet Switch
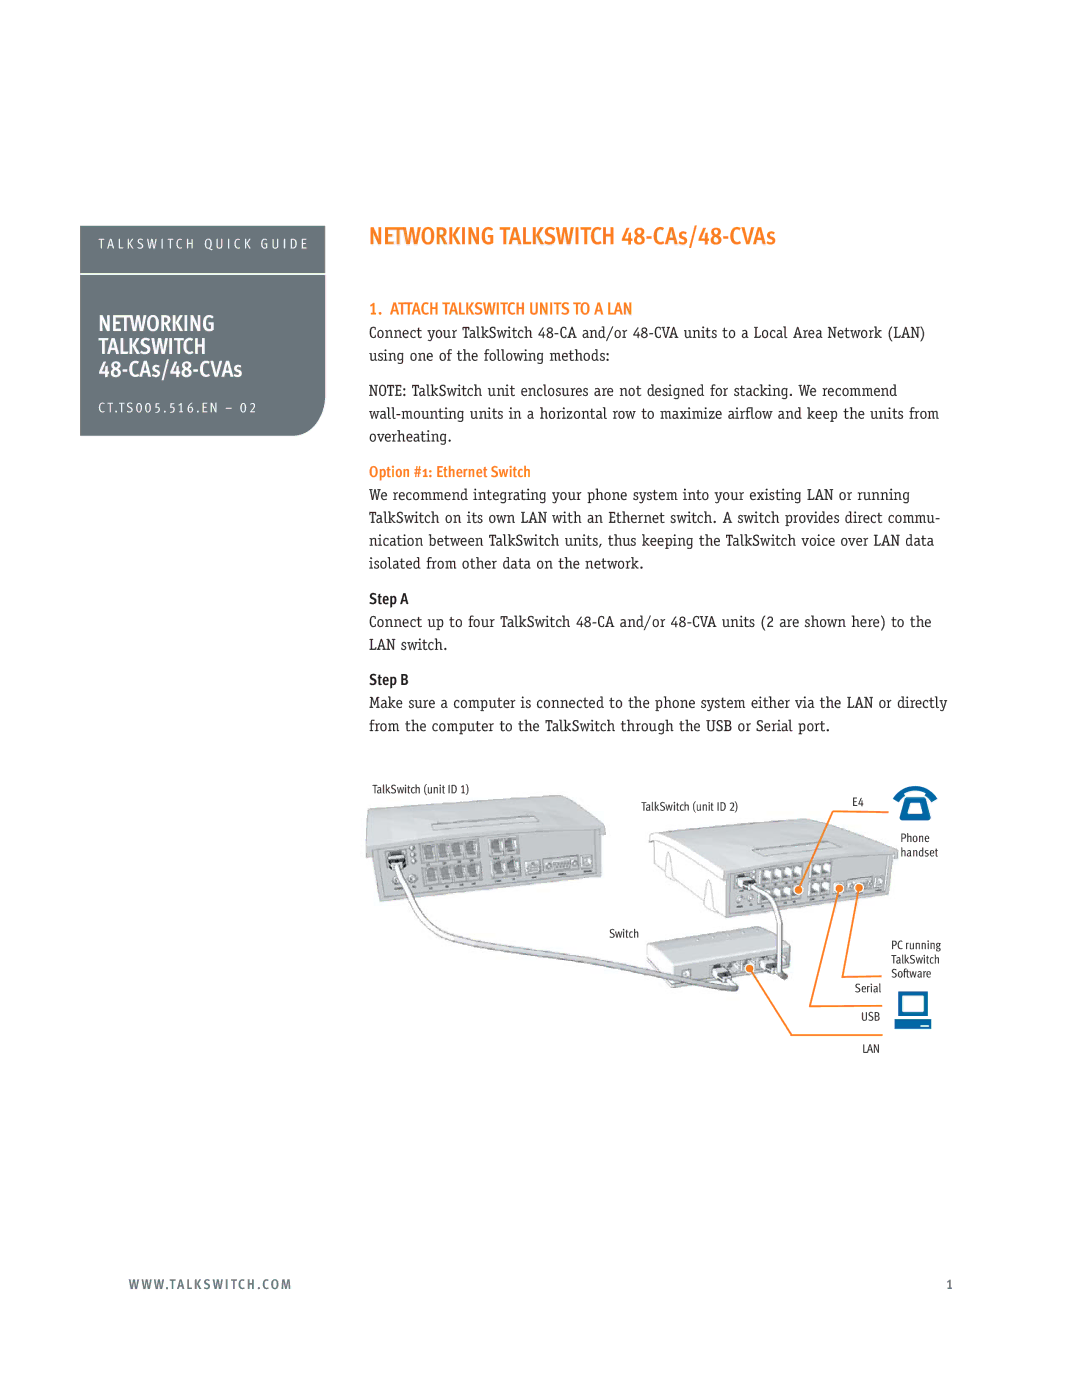
We recommend integrating your phone system into your existing LAN or running TalkSwitch on its own LAN with an Ethernet switch. A switch provides direct commu- nication between TalkSwitch units, thus keeping the TalkSwitch voice over LAN data isolated from other data on the network.
Step A
Connect up to four TalkSwitch
Step B
Make sure a computer is connected to the phone system either via the LAN or directly from the computer to the TalkSwitch through the USB or Serial port.
TalkSwitch (unit ID 1)
TalkSwitch (unit ID 2) | E4 |
|
Phone handset
Switch
PC running
TalkSwitch
Software
Serial
USB
LAN
W W W.T A L K S W I T C H . C O M | 1 |
