Basic Operation
| 2 |
| 1 |
| 5 |
| ||
|
|
|
|
|
|
|
|
|
|
|
|
|
|
|
|
|
|
34
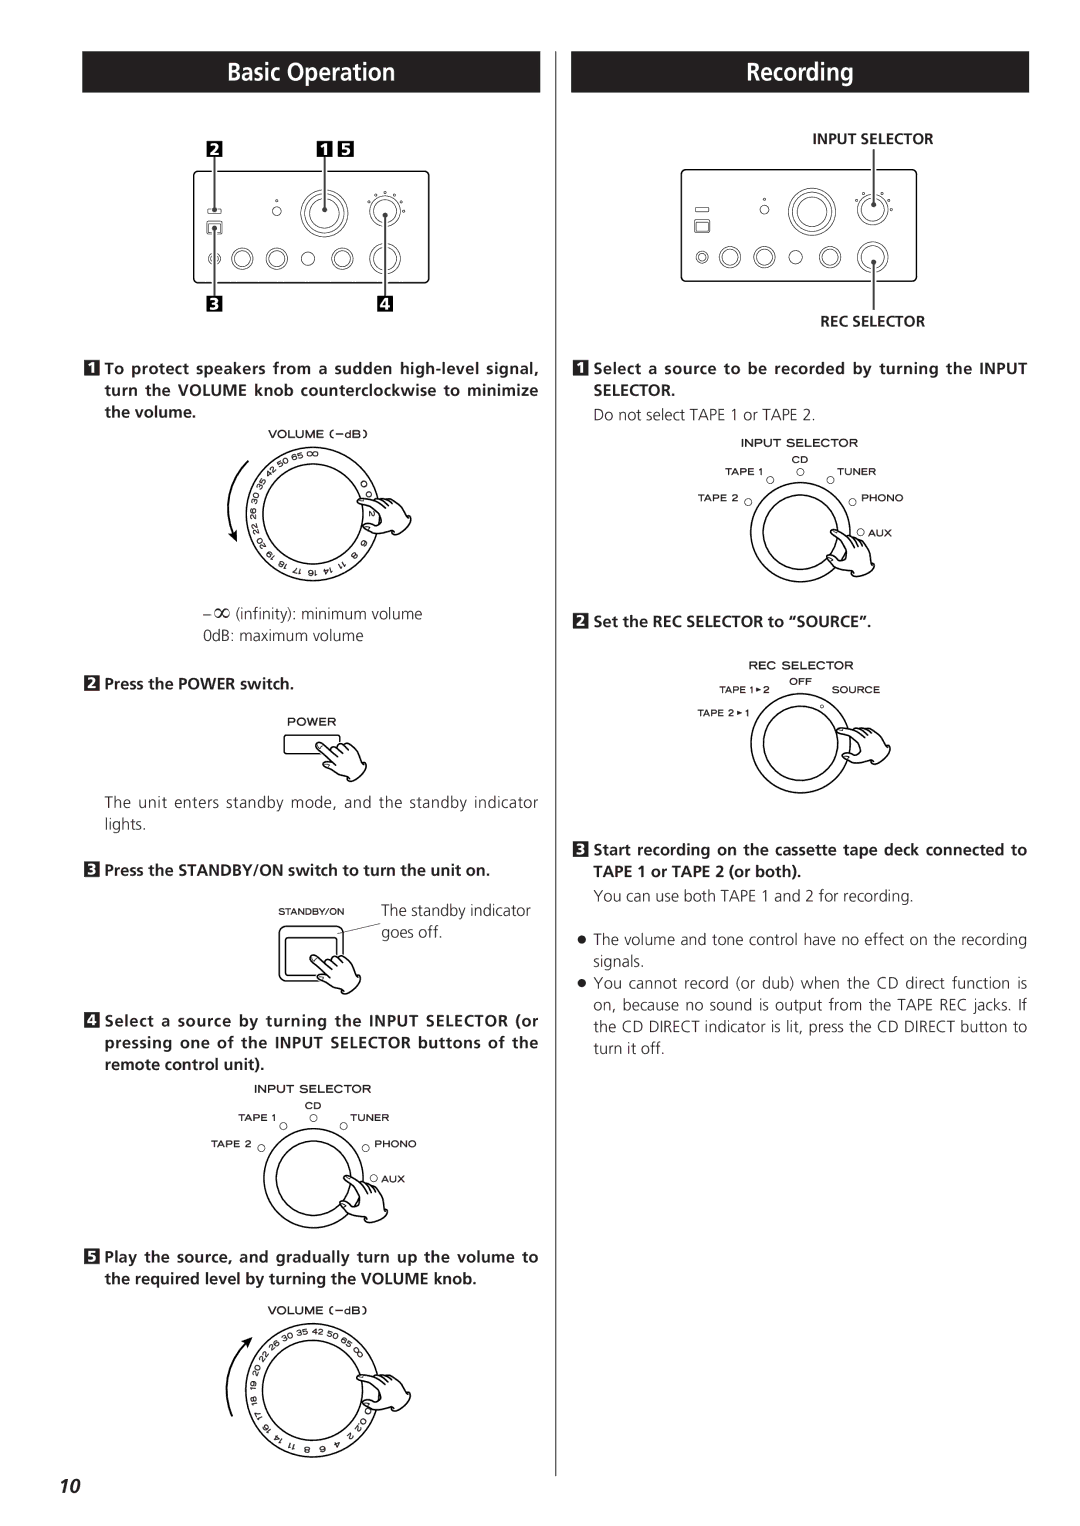
1To protect speakers from a sudden
–∞ (infinity): minimum volume 0dB: maximum volume
2Press the POWER switch.
The unit enters standby mode, and the standby indicator lights.
3Press the STANDBY/ON switch to turn the unit on.
The standby indicator ![]() goes off.
goes off.
4Select a source by turning the INPUT SELECTOR (or pressing one of the INPUT SELECTOR buttons of the remote control unit).
5Play the source, and gradually turn up the volume to the required level by turning the VOLUME knob.
Recording
INPUT SELECTOR
REC SELECTOR
1Select a source to be recorded by turning the INPUT SELECTOR.
Do not select TAPE 1 or TAPE 2.
2Set the REC SELECTOR to “SOURCE”.
3Start recording on the cassette tape deck connected to TAPE 1 or TAPE 2 (or both).
You can use both TAPE 1 and 2 for recording.
<The volume and tone control have no effect on the recording signals.
<You cannot record (or dub) when the CD direct function is on, because no sound is output from the TAPE REC jacks. If the CD DIRECT indicator is lit, press the CD DIRECT button to turn it off.
10
