Preparatory adjustments
Using the balance weight control
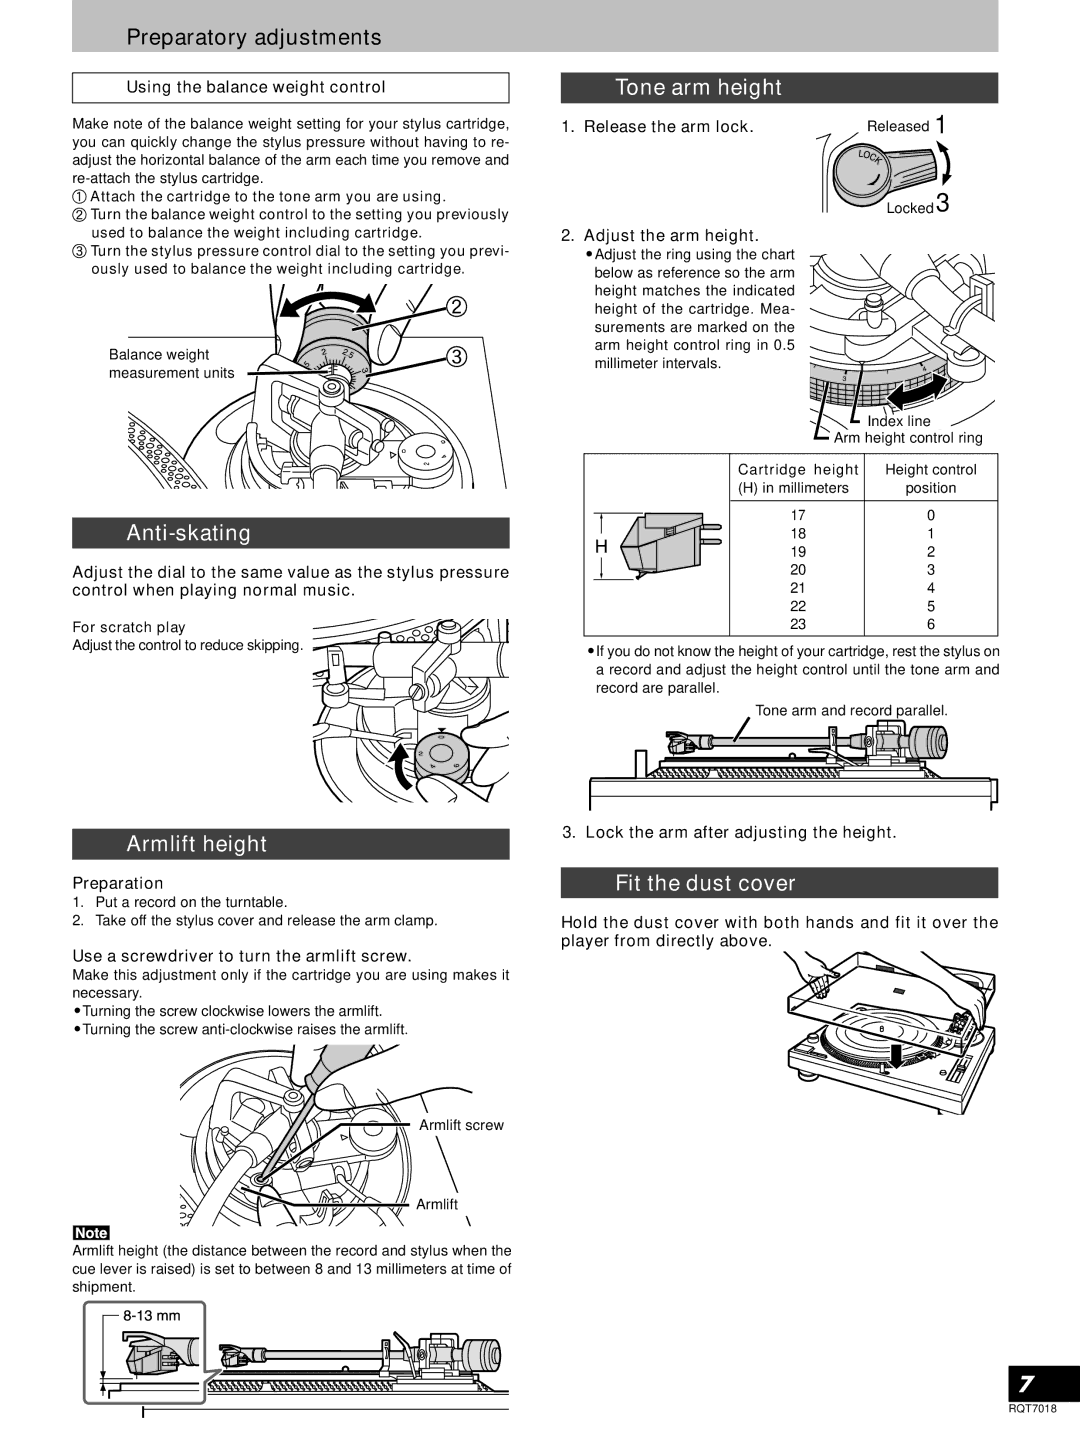
Make note of the balance weight setting for your stylus cartridge, you can quickly change the stylus pressure without having to re- adjust the horizontal balance of the arm each time you remove and
 Attach the cartridge to the tone arm you are using.
![]() Turn the balance weight control to the setting you previously used to balance the weight including cartridge.
Turn the balance weight control to the setting you previously used to balance the weight including cartridge.
![]() Turn the stylus pressure control dial to the setting you previ- ously used to balance the weight including cartridge.
Turn the stylus pressure control dial to the setting you previ- ously used to balance the weight including cartridge.
Balance weight measurement units
Tone arm height
1.Release the arm lock.
2.Adjust the arm height.
•Adjust the ring using the chart below as reference so the arm height matches the indicated height of the cartridge. Mea- surements are marked on the arm height control ring in 0.5 millimeter intervals.
Released 1
Locked 3
Anti-skating
Adjust the dial to the same value as the stylus pressure control when playing normal music.
For scratch play
Adjust the control to reduce skipping.
Index line
Arm height control ring
Cartridge height | Height control |
(H) in millimeters | position |
17 | 0 |
18 | 1 |
19 | 2 |
20 | 3 |
21 | 4 |
22 | 5 |
23 | 6 |
•If you do not know the height of your cartridge, rest the stylus on a record and adjust the height control until the tone arm and record are parallel.
Tone arm and record parallel.
Armlift height
Preparation
1.Put a record on the turntable.
2.Take off the stylus cover and release the arm clamp.
Use a screwdriver to turn the armlift screw.
Make this adjustment only if the cartridge you are using makes it necessary.
•Turning the screw clockwise lowers the armlift.
•Turning the screw
Armlift screw
![]() Armlift
Armlift
Armlift height (the distance between the record and stylus when the cue lever is raised) is set to between 8 and 13 millimeters at time of shipment.
3. Lock the arm after adjusting the height.
Fit the dust cover
Hold the dust cover with both hands and fit it over the player from directly above.
7
RQT7018
