1.
1.


 FEATURES
The Teledex B220 is a
Your B220 has these useful features:
1.1AUTO LINE SELECTION – Automatically selects the available, idle line using either the handset or the speakerphone.
1.2AUTO RINGER SELECTION – Automatically selects the ringing line using either the handset or the speakerphone.
1.3
1.4SPEAKERPHONE – For convenient
1.5RINGER CADENCE ADJUSTMENT – provides selection of unique ringing cadences for each line.
1.6TEN (10)
1.7FLASH – Sends an electronic
1.8LAST NUMBER REDIAL – Dials the last number dialed.
1.9HOLD – Places a call on hold.
1.10MUTE – Mutes the microphone of the handset or speakerphone.
1.11RELEASE – To
1.12VOLUME CONTROL – Adjusts volume of handset or speakerphone.
1.13DATA PORT – Enables parallel connection of another telephone, fax or answering machine, or laptop computer to the phone line.
1.14HEARING AID COMPATIBLE
The B220 is ETL listed to UL standards and meets all applicable FCC standards and requirements.


 2.
2.
 UNPACKING

 YOUR
YOUR
 B220
B220

Inside the box, you will find all of the items needed for installation, as shown below:
FIGURE 2
Check to be sure that your package includes all the above items. If any items are missing or damaged, please contact the distributor where you purchased the phone.
2


 3.
3.


 INSTALLATION

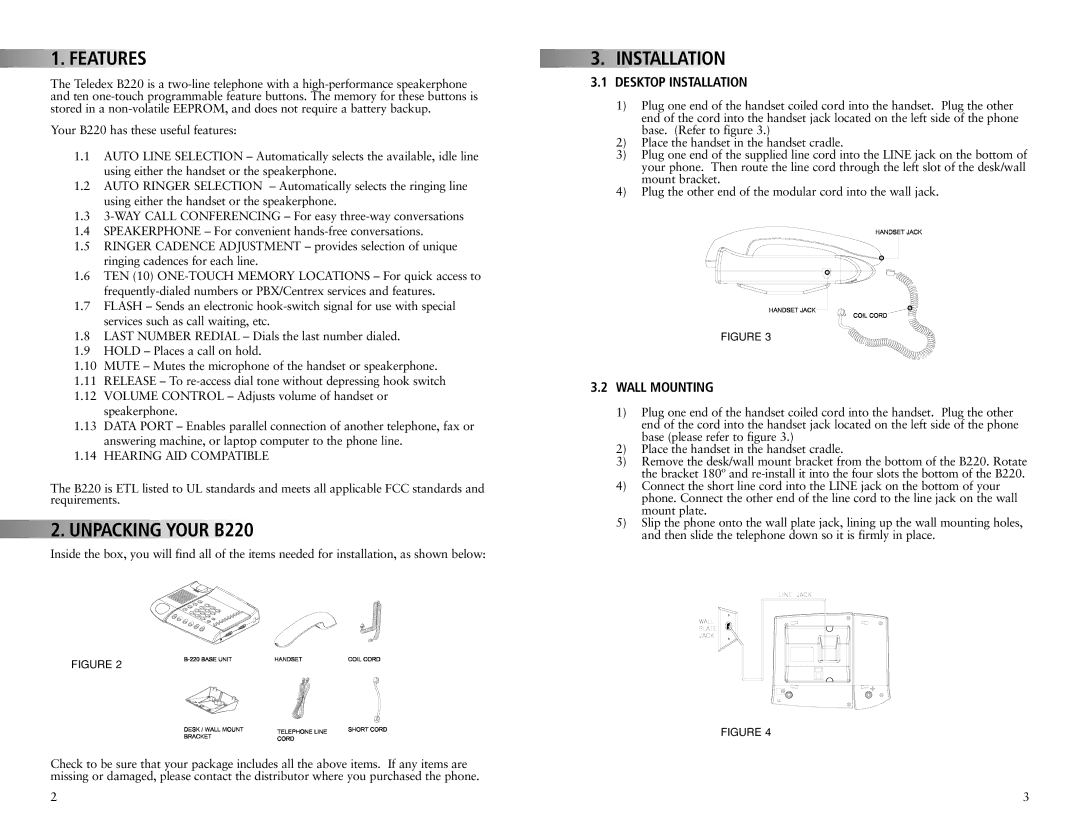
3.1DESKTOP INSTALLATION
1)Plug one end of the handset coiled cord into the handset. Plug the other end of the cord into the handset jack located on the left side of the phone base. (Refer to figure 3.)
2)Place the handset in the handset cradle.
3)Plug one end of the supplied line cord into the LINE jack on the bottom of your phone. Then route the line cord through the left slot of the desk/wall mount bracket.
4)Plug the other end of the modular cord into the wall jack.
FIGURE 3
3.2WALL MOUNTING
1)Plug one end of the handset coiled cord into the handset. Plug the other end of the cord into the handset jack located on the left side of the phone base (please refer to figure 3.)
2)Place the handset in the handset cradle.
3)Remove the desk/wall mount bracket from the bottom of the B220. Rotate the bracket 180º and
4)Connect the short line cord into the LINE jack on the bottom of your phone. Connect the other end of the line cord to the line jack on the wall mount plate.
5)Slip the phone onto the wall plate jack, lining up the wall mounting holes, and then slide the telephone down so it is firmly in place.
FIGURE 4
3