S210 Wiring Block Instructions
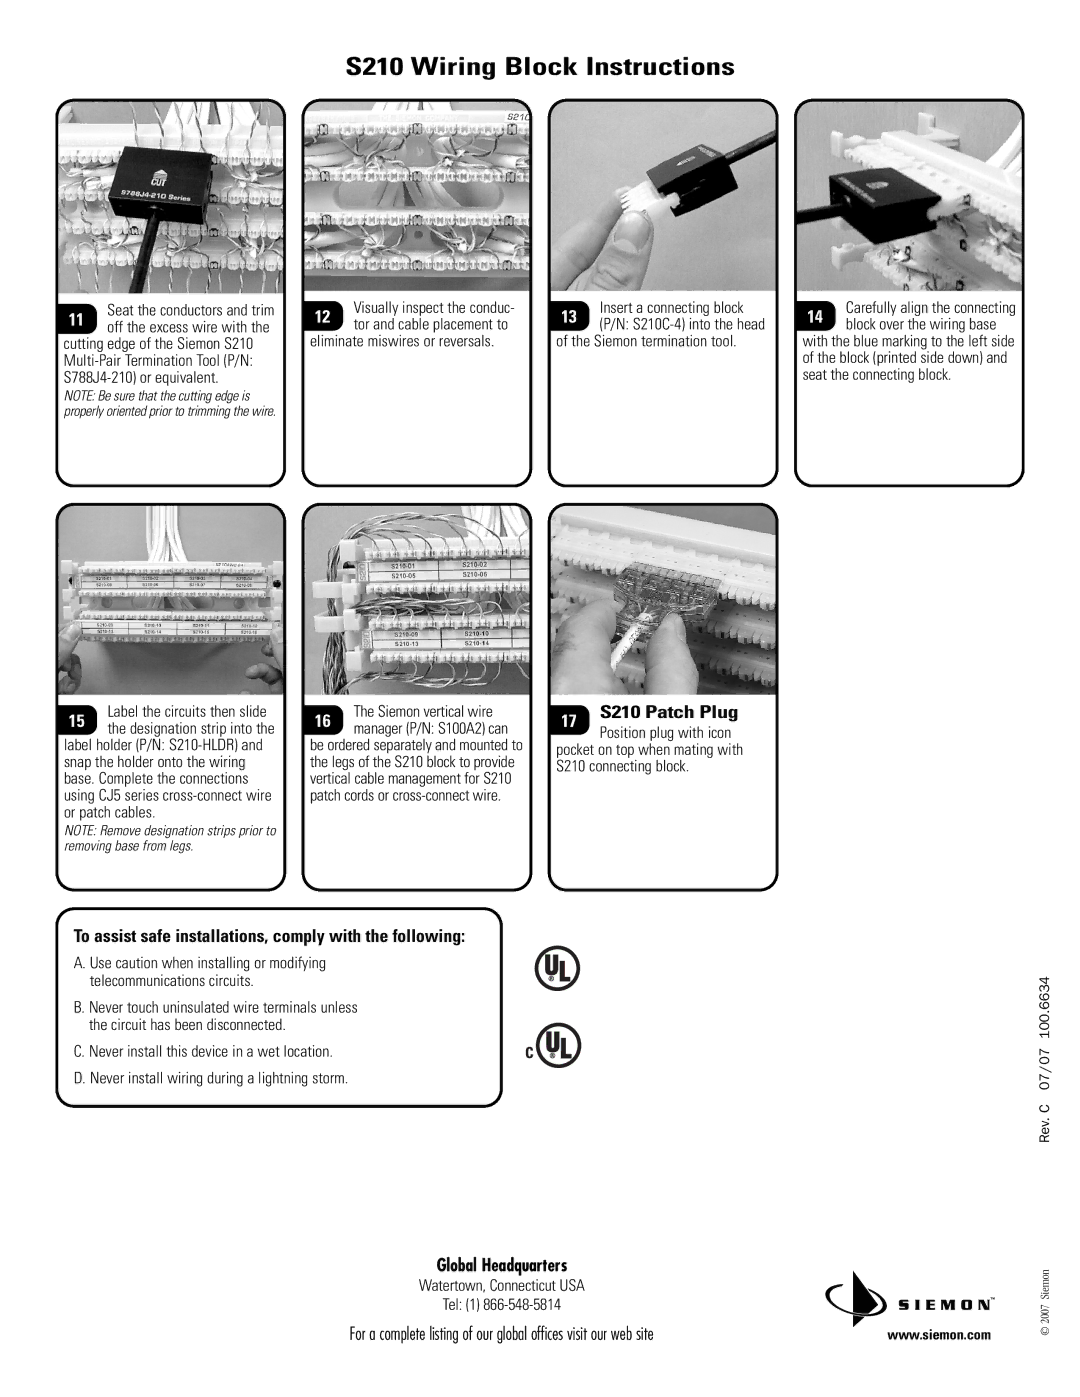
Seat the conductors and trim
11 off the excess wire with the cutting edge of the Siemon S210
NOTE: Be sure that the cutting edge is properly oriented prior to trimming the wire.
Label the circuits then slide
15 the designation strip into the label holder (P/N:
NOTE: Remove designation strips prior to removing base from legs.
Visually inspect the conduc-
12 tor and cable placement to eliminate miswires or reversals.
The Siemon vertical wire
16 manager (P/N: S100A2) can be ordered separately and mounted to the legs of the S210 block to provide vertical cable management for S210 patch cords or
Insert a connecting block
13 (P/N:
17S210 Patch Plug
Position plug with icon
pocket on top when mating with S210 connecting block.
Carefully align the connecting
14 block over the wiring base with the blue marking to the left side of the block (printed side down) and seat the connecting block.
To assist safe installations, comply with the following:
A. Use caution when installing or modifying telecommunications circuits.
B. Never touch uninsulated wire terminals unless the circuit has been disconnected.
C. Never install this device in a wet location.
D. Never install wiring during a lightning storm.
Global Headquarters
Watertown, Connecticut USA
Tel: (1)
For a complete listing of our global offices visit our web site
www.siemon.com
Rev. C 07/07 100.6634
© 2007 Siemon