Phoenix 200 HT specifications
Therma-Stor Products Group has established itself as a key player in the moisture control and energy management industry, and one of its standout offerings is the Phoenix 200 HT. This innovative dehumidifier is designed for high-performance applications, catering particularly to the needs of contractors, restoration professionals, and residential users who require efficient moisture removal.One of the main features of the Phoenix 200 HT is its robust, yet compact design. Engineered for versatility, this unit fits conveniently into tight spaces and is ideal for residential areas as well as commercial settings. The dehumidifier can effectively handle large volumes of moisture, boasting a removal capacity of up to 80 pints per day under AHAM standards. This makes it particularly effective in environments plagued by high humidity, such as basements or areas recovering from water damage.
The Phoenix 200 HT employs advanced technology with its high-temperature operational capability, allowing it to perform efficiently in conditions where traditional dehumidifiers may struggle. It can operate effectively in temperatures as high as 100°F and relative humidity levels reaching 100%, making it suitable for a wide range of applications, including restoration projects after flood damage or in construction drying processes.
Energy efficiency is another hallmark of the Phoenix 200 HT. It operates with a low amp draw, making it an eco-friendly choice that helps to reduce energy costs. This feature is not only beneficial for budget-conscious users but also aligns with growing environmental concerns, as energy-efficient appliances contribute to overall sustainability.
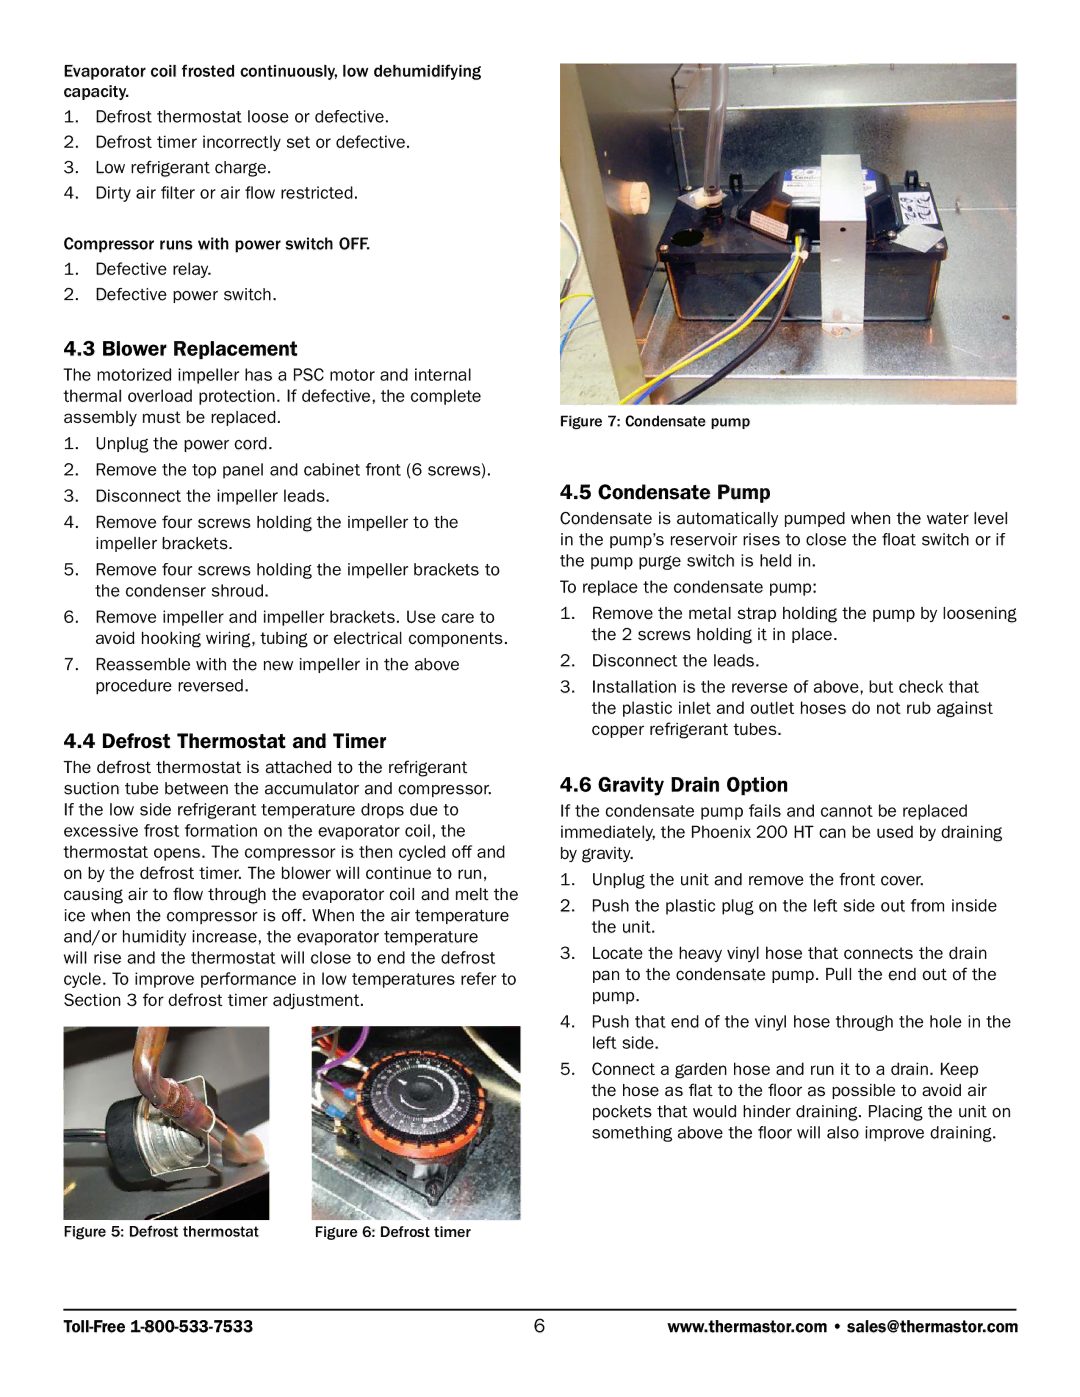
The unit is designed with user convenience in mind. It includes an easy-to-read digital readout that displays current humidity levels and allows for precise control settings. Additionally, the Phoenix 200 HT is equipped with a built-in pump, facilitating continuous drainage without the need for manual emptying. Users appreciate the flexibility this affords them, particularly in extended operation scenarios.
Durable construction ensures that the Phoenix 200 HT withstands demanding job site conditions. The unit's mold-resistant housing and corrosion-resistant components contribute to its longevity, making it a reliable investment. With its impressive blend of performance, efficiency, and user-friendly features, the Therma-Stor Products Group Phoenix 200 HT is an essential tool for anyone looking to effectively manage moisture in various environments.