5. INSTALLATION
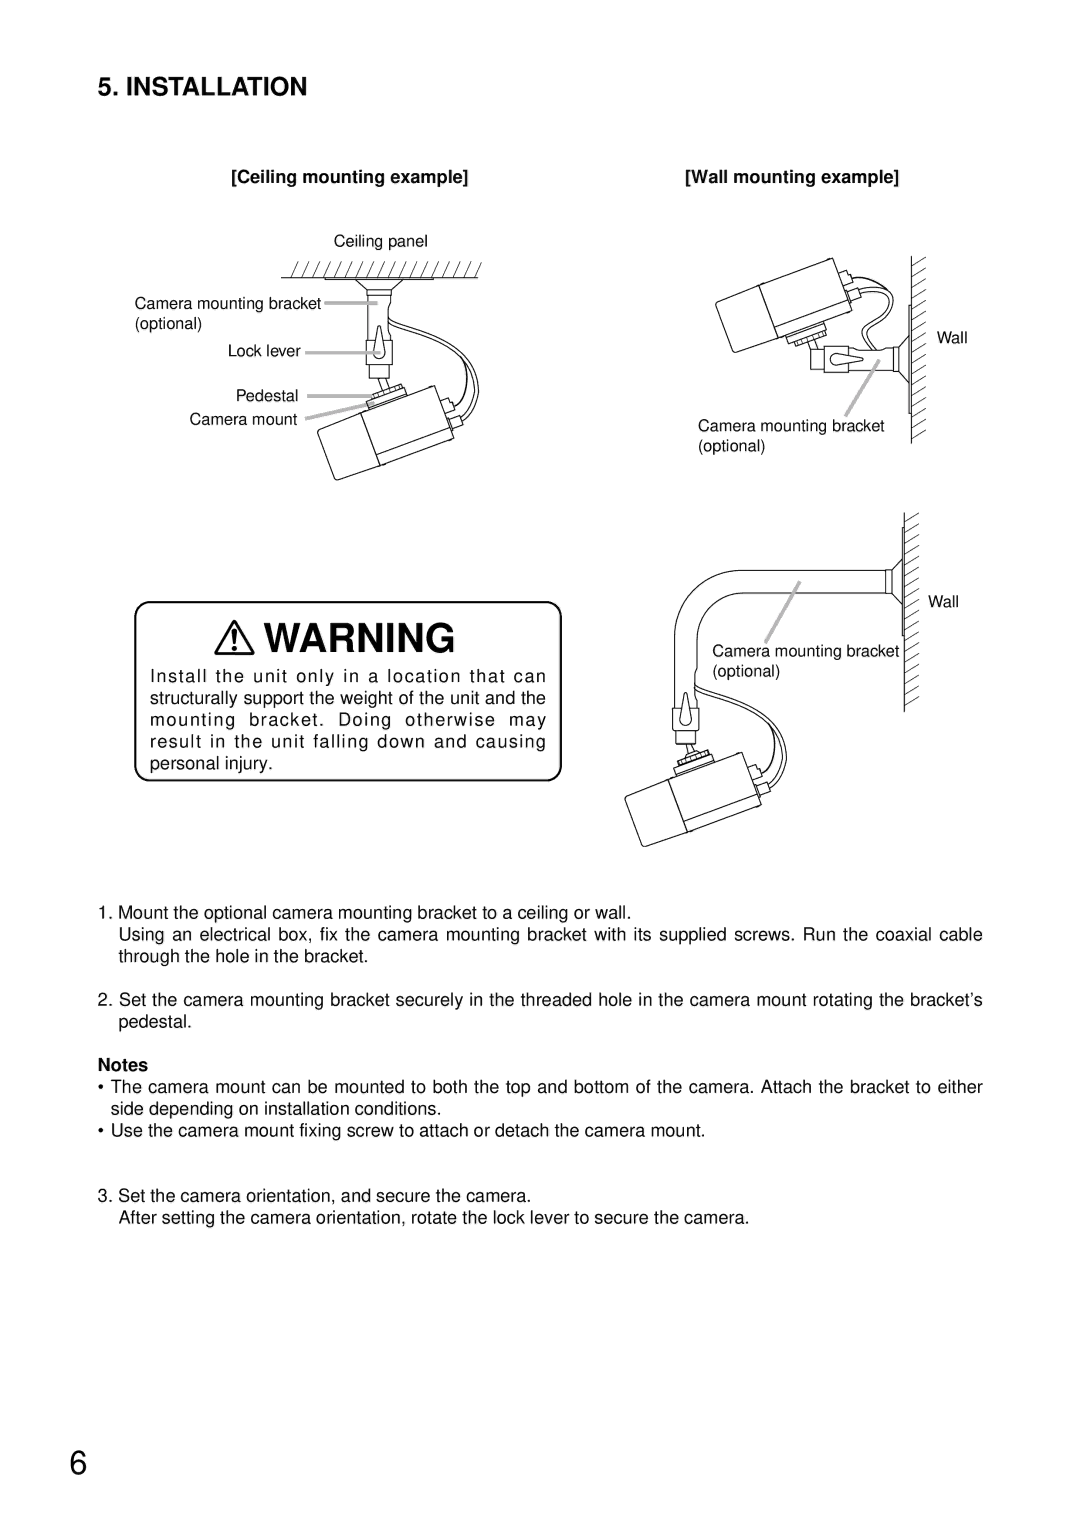
[Ceiling mounting example]
Ceiling panel
Camera mounting bracket (optional)
Lock lever
Pedestal
Camera mount
![]() WARNING
WARNING
Install the unit only in a location that can structurally support the weight of the unit and the mounting bracket. Doing otherwise may result in the unit falling down and causing personal injury.
[Wall mounting example]
Wall
Camera mounting bracket (optional)
Wall
Camera mounting bracket (optional)
1.Mount the optional camera mounting bracket to a ceiling or wall.
Using an electrical box, fix the camera mounting bracket with its supplied screws. Run the coaxial cable through the hole in the bracket.
2.Set the camera mounting bracket securely in the threaded hole in the camera mount rotating the bracket’s pedestal.
Notes
•The camera mount can be mounted to both the top and bottom of the camera. Attach the bracket to either side depending on installation conditions.
•Use the camera mount fixing screw to attach or detach the camera mount.
3.Set the camera orientation, and secure the camera.
After setting the camera orientation, rotate the lock lever to secure the camera.
6