5. INSTALLATION
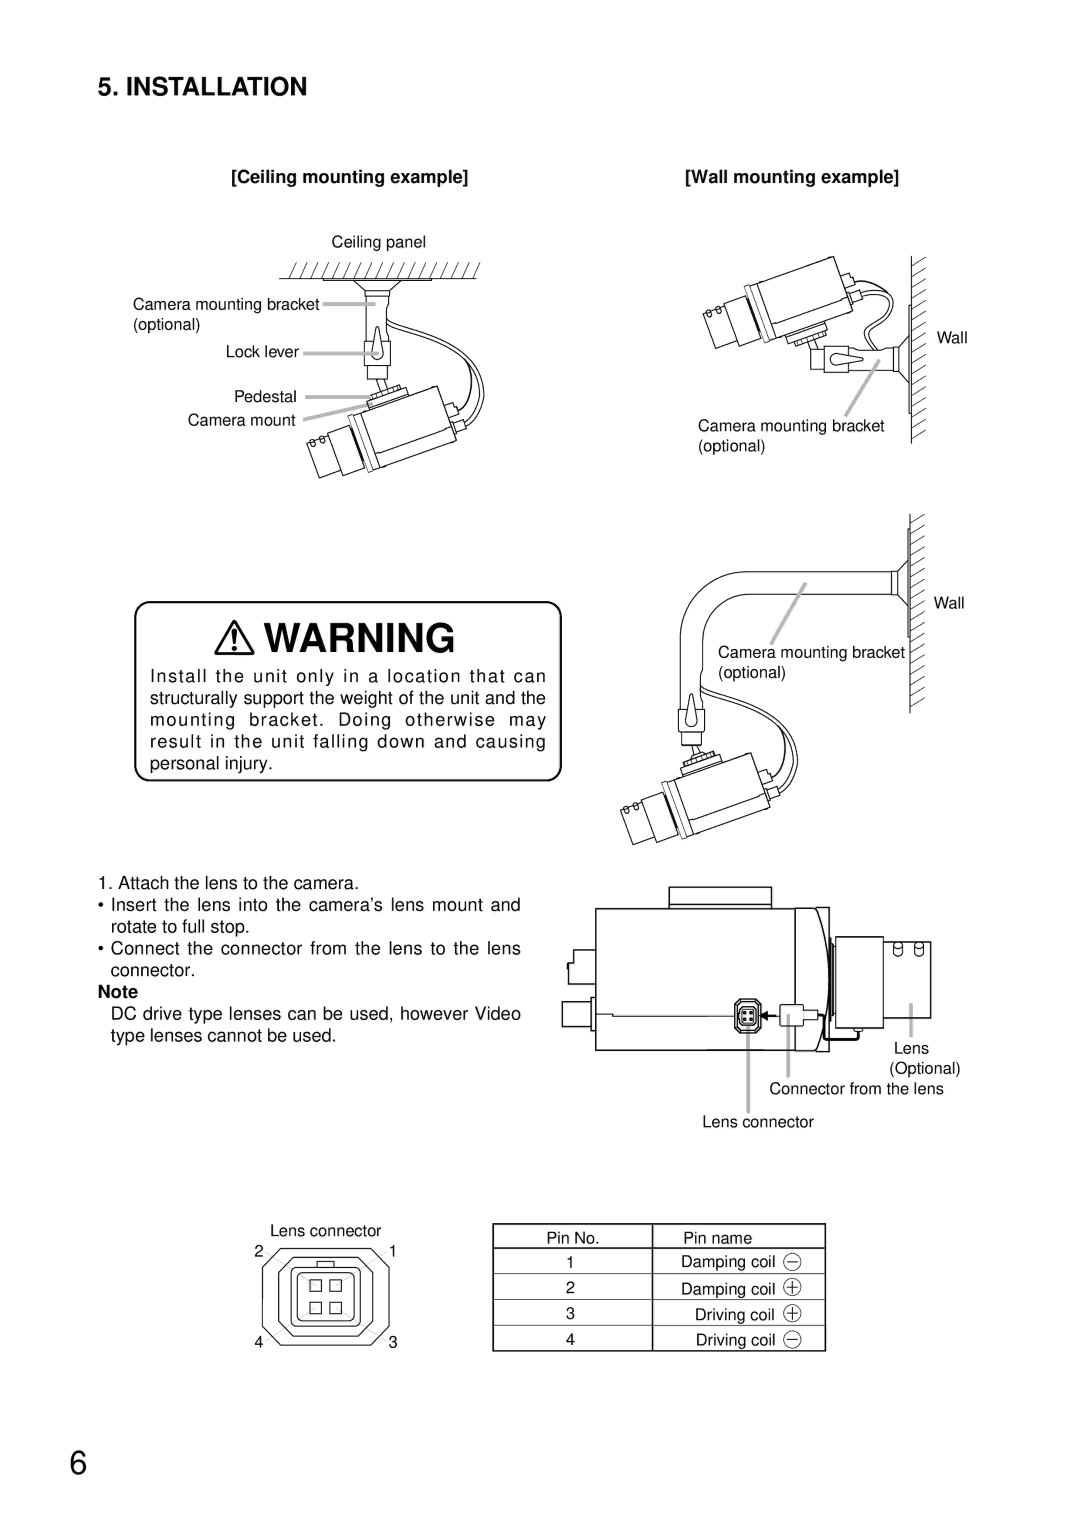
[Ceiling mounting example]
Ceiling panel
Camera mounting bracket (optional)
Lock lever
Pedestal
Camera mount
![]() WARNING
WARNING
Install the unit only in a location that can structurally support the weight of the unit and the mounting bracket. Doing otherwise may result in the unit falling down and causing personal injury.
[Wall mounting example]
Wall
Camera mounting bracket (optional)
Wall
Camera mounting bracket (optional)
1. Attach the lens to the camera.
•Insert the lens into the camera’s lens mount and rotate to full stop.
•Connect the connector from the lens to the lens connector.
Note
DC drive type lenses can be used, however Video type lenses cannot be used.
Lens |
(Optional) |
Connector from the lens |
Lens connector
Lens connector
21
43
Pin No. | Pin name |
1Damping coil
2Damping coil
3 | Driving coil |
|
|
|
| |
|
|
|
| |||
4 | Driving coil |
|
| |||
| ||||||
6
