RS-485 specifications
The Toshiba RS-485 is a robust and widely used communication standard designed for industrial applications involving serial data transmission. This technology is particularly appreciated for its ability to connect multiple devices (up to 32 nodes) using a simple twisted pair wiring, making it cost-effective and efficient in environments where reliable communication is essential.One of the main features of the Toshiba RS-485 is its differential signaling technique. This approach significantly reduces noise and allows for long-distance communication, often exceeding 4000 feet. By utilizing a twisted pair cable, RS-485 devices can communicate at baud rates of up to 10 Mbps, although practical distances may require lower speeds to maintain data integrity.
Toshiba's implementation of RS-485 also supports half-duplex and full-duplex modes, providing versatility in how devices communicate. In half-duplex mode, data can be transmitted in both directions but not simultaneously, making it suitable for applications where control over the communication direction is manageable. Full-duplex mode, on the other hand, enables simultaneous two-way communication, improving the speed and efficiency of data transfer.
The Toshiba RS-485 standard is characterized by its robustness in handling high electromagnetic interference (EMI) and its ability to operate in harsh environments. With a wide operating temperature range, the RS-485 devices can function effectively in various industrial settings, from factories to outdoor applications. Furthermore, the standard supports various voltage levels, providing flexibility in design and functionality.
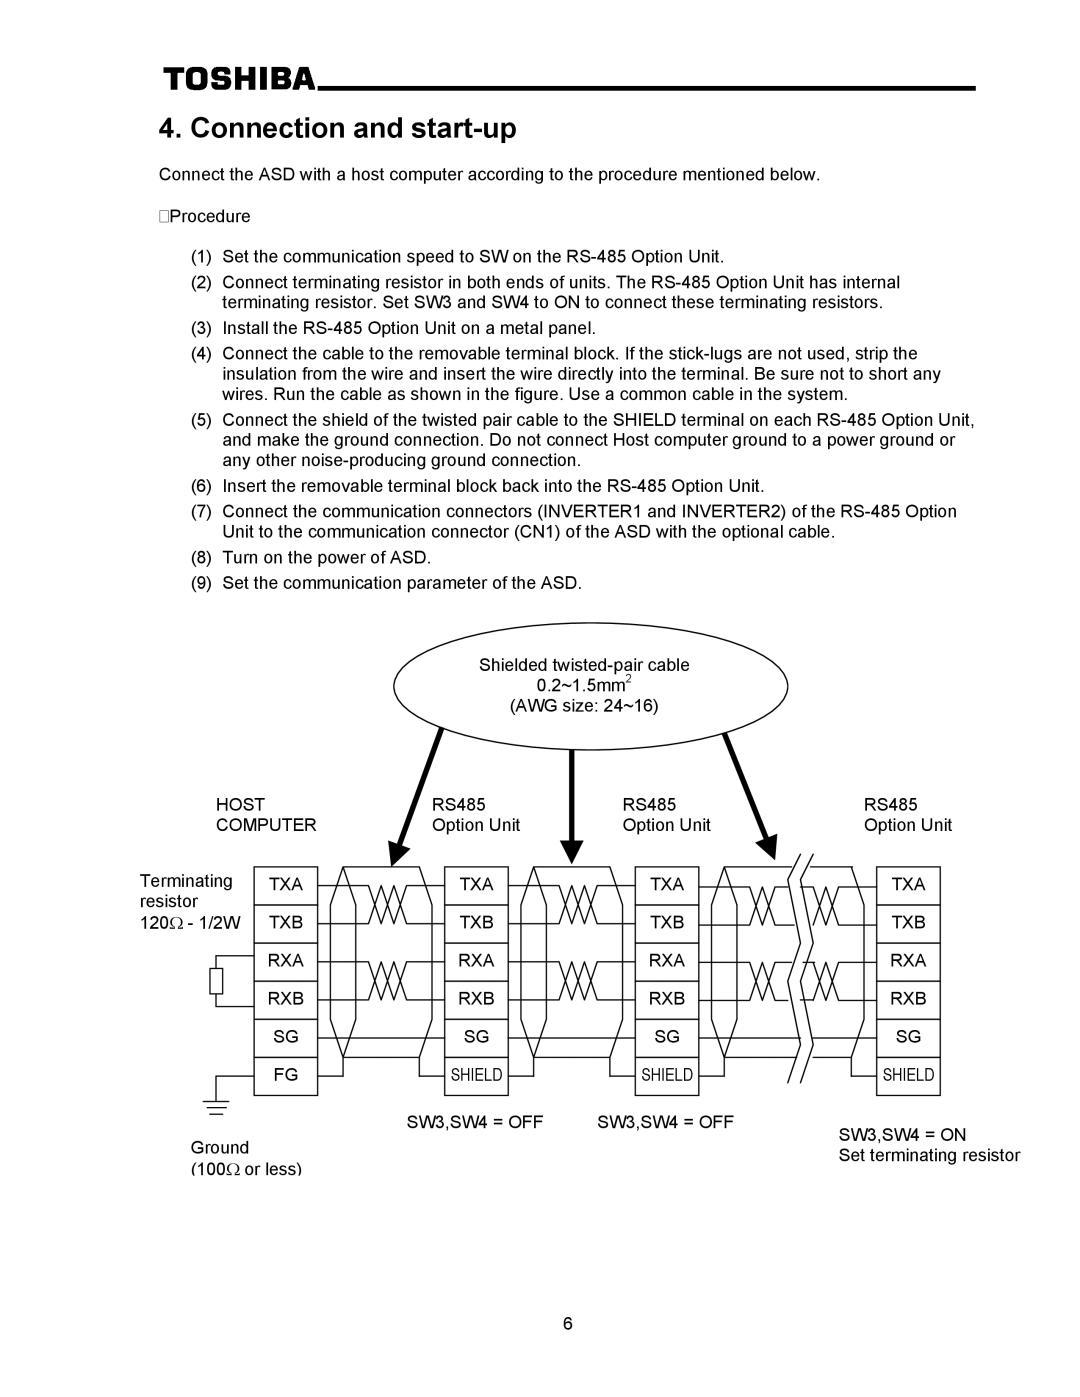
Another essential technology in the Toshiba RS-485 system is its fault tolerance. The differential signaling allows devices to maintain communication even if one of the wires is compromised, providing greater reliability compared to single-ended systems. Additionally, the use of termination resistors helps mitigate reflections, further enhancing performance.
In summary, Toshiba RS-485 technology provides the backbone for reliable, efficient, and robust serial communication in industrial applications. Its features, including long-distance capabilities, support for multiple devices, resistance to noise, and fault tolerance, make it a preferred choice for many engineers and system designers. This standard not only meets the demands of the industry but also adapts to the evolving technological landscape, ensuring that it remains relevant in the years to come.

