REPLACING THE OVEN LIGHT BULB
The type of bulb required is a 300°C 25 watt small Edison Screw. Part number 572 491
CAUTION: DISCONNECT THE COOKER FROM THE ELECTRICITY SUPPLY BEFORE REPLACING THE BULB.
Open door and remove the shelves to enable easy access to the oven light assembly. Insert a flat blade screwdriver between the oven side and the glass which covers the bulb.
Support the glass with your hand and prise out sufficiently to release the glass cover. Unscrew the bulb in an
Fit the new bulb by turning in a clockwise direction until it is secure. Ensuring the indent to the flange is pointing to the rear of the oven, replace the glass by pushing it firmly into the hole to cover the bulb assembly.
Replace the shelves. Restore the electricity supply and adjust the time of day and clock, as necessary.
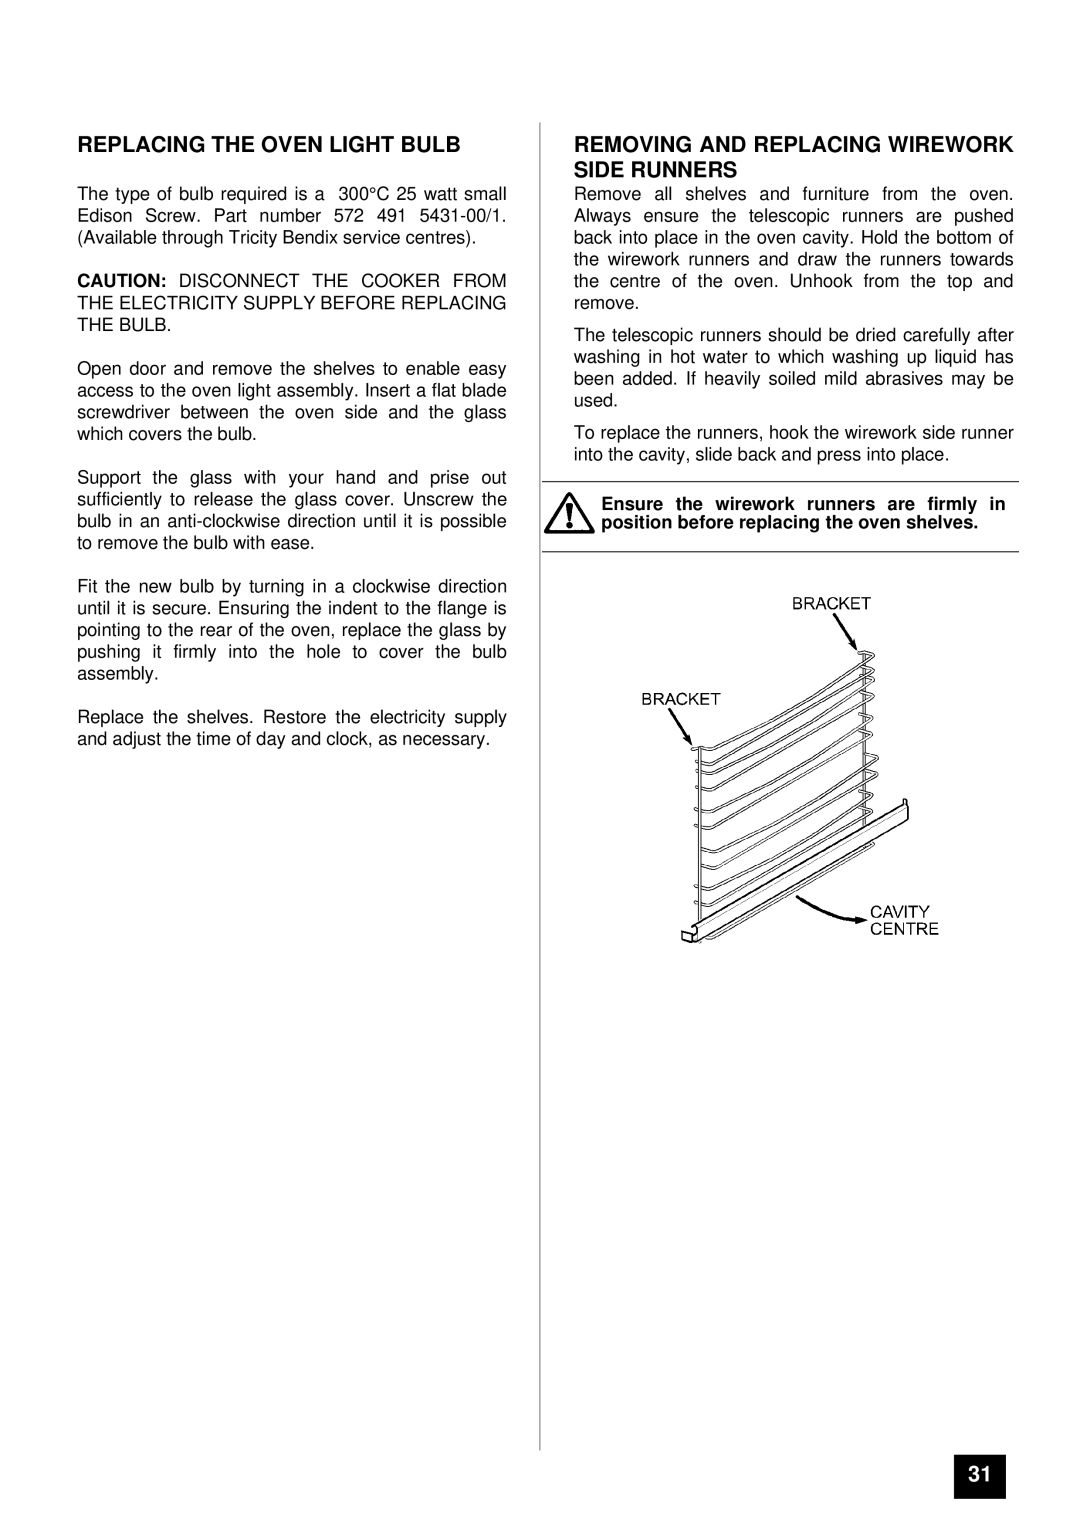
REMOVING AND REPLACING WIREWORK SIDE RUNNERS
Remove all shelves and furniture from the oven. Always ensure the telescopic runners are pushed back into place in the oven cavity. Hold the bottom of the wirework runners and draw the runners towards the centre of the oven. Unhook from the top and remove.
The telescopic runners should be dried carefully after washing in hot water to which washing up liquid has been added. If heavily soiled mild abrasives may be used.
To replace the runners, hook the wirework side runner into the cavity, slide back and press into place.
Ensure the wirework runners are firmly in position before replacing the oven shelves.
31