
B126-1A1, B126-002, B126-1A0, B126-110, B126-004 specifications
Tripp Lite is renowned for its innovative solutions in the world of connectivity and power management, with products designed to meet the diverse needs of both commercial and residential users. Among its extensive lineup, the Tripp Lite B126 series stands out, offering a range of signal extenders that enhance audio-visual experiences through advanced technologies.The Tripp Lite B126-1P0 is a versatile HDMI over Cat5/Cat6 extender, designed to ensure hassle-free transmission of high-definition video and audio. This model supports resolutions up to 1080p, making it ideal for home theaters, conference rooms, and educational settings. Its ability to extend HDMI signals up to 150 feet without signal degradation is a key feature, offering a reliable solution for those looking to boost their display capabilities.
In addition to the B126-1P0, the B126-1A1-WP and B126-1A0-WP-1 models feature wall plate designs that seamlessly integrate into any installation. These wall plate extenders maintain the functionality of the original HDMI signal while providing a clean and organized appearance. The B126-1A1-WP is particularly invaluable for environments where aesthetics matter, while the B126-1A0-WP-1 delivers robust performance with straightforward setup procedures.
Another notable model is the B126-1P0-WP-1, which combines the sleek design of a wall plate with powerful signal transmission capabilities. Equipped with advanced equalization technology, this extender ensures consistent video quality over varying distances. This model is perfect for permanent installations in offices or lecture halls where a polished look is essential without compromising on performance.
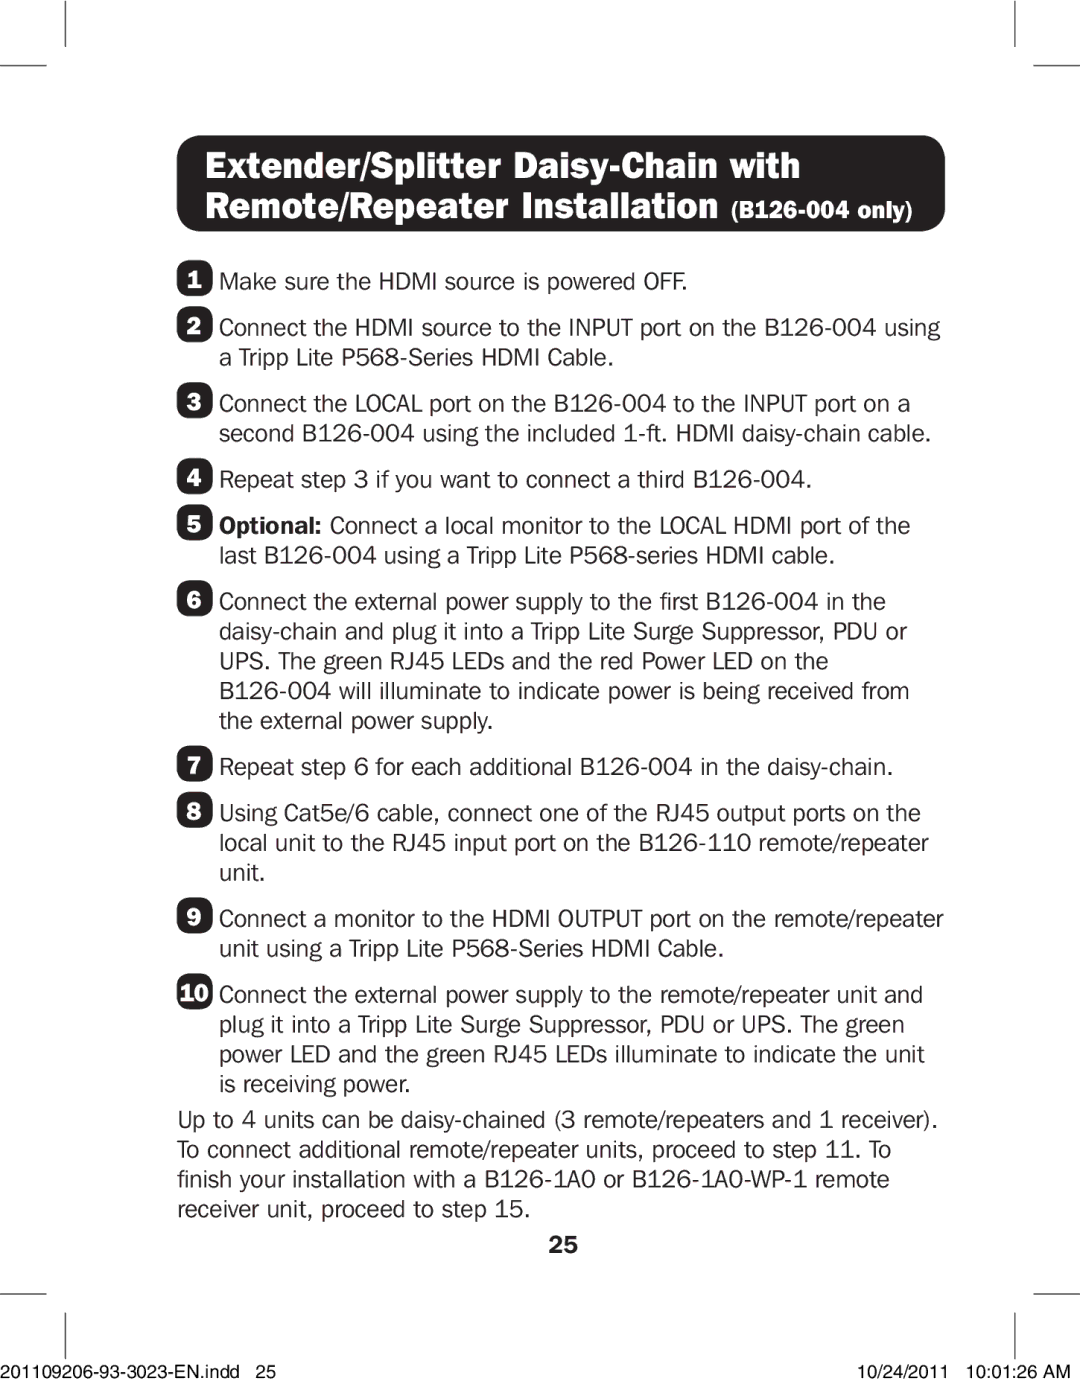
Completing the range is the Tripp Lite B126-004, a 4-port HDMI over Cat5/Cat6 splitter. This splitter is ideal for users needing to connect multiple displays from a single HDMI source. It supports resolutions up to 1080p and features built-in equalization for optimal performance. The splitter further enhances operational efficiency by supporting cascading configurations, making it a must-have for complex audio-visual setups.
In summary, the Tripp Lite B126 series offers an impressive portfolio of HDMI extenders and splitters that prioritize high-quality performance, reliability, and aesthetic appeal. Whether for home use or professional applications, these products stand out as essential tools for managing and optimizing audio-visual experiences in various environments. With advanced features and easy installation, Tripp Lite continues to set industry standards for connectivity solutions.