Installation
1
2 ![]() 5
5
3
4
6
7
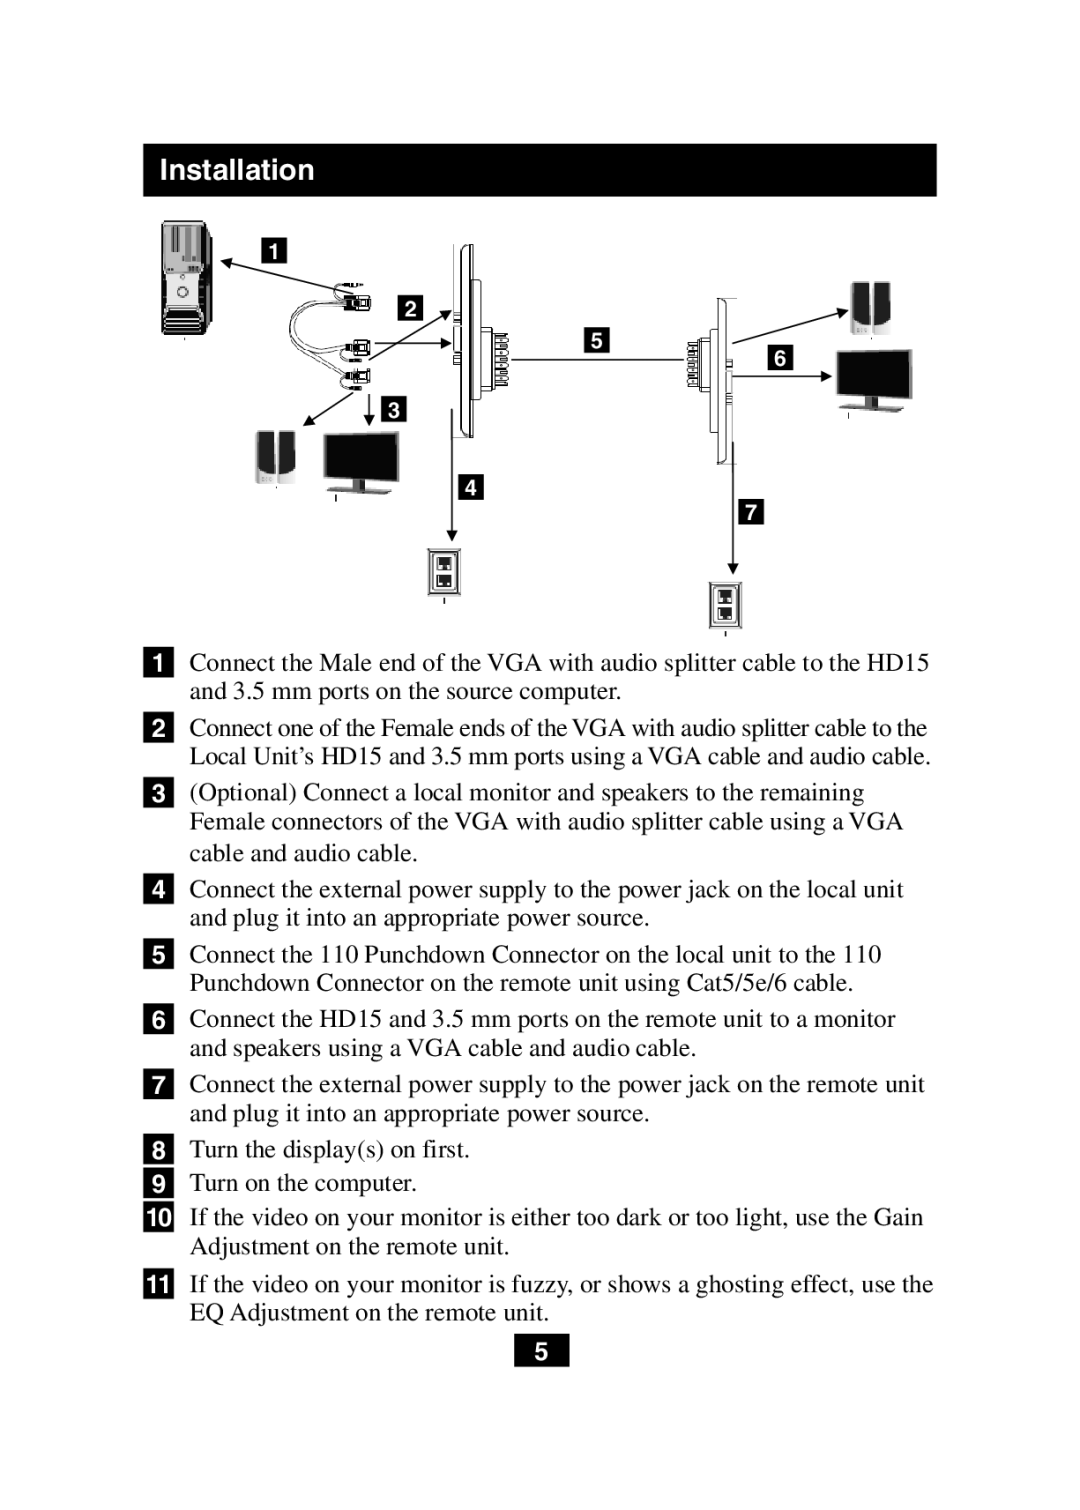
1Connect the Male end of the VGA with audio splitter cable to the HD15 and 3.5 mm ports on the source computer.
2Connect one of the Female ends of the VGA with audio splitter cable to the Local Unit’s HD15 and 3.5 mm ports using a VGA cable and audio cable.
3(Optional) Connect a local monitor and speakers to the remaining Female connectors of the VGA with audio splitter cable using a VGA cable and audio cable.
4Connect the external power supply to the power jack on the local unit and plug it into an appropriate power source.
5Connect the 110 Punchdown Connector on the local unit to the 110 Punchdown Connector on the remote unit using Cat5/5e/6 cable.
6Connect the HD15 and 3.5 mm ports on the remote unit to a monitor and speakers using a VGA cable and audio cable.
7Connect the external power supply to the power jack on the remote unit and plug it into an appropriate power source.
8Turn the display(s) on first.
9Turn on the computer.
10If the video on your monitor is either too dark or too light, use the Gain Adjustment on the remote unit.
11If the video on your monitor is fuzzy, or shows a ghosting effect, use the EQ Adjustment on the remote unit.
5