
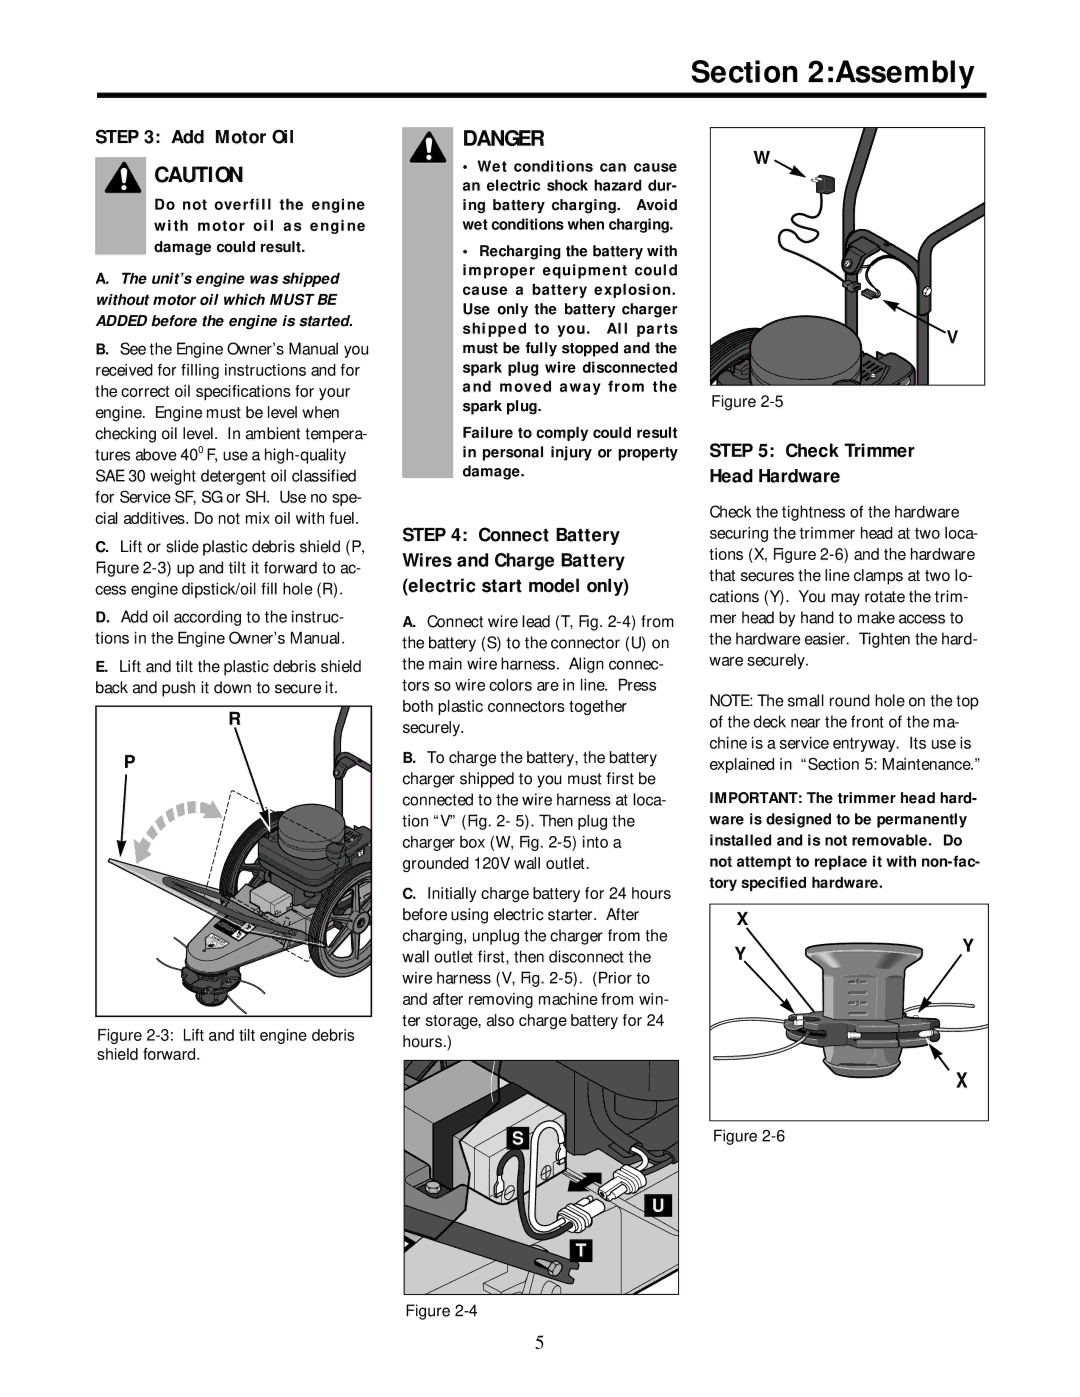
52051, 52052 specifications
Troy-Bilt has long been recognized for its commitment to quality and innovation in outdoor power equipment, and the Troy-Bilt 52052 and 52051 models are no exception. These garden tillers are designed to tackle a variety of tilling tasks, making them suitable for both novice gardeners and seasoned horticulturists.The Troy-Bilt 52052 features a robust 4-cycle engine, which provides ample power to tackle tough soil conditions. With a displacement of 196 cc, this model is equipped to till soil up to 10 inches deep, ensuring that nutrients can be effectively mixed into your garden bed. The 52051 shares similar characteristics but is tailored for slightly different gardening needs. Both models feature an adjustable tilling width, allowing users to customize their tilling experience, with widths ranging from 16 to 21 inches. This versatility enables gardeners to efficiently navigate tight spaces or cover larger plots in fewer passes.
One of the standout technologies integrated into these models is the "Rear-Tine" design, which allows for smoother operation and superior maneuverability. This design feature not only enhances ease of use but also reduces strain on the user, making gardening tasks less daunting. The counter-rotating tines of the tillers are specifically designed to break up hard soil, allowing for effective aeration and preparation of planting beds.
Both models excel in terms of convenience, featuring a user-friendly starting system. The push-button electric start on the 52052 is particularly beneficial for those who may have difficulty with traditional pull-start mechanisms. Additionally, the tillers are designed with ergonomic controls, ensuring that users can operate them comfortably for extended periods.
Durability is another hallmark of the Troy-Bilt brand, and these tillers are constructed with high-quality materials to withstand the rigors of regular use. The heavy-duty steel tines are built to last, and the sturdy frame ensures stability while in operation.
In summary, the Troy-Bilt 52052 and 52051 garden tillers combine power, versatility, and user-friendly features, making them excellent choices for anyone looking to enhance their gardening experience. With their advanced technologies and robust construction, these tillers promise to deliver outstanding performance for all your gardening needs.