Section 4: Operation 11

USE THE CORRECT DIAMETER TRIMMER LINE

Before starting a project, look at the grass or material you will be cutting.

For tougher conditions, use two (or four) sections of the thicker gauge, .155" diame- ter extra-heavy duty line. For less demanding conditions, use two sections of the thinner gauge, .130" diameter heavy-duty line. The thicker line has the heft to chop through tougher materials, while the thinner line provides a more pre- cise cut. To change trimmer lines, refer to “Changing Trimmer Lines” in Section 5.

NOTE: The thinner line is also recom- mended for use near trees or ornamentals to help prevent girdling (cutting the bark).

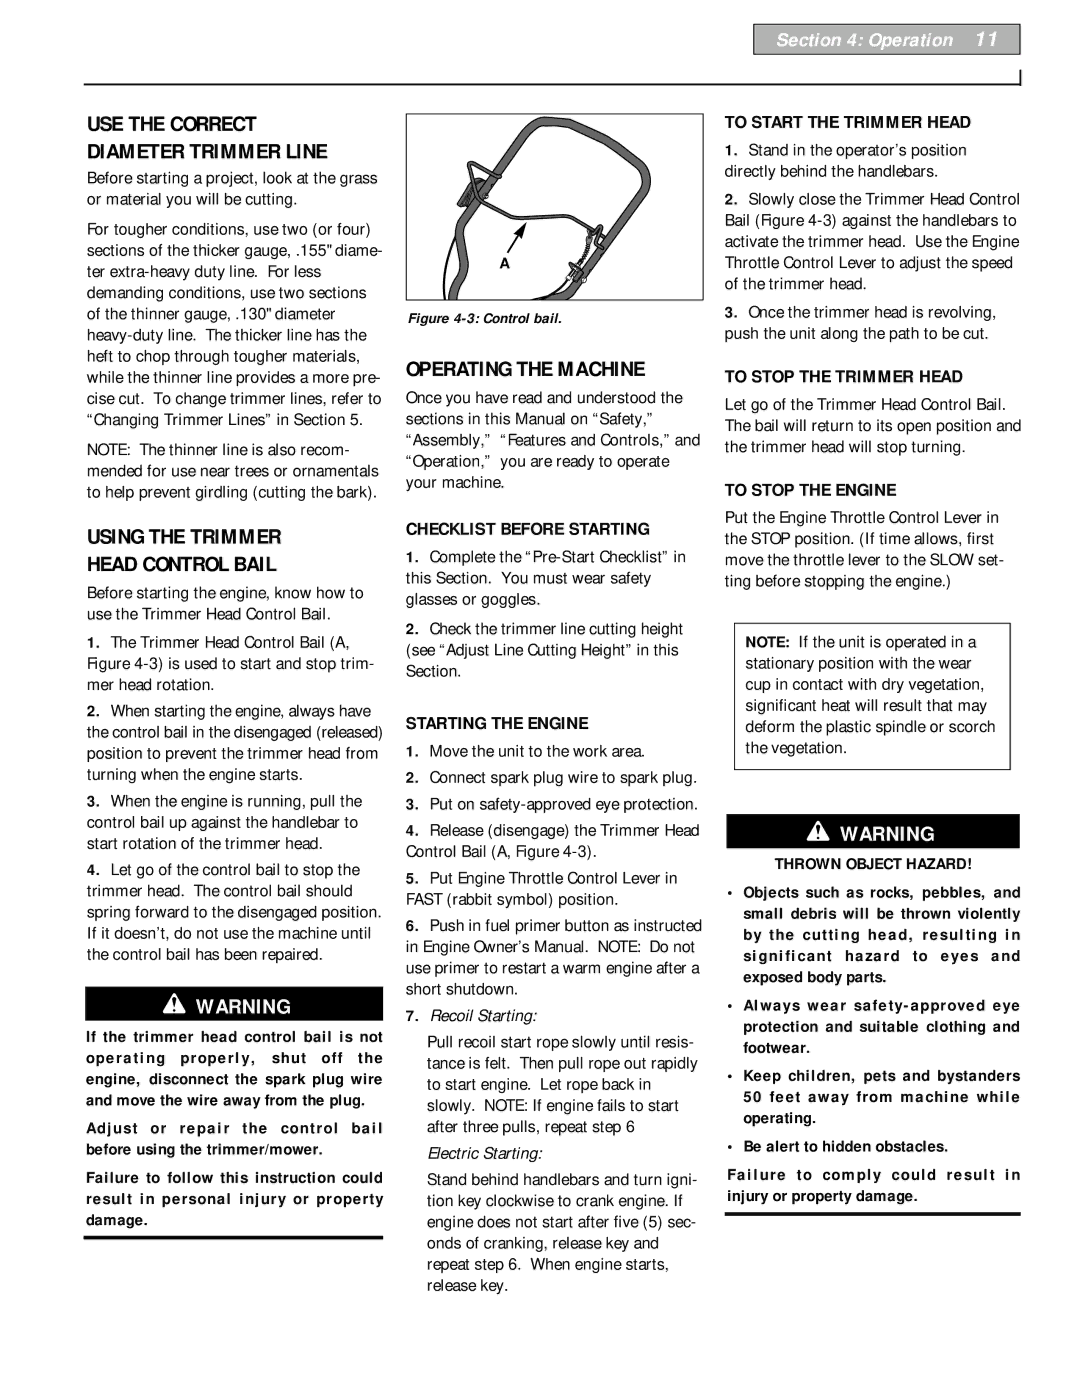
A

Figure 4-3: Control bail.

OPERATING THE MACHINE

Once you have read and understood the sections in this Manual on “Safety,” “Assembly,” “Features and Controls,” and “Operation,” you are ready to operate your machine.

TO START THE TRIMMER HEAD

1.Stand in the operator’s position directly behind the handlebars.

2.Slowly close the Trimmer Head Control Bail (Figure 4-3) against the handlebars to activate the trimmer head. Use the Engine Throttle Control Lever to adjust the speed of the trimmer head.

3.Once the trimmer head is revolving, push the unit along the path to be cut.

TO STOP THE TRIMMER HEAD

Let go of the Trimmer Head Control Bail. The bail will return to its open position and the trimmer head will stop turning.

TO STOP THE ENGINE

USING THE TRIMMER

HEAD CONTROL BAIL

Before starting the engine, know how to use the Trimmer Head Control Bail.

1.The Trimmer Head Control Bail (A, Figure 4-3) is used to start and stop trim- mer head rotation.

2.When starting the engine, always have the control bail in the disengaged (released) position to prevent the trimmer head from turning when the engine starts.

3.When the engine is running, pull the control bail up against the handlebar to start rotation of the trimmer head.

4.Let go of the control bail to stop the trimmer head. The control bail should spring forward to the disengaged position. If it doesn’t, do not use the machine until the control bail has been repaired.

WARNING

If the trimmer head control bail is not operating properly, shut off the engine, disconnect the spark plug wire and move the wire away from the plug.

Adjust or repair the control bail before using the trimmer/mower.

Failure to follow this instruction could result in personal injury or property damage.

CHECKLIST BEFORE STARTING

1.Complete the “Pre-Start Checklist” in this Section. You must wear safety glasses or goggles.

2.Check the trimmer line cutting height (see “Adjust Line Cutting Height” in this Section.

STARTING THE ENGINE

1.Move the unit to the work area.

2.Connect spark plug wire to spark plug.

3.Put on safety-approved eye protection.

4.Release (disengage) the Trimmer Head Control Bail (A, Figure 4-3).

5.Put Engine Throttle Control Lever in FAST (rabbit symbol) position.

6.Push in fuel primer button as instructed in Engine Owner’s Manual. NOTE: Do not use primer to restart a warm engine after a short shutdown.

7.Recoil Starting:

Pull recoil start rope slowly until resis- tance is felt. Then pull rope out rapidly to start engine. Let rope back in slowly. NOTE: If engine fails to start after three pulls, repeat step 6

Electric Starting:

Stand behind handlebars and turn igni- tion key clockwise to crank engine. If engine does not start after five (5) sec- onds of cranking, release key and repeat step 6. When engine starts, release key.

Put the Engine Throttle Control Lever in the STOP position. (If time allows, first move the throttle lever to the SLOW set- ting before stopping the engine.)

NOTE: If the unit is operated in a stationary position with the wear cup in contact with dry vegetation, significant heat will result that may deform the plastic spindle or scorch the vegetation.

WARNING

THROWN OBJECT HAZARD!

Objects such as rocks, pebbles, and small debris will be thrown violently by the cutting head, resulting in significant hazard to eyes and exposed body parts.

Always wear safety-approved eye protection and suitable clothing and footwear.

Keep children, pets and bystanders 50 feet away from machine while operating.

Be alert to hidden obstacles.

Failure to comply could result in injury or property damage.

Page 11
Image 11
Troy-Bilt 52070, 52066 owner manual Operating the Machine, Using the Trimmer Head Control Bail

52066, 52070 specifications

The Troy-Bilt 52070 and 52066 are powerful tillers designed for home gardening enthusiasts and professionals alike, offering remarkable performance and ease of use. Troy-Bilt, a well-known brand in gardening equipment, has incorporated advanced features and technologies in these models to enhance tilling efficiency and ensure user comfort.

One of the standout features of the Troy-Bilt 52070 and 52066 tillers is their robust engine options. Both models come equipped with a reliable 160cc OHV engine, providing ample power to tackle tough soil types and overgrown garden beds. This engine delivers consistent performance, ensuring that users can complete their tilling tasks in a timely fashion.

The tilling width ranges from 16 to 21 inches, allowing for versatile usage depending on the size of the garden or area being worked on. The adjustable tilling depth, reaching up to 7 inches, ensures that users can cultivate the soil to the desired texture, whether for planting or aerating purposes.

Another innovative aspect of these tillers is the patented Bolo tilling blades. These specially designed blades are engineered to break up tough soil effectively, reducing the amount of effort required and increasing the depth of cultivation. The blades are made from durable materials, ensuring longevity and consistent performance even under demanding conditions.

The Troy-Bilt 52070 and 52066 also feature a user-friendly design, making them accessible to gardeners of all skill levels. The adjustable handlebars offer customizable height settings, enhancing comfort during operation. Additionally, both models are equipped with a forward and reverse self-propulsion system, giving users better control and maneuverability in tight spaces and while navigating through obstacles.

Furthermore, these tillers include a check plug feature for easy oil maintenance, ensuring optimal engine performance over time. The removable and adjustable side shields assist with debris management, keeping the work area tidy and safe.

In conclusion, the Troy-Bilt 52070 and 52066 tillers combine powerful performance with user-friendly features, making them ideal for anyone looking to cultivate their garden efficiently. With their durable construction, advanced tilling technology, and thoughtful design, these models represent a reliable investment for both novice and experienced gardeners.