Section 5: Maintenance 17

WARNING

Before inspecting, cleaning or servicing the machine, shut off engine, wait for all moving parts to come to a complete stop, remove ignition key on electric start models, disconnect spark plug wire and move wire away from spark plug.

Failure to follow these instructions can result in serious personal injury or property damage.

2.Unscrew plastic gear oil fill plug from top of transmission.

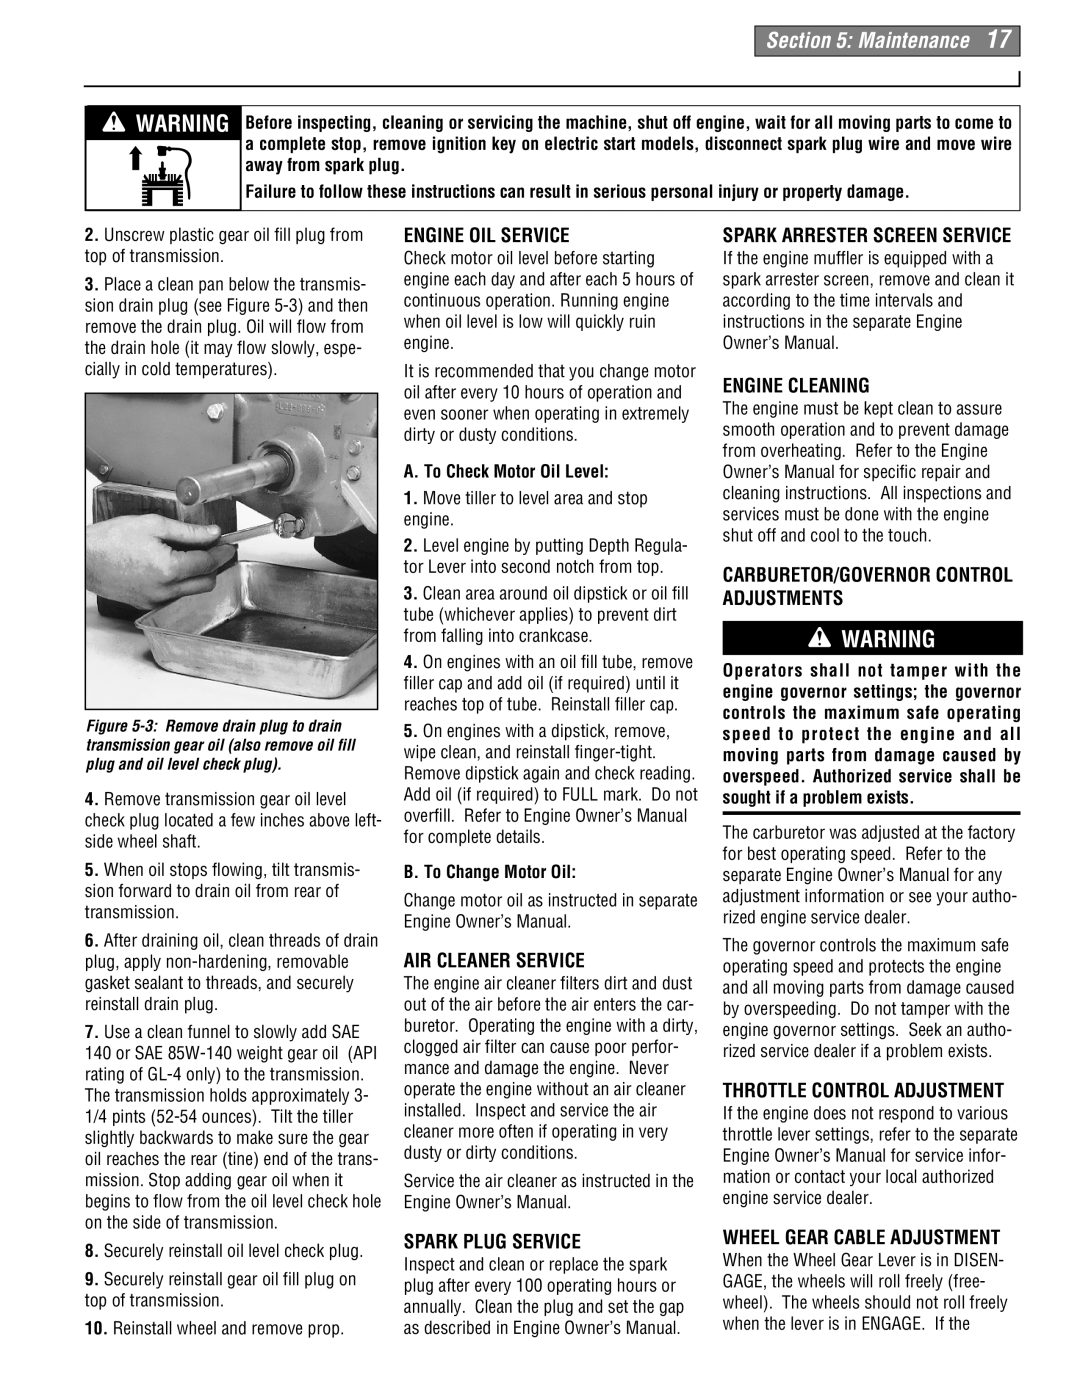
3.Place a clean pan below the transmis- sion drain plug (see Figure 5-3) and then remove the drain plug. Oil will flow from the drain hole (it may flow slowly, espe- cially in cold temperatures).

Figure 5-3: Remove drain plug to drain transmission gear oil (also remove oil fill plug and oil level check plug).

4.Remove transmission gear oil level check plug located a few inches above left- side wheel shaft.

5.When oil stops flowing, tilt transmis- sion forward to drain oil from rear of transmission.

6.After draining oil, clean threads of drain plug, apply non-hardening, removable gasket sealant to threads, and securely reinstall drain plug.

7.Use a clean funnel to slowly add SAE

140or SAE 85W-140 weight gear oil (API rating of GL-4 only) to the transmission. The transmission holds approximately 3- 1/4 pints (52-54 ounces). Tilt the tiller slightly backwards to make sure the gear oil reaches the rear (tine) end of the trans- mission. Stop adding gear oil when it begins to flow from the oil level check hole on the side of transmission.

8.Securely reinstall oil level check plug.

9.Securely reinstall gear oil fill plug on top of transmission.

10.Reinstall wheel and remove prop.

ENGINE OIL SERVICE

Check motor oil level before starting engine each day and after each 5 hours of continuous operation. Running engine when oil level is low will quickly ruin engine.

It is recommended that you change motor oil after every 10 hours of operation and even sooner when operating in extremely dirty or dusty conditions.

A. To Check Motor Oil Level:

1.Move tiller to level area and stop engine.

2.Level engine by putting Depth Regula- tor Lever into second notch from top.

3.Clean area around oil dipstick or oil fill tube (whichever applies) to prevent dirt from falling into crankcase.

4.On engines with an oil fill tube, remove filler cap and add oil (if required) until it reaches top of tube. Reinstall filler cap.

5.On engines with a dipstick, remove, wipe clean, and reinstall finger-tight. Remove dipstick again and check reading. Add oil (if required) to FULL mark. Do not overfill. Refer to Engine Owner’s Manual for complete details.

B. To Change Motor Oil:

Change motor oil as instructed in separate Engine Owner’s Manual.

AIR CLEANER SERVICE

The engine air cleaner filters dirt and dust out of the air before the air enters the car- buretor. Operating the engine with a dirty, clogged air filter can cause poor perfor- mance and damage the engine. Never operate the engine without an air cleaner installed. Inspect and service the air cleaner more often if operating in very dusty or dirty conditions.

Service the air cleaner as instructed in the Engine Owner’s Manual.

SPARK PLUG SERVICE

Inspect and clean or replace the spark plug after every 100 operating hours or annually. Clean the plug and set the gap as described in Engine Owner’s Manual.

SPARK ARRESTER SCREEN SERVICE

If the engine muffler is equipped with a spark arrester screen, remove and clean it according to the time intervals and instructions in the separate Engine Owner’s Manual.

ENGINE CLEANING

The engine must be kept clean to assure smooth operation and to prevent damage from overheating. Refer to the Engine Owner’s Manual for specific repair and cleaning instructions. All inspections and services must be done with the engine shut off and cool to the touch.

CARBURETOR/GOVERNOR CONTROL ADJUSTMENTS

WARNING

Operators shall not tamper with the engine governor settings; the governor controls the maximum safe operating speed to protect the engine and all moving parts from damage caused by overspeed. Authorized service shall be sought if a problem exists.

The carburetor was adjusted at the factory for best operating speed. Refer to the separate Engine Owner’s Manual for any adjustment information or see your autho- rized engine service dealer.

The governor controls the maximum safe operating speed and protects the engine and all moving parts from damage caused by overspeeding. Do not tamper with the engine governor settings. Seek an autho- rized service dealer if a problem exists.

THROTTLE CONTROL ADJUSTMENT

If the engine does not respond to various throttle lever settings, refer to the separate Engine Owner’s Manual for service infor- mation or contact your local authorized engine service dealer.

WHEEL GEAR CABLE ADJUSTMENT

When the Wheel Gear Lever is in DISEN- GAGE, the wheels will roll freely (free- wheel). The wheels should not roll freely when the lever is in ENGAGE. If the

Page 17
Image 17
Troy-Bilt 665B manual Engine OIL Service, AIR Cleaner Service, Spark Plug Service

665B specifications

Troy-Bilt is a trusted name in outdoor power equipment, and their line of tillers, including the E666M, 664D, and 665B models, exemplifies their commitment to quality and practicality. These tillers are designed to make soil preparation easier and more efficient, catering to both amateur gardeners and seasoned landscapers alike.

The Troy-Bilt E666M is a robust machine tailored for ease of use and reliability. With a powerful engine, it delivers consistent performance, ensuring that users can tackle even the toughest soils. One of its standout features is the adjustable tilling width, which provides flexibility for various gardening needs. This tiller also boasts a Reverse Tillage feature, allowing the operator to break up stubborn soil with ease while enhancing control during operation.

The 664D model takes efficiency a step further with its durable construction and user-friendly design. This tiller is equipped with a dependable engine that provides ample power for deep soil cultivation. The 664D features self-propulsion technology, allowing users to maintain steady speed without exerting excessive effort. The adjustable depth settings further enhance soil penetration, making it possible to cultivate deep for extensive planting or surface till for lighter gardening tasks.

With the 665B, Troy-Bilt introduces advanced engineering for increased maneuverability and performance. This tiller features a patented belt-drive system that improves torque and ensures optimal power transfer to the tines. The 665B is also designed with comfort in mind, featuring ergonomic handles that reduce strain on the operator, making it ideal for longer gardening sessions. Its heavy-duty tines ensure exceptional soil mixing, while the adjustable tilling width and depth allow for customization according to specific gardening requirements.

All three tillers come equipped with Troy-Bilt's signature red oversized drag stake, enabling users to control tilling depth and improve stability during operation. They are designed with durable components that promise longevity and reliability, ensuring that they can withstand rigorous use season after season.

In summary, the Troy-Bilt E666M, 664D, and 665B tillers offer a variety of features and technologies that cater to every gardening need. With their reliable engines, user-friendly designs, and advanced tilling capabilities, these models embody the innovation and durability that Troy-Bilt is known for, making them excellent choices for anyone looking to elevate their gardening experience.